Product Review Article...
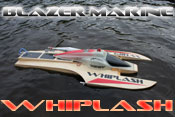
Review of the Whiplash by Blazer Marine...
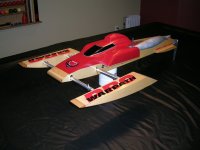
The Sport Hydro is one of the fastest types of R/C boats. Next to outriggers, this is about as fast as it gets! There are many competitive sport hydros out there on the market today, but what makes the Whiplash from Blazer Marine really stand out is the way it actually performs very similar to an outrigger and is as fast as many of them, in some cases maybe faster! The Whiplash is designed and sold by Brian Blazer and his father Bob Blazer. They are based out of Cincinnati Ohio USA.
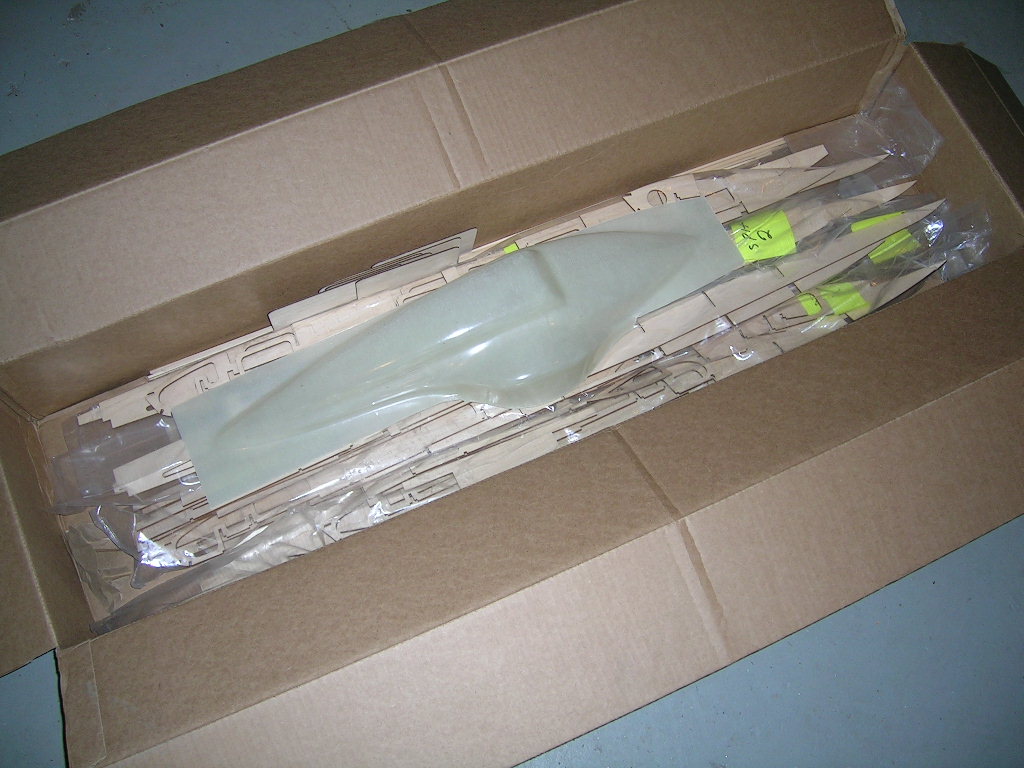
This great performance does come with a price however. If you want your Whiplash to perform to its full potential you will have to take your time and build it correctly and accurately. Word of warning...it may seem a bit overwhelming when you first open the box! Don't worry, I felt the same way. Even though I had built a few wood kit boats in the 20+ years I've been model boating, this one had me scared and scratching my head a bit at first. Take your time and get everything sorted out, don't rush anything and read the instructions and everything should turn out fine.
Note: as of recently builders, of Whiplash hydros now have access to some new manuals that were done by Tom Tetrault in conjunction with the Blazers. These new manuals really outline the build much better than the old one did and it will make it much easier to successfully build your Whiplash. I have added links at the end of this article so that you can download copies.
So let's move on with the build of this Whiplash...
In this article I will mostly be showing pictures of the building steps without going too much into detail...the information really is all outlined in the new manuals.
Here are a few pictures of the kit as received. There are actually a few pieces missing from the pictures.
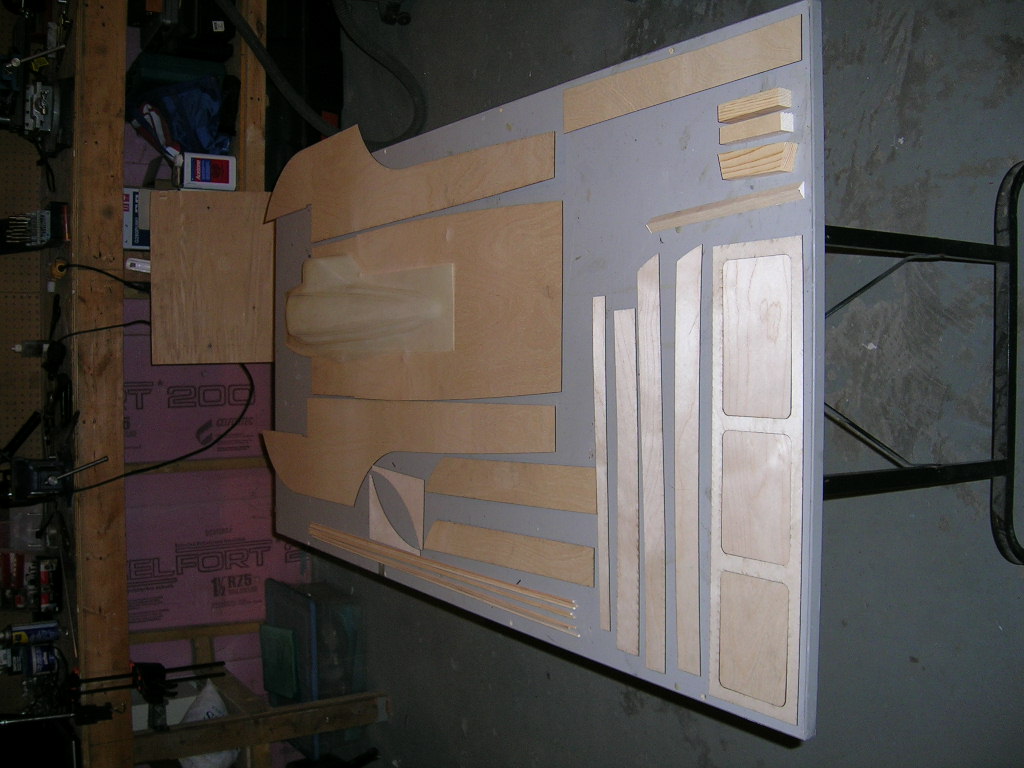
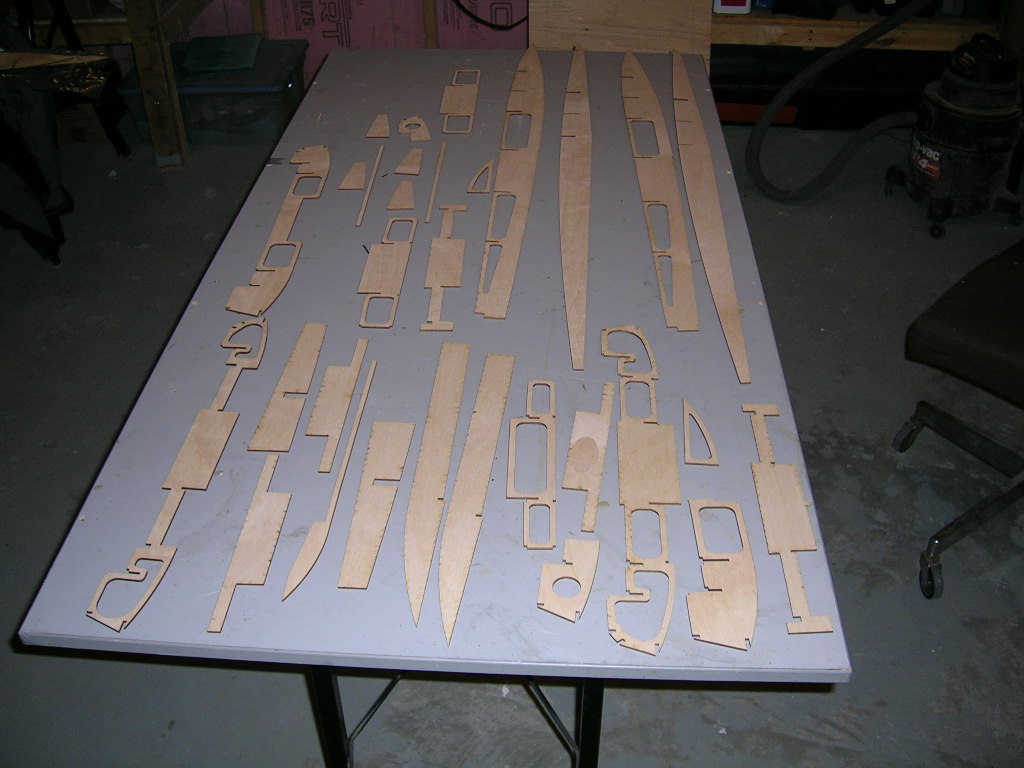
The absolute most important thing you need to successfully build this boat (as with any boat really) is a sturdy and perfectly FLAT work surface. Build a boat on a crooked surface, get a crooked boat! There really is no room for error here, especially not with a boat design for the kind of speeds the Whiplash is designed for.
I actually used one of my setup boards to build the Whiplash on. It is made of 1" thick oak veneered press-wood and reinforced on the underside with 2 strips of 3x1" solid oak strips vertically mounted. This board is rock solid and perfectly true.
You can also build the Whiplash using a jig. The kits are supplied with drawings to make a jig if you want to use one. I asked Brian Blazer about this when I got my kit and he recommended building the boat on a flat board and that it would work just as good if not better. We didn't get into the details about this, but I suspect that suggests this method because if the jig isn't build perfectly square neither will the boats. It is much easier for the average guy to find a flat board than to build a good accurate jig. We don't all have the same tools and the same mechanical skills. The kit was this designed to assemble accurately on a flat work surface to make it easier for everyone.
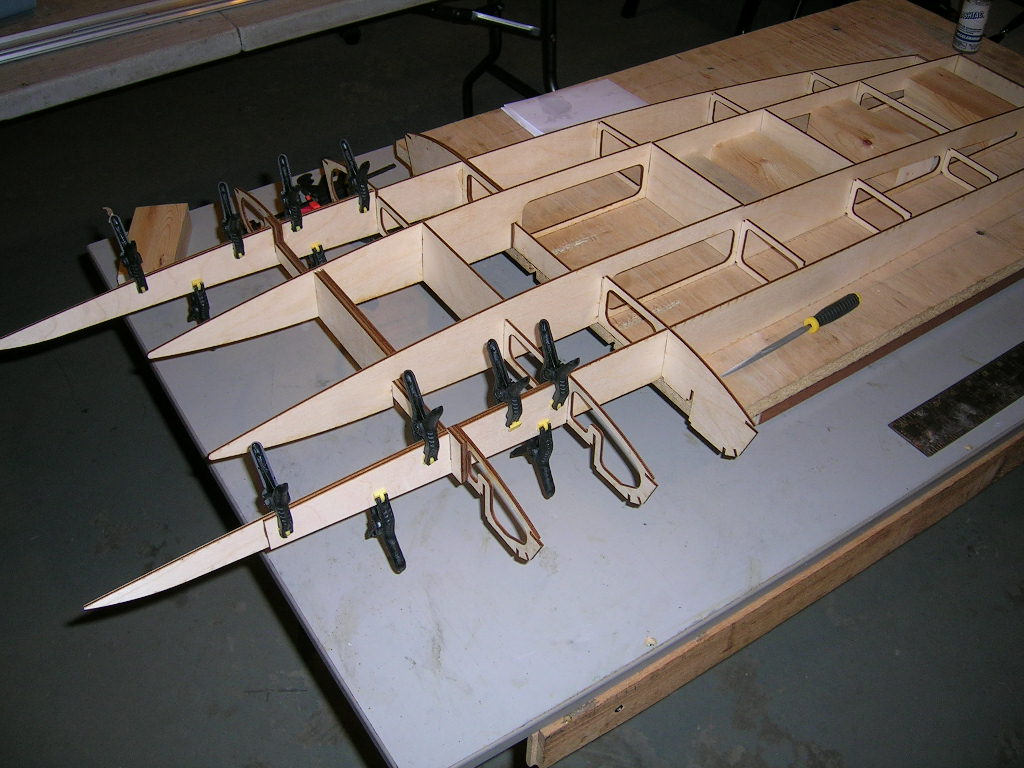
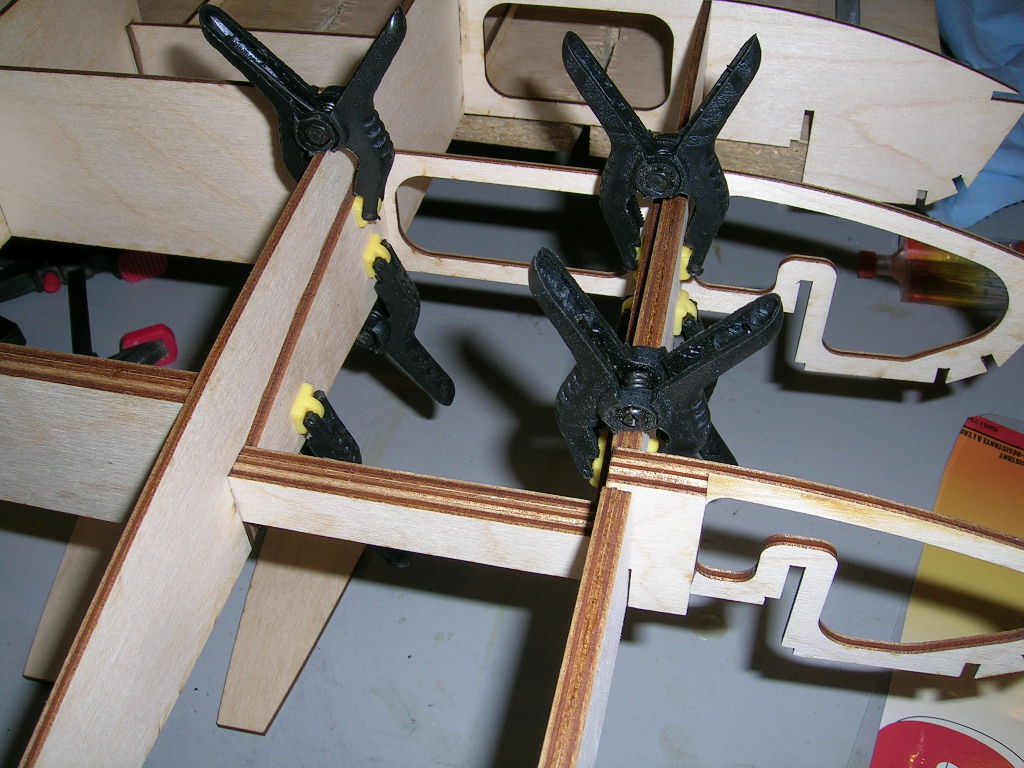
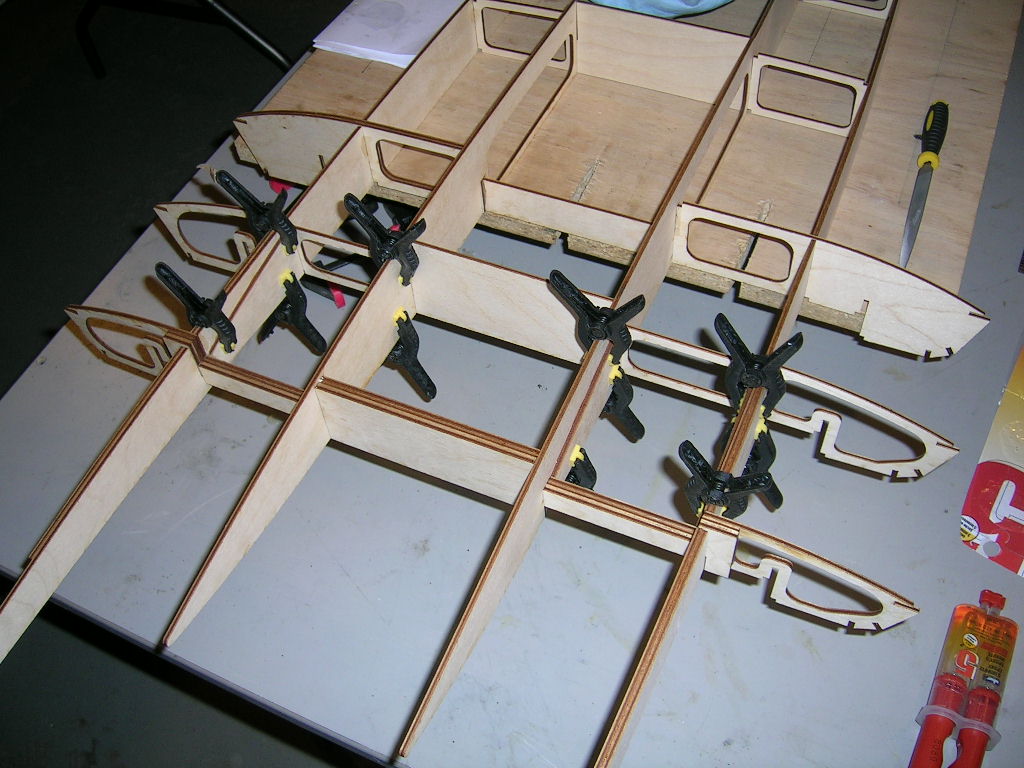
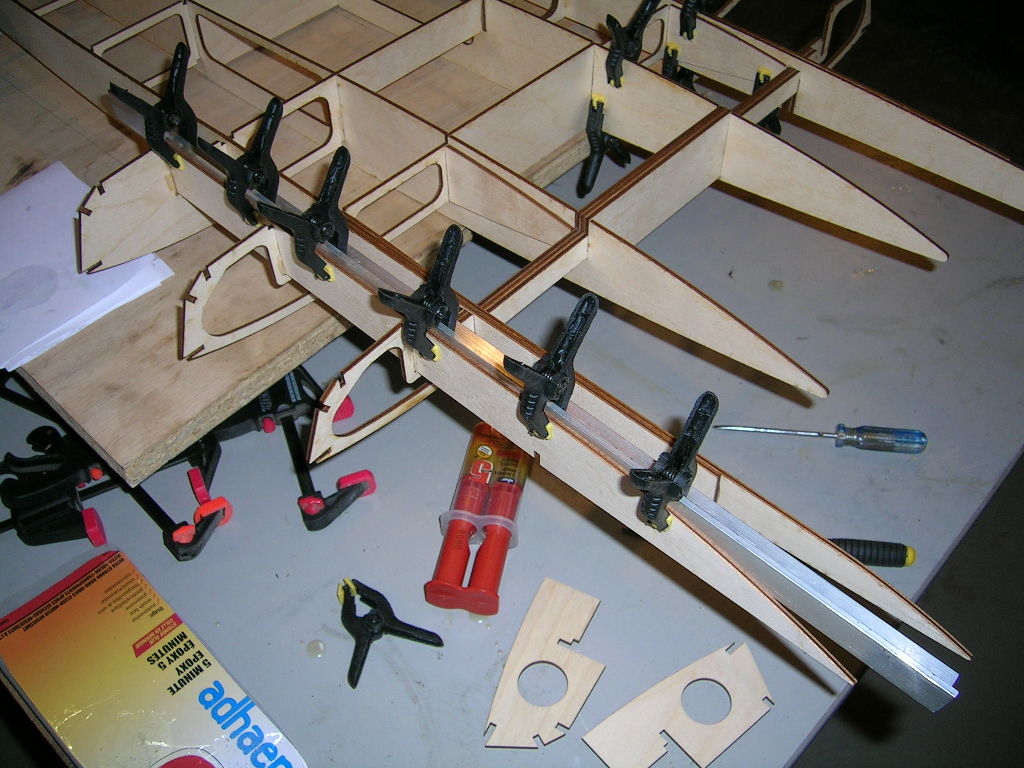
The boat is assembled right-side-up on the board with its sponsons overhanging the edge. The bottom of the hull from the back of the sponsons all the way back to the transom is perfectly flat so this is what sits on your building board as you put it all together. In order to make sure everything goes together straight, I made some reference lines lengthwise, perpendicular with the edge of the board that the sponson were to hang off of. The framing was then assembled parallel to these lines, ensuring that everything was square.
Most of the framing assembly of my Whiplash was done using 5 and 30 minute epoxy. All the reinforcing and inside sealing was done with West Systems 105 Resin with 205/206 Hardeners (with filler in some areas to create filets). The external sealing and finish clearcoat was done with West Systems 105 Resin and 207 Hardener.
I actually used one of my setup boards to build the Whiplash on. It is made of 1" thick oak veneered press-wood and reinforced on the underside with 2 strips of 3x1" solid oak strips vertically mounted. This board is rock solid and perfectly true.
You can also build the Whiplash using a jig. The kits are supplied with drawings to make a jig if you want to use one. I asked Brian Blazer about this when I got my kit and he recommended building the boat on a flat board and that it would work just as good if not better. We didn't get into the details about this, but I suspect that suggests this method because if the jig isn't build perfectly square neither will the boats. It is much easier for the average guy to find a flat board than to build a good accurate jig. We don't all have the same tools and the same mechanical skills. The kit was this designed to assemble accurately on a flat work surface to make it easier for everyone.
The boat is assembled right-side-up on the board with its sponsons overhanging the edge. The bottom of the hull from the back of the sponsons all the way back to the transom is perfectly flat so this is what sits on your building board as you put it all together. In order to make sure everything goes together straight, I made some reference lines lengthwise, perpendicular with the edge of the board that the sponson were to hang off of. The framing was then assembled parallel to these lines, ensuring that everything was square.
Most of the framing assembly of my Whiplash was done using 5 and 30 minute epoxy. All the reinforcing and inside sealing was done with West Systems 105 Resin with 205/206 Hardeners (with filler in some areas to create filets). The external sealing and finish clearcoat was done with West Systems 105 Resin and 207 Hardener.


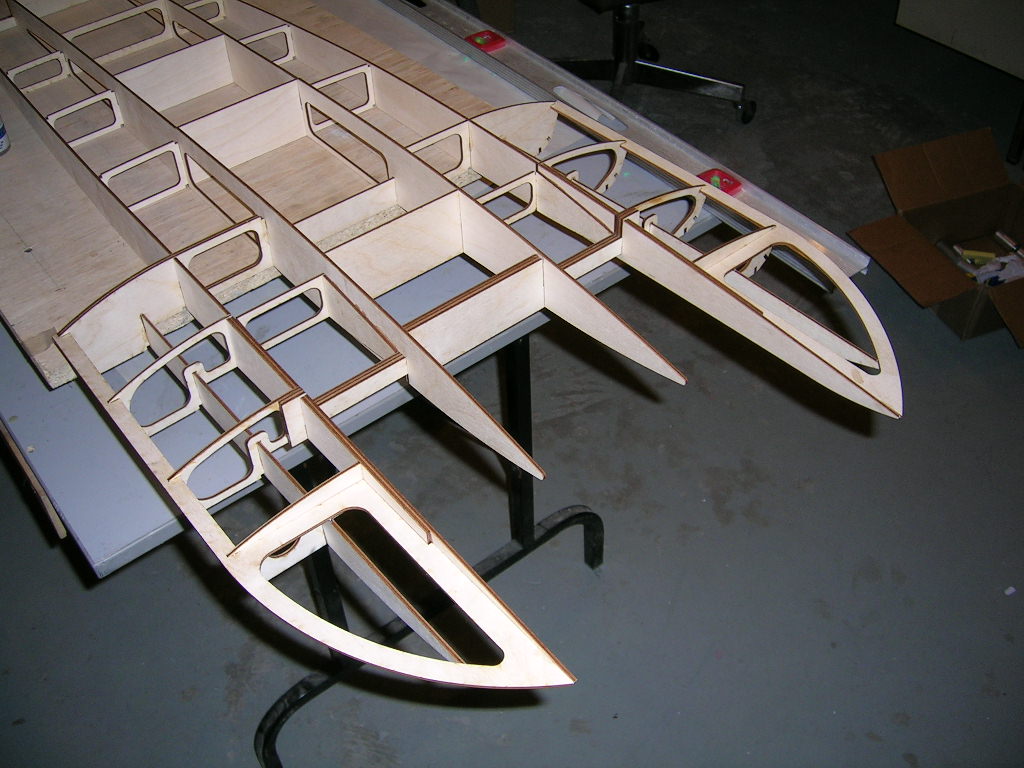
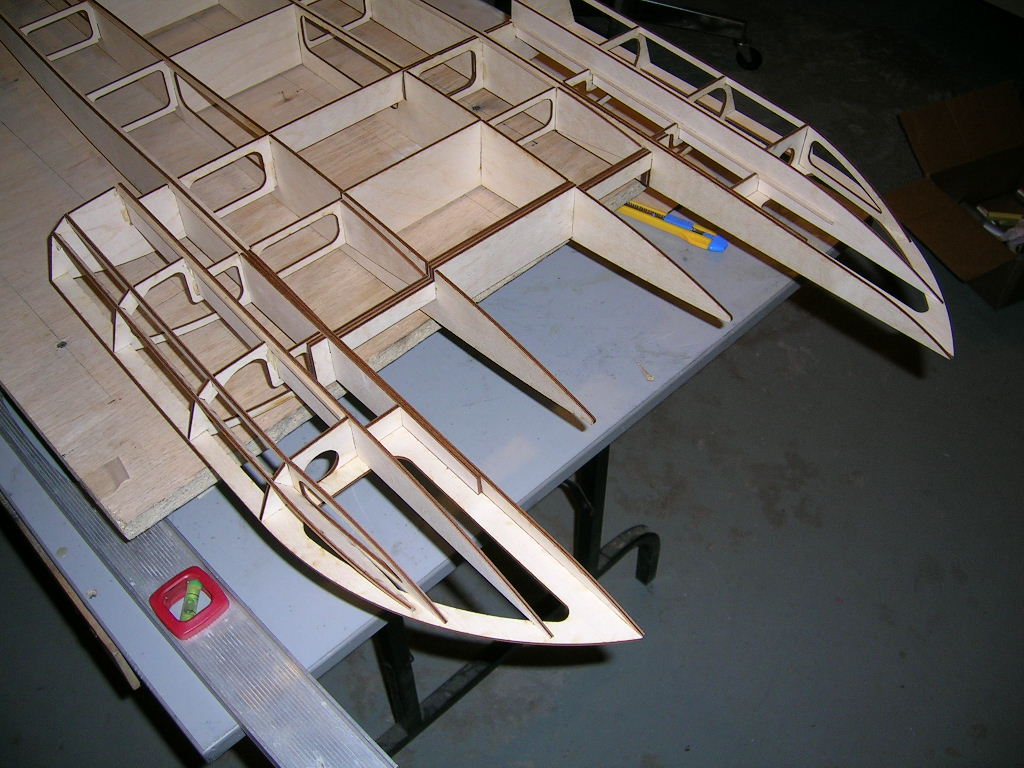
The framing is now really beginning to look like a hydro. At this point the boat is turned upside down to finish the framing of the sponsons and installing bottom sheeting. The remaining sponson pieces that must be installed to finish the sponsons are a little tricky to sort out and install correctly so read the instructions and study the diagrams carefully.

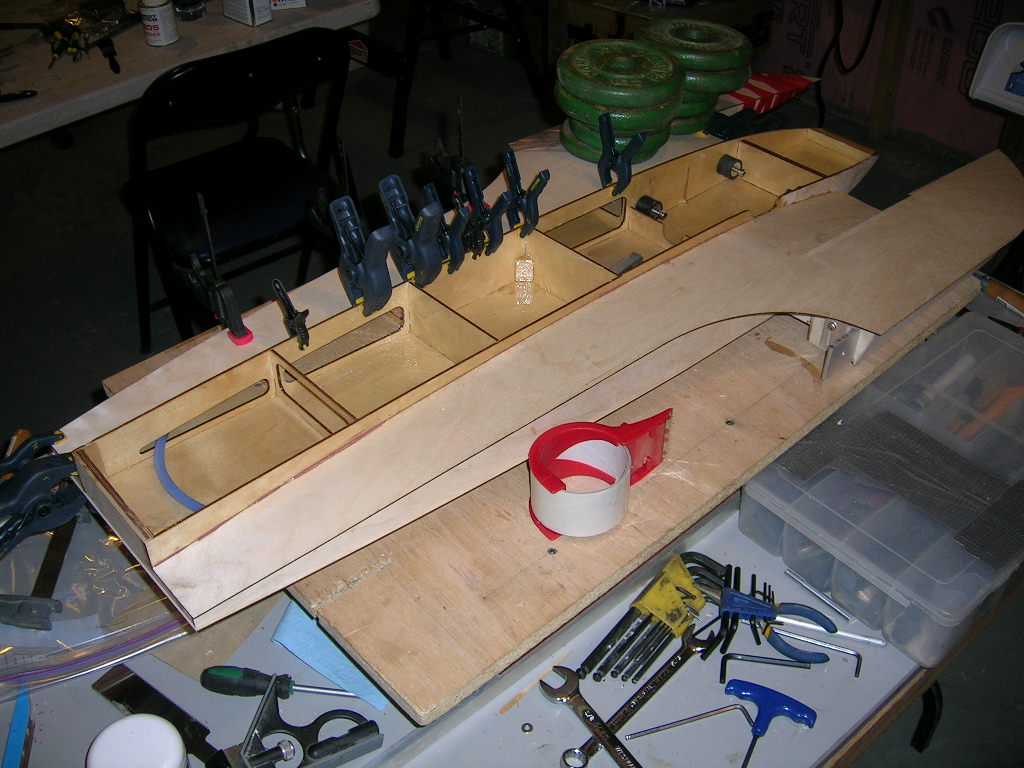
Right-side-up again, this time to install nose pieces and seal the interior of the hull.


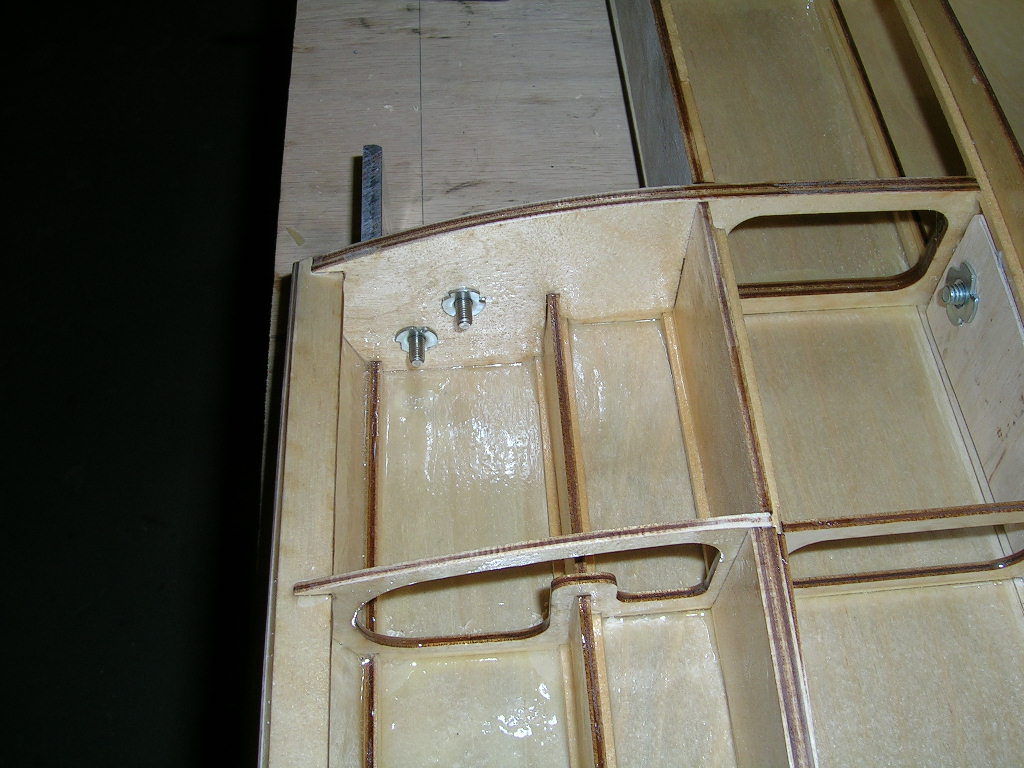
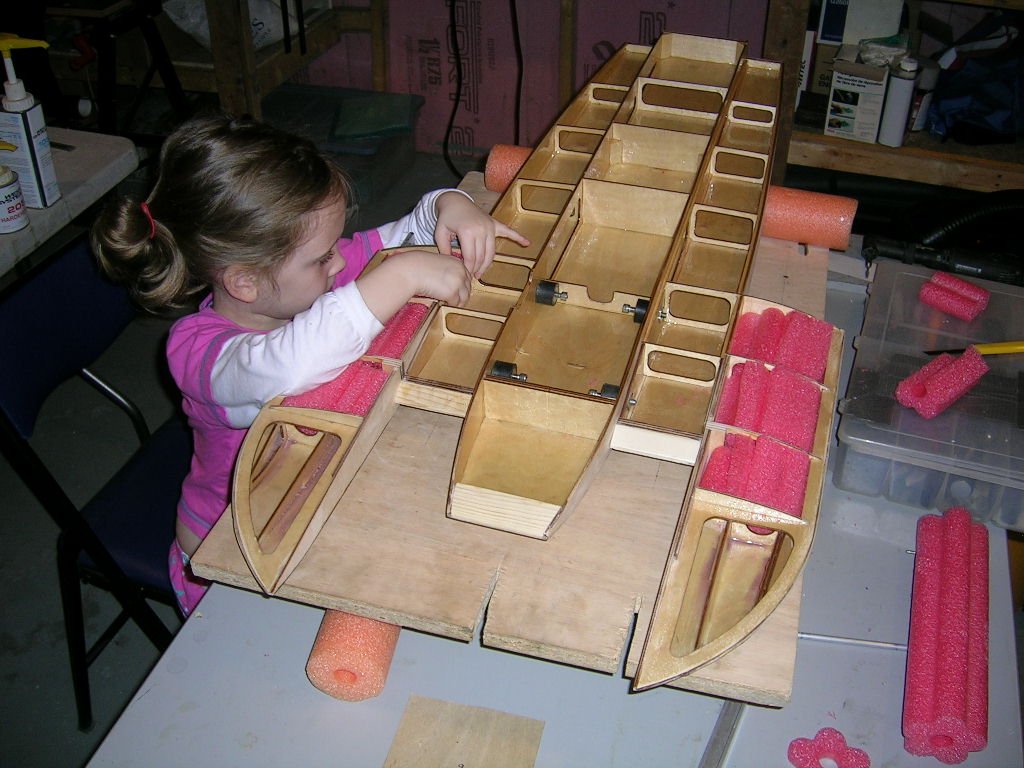
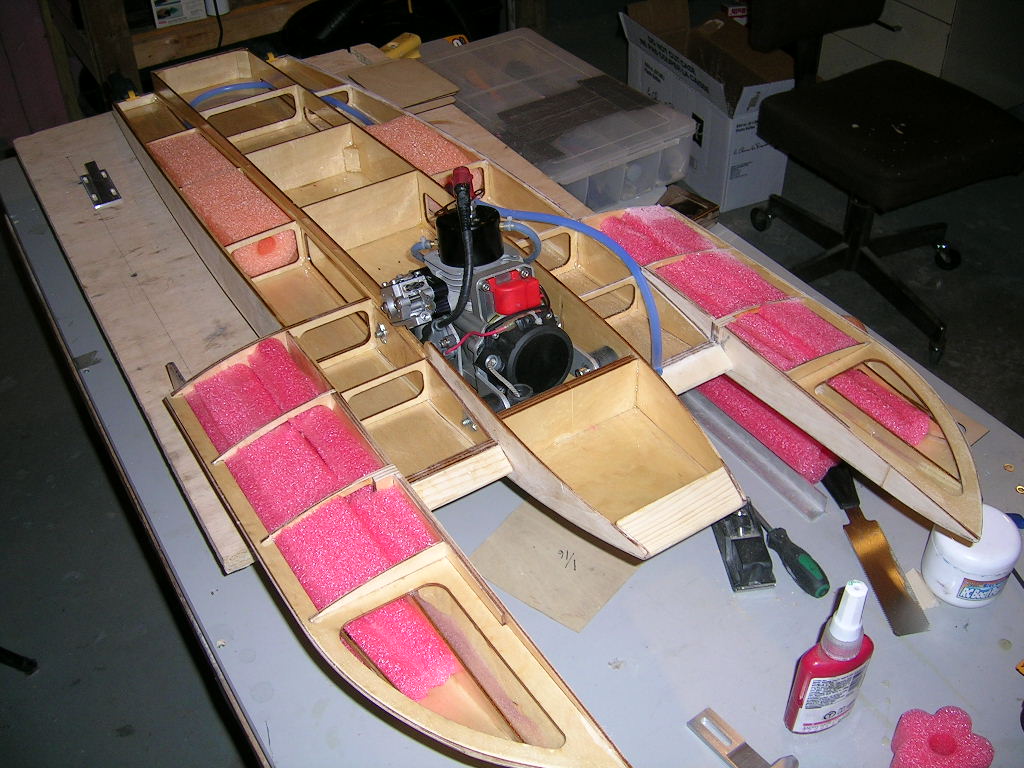
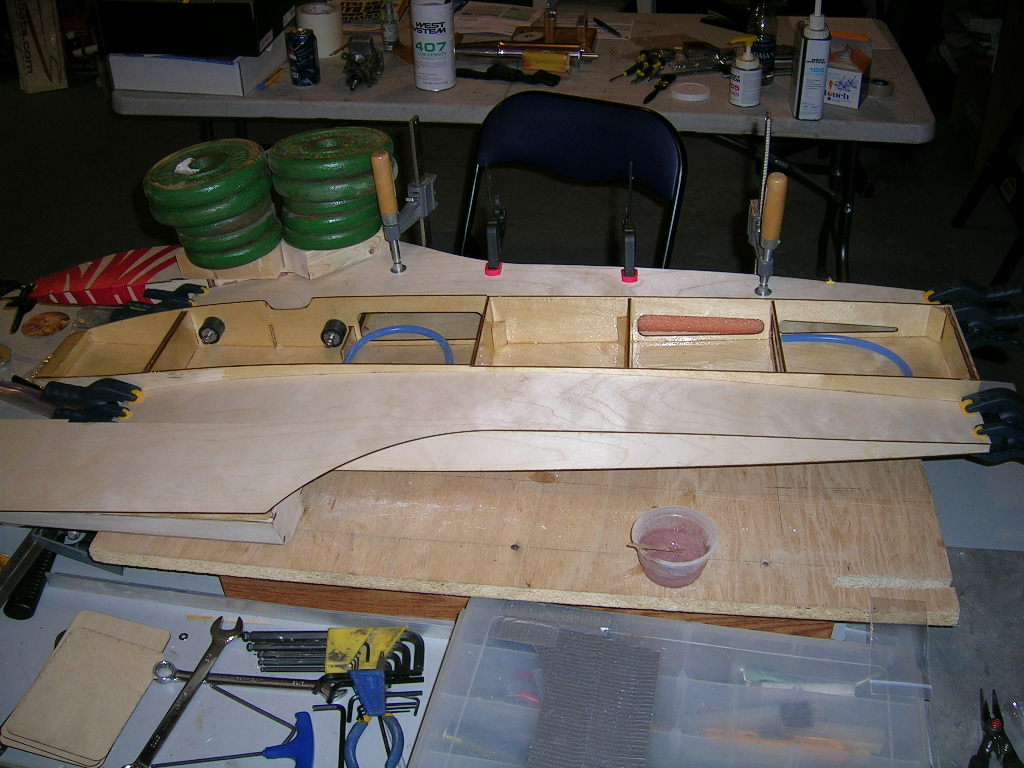
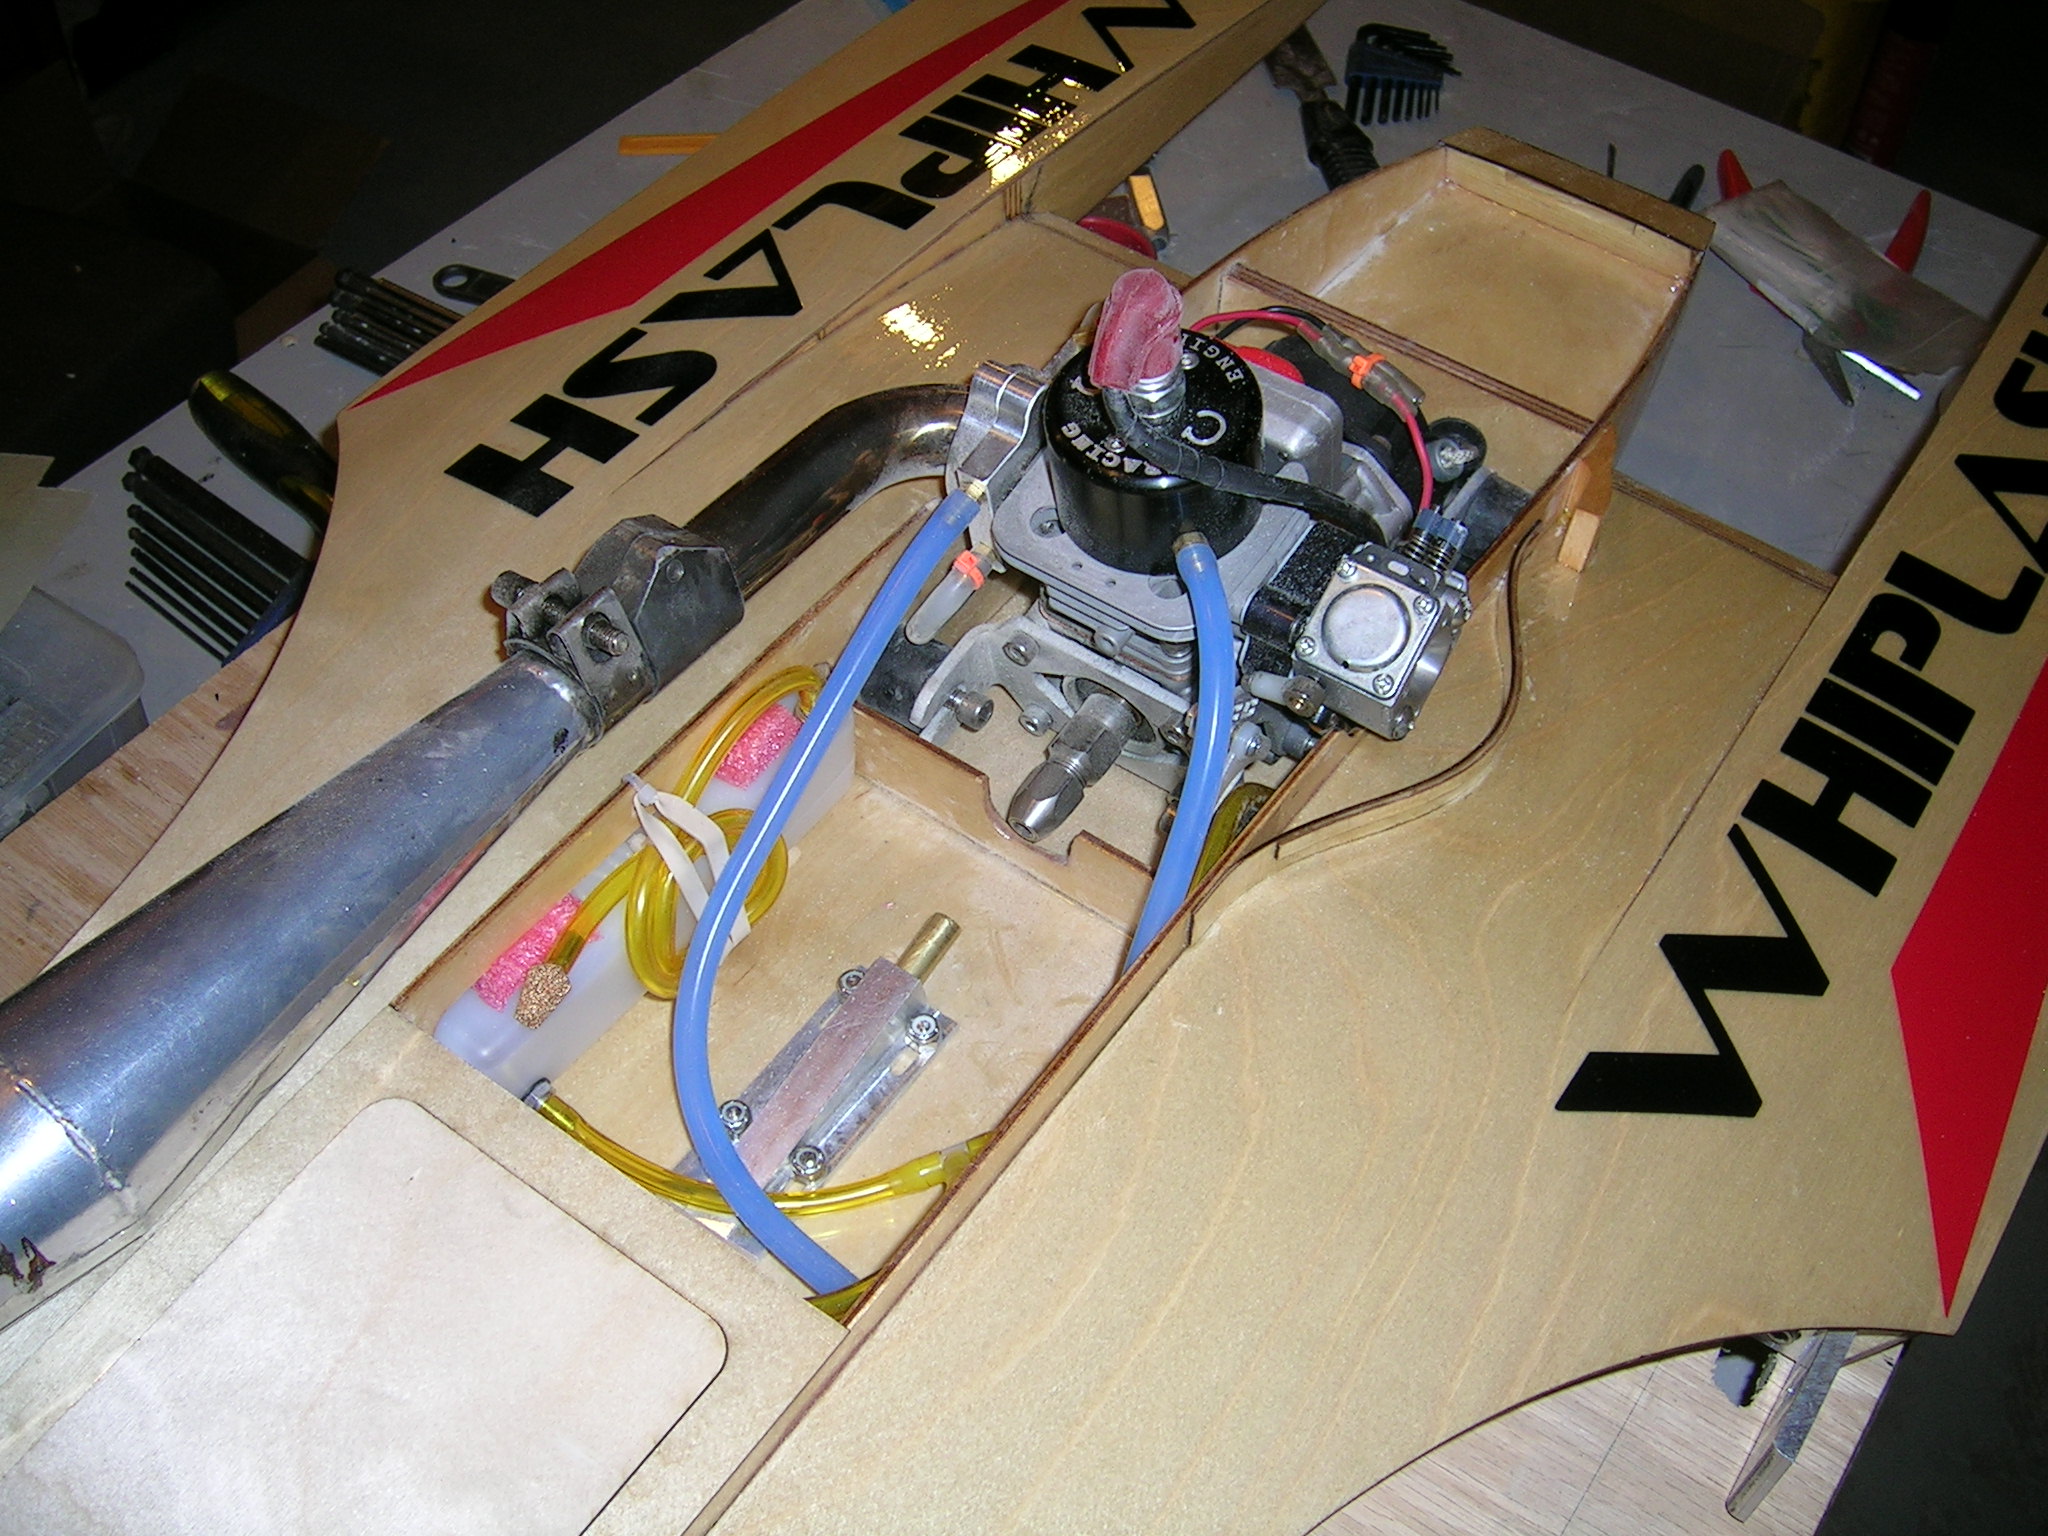
With the interior of the hull completely sealed and dry it's not time to install the engine mount rubber isolators. For my Whiplash I decided to use CC Racing mounts with the standard isolators. It is a tight fit, but it can be done. These are the standard mounts I use on all my boats so I really wanted to find a way to use these with my Whiplash. It worked with only slight modifications to the front T-nuts used to hold the isolators in. The T-nut barrels were also shortened slightly so that they would not protrude inside the engine rails. I also installed some 1/8" doublers on the outside of the engine rails where the rear isolators mount. I put epoxy in the holes of the T-nuts when installing them to prevent them from ever backing out. Here are some pictures with explanations (see text at bottom of images when enlarged).
Notice that one bulkhead has been cut out between the engine rails to create a compartment for the motor. The bulkhead behind it has been slotted for the engine collet and flex shaft to pass. The right (starboard) side rail has also been notched to allow for clearance for the carburetor.


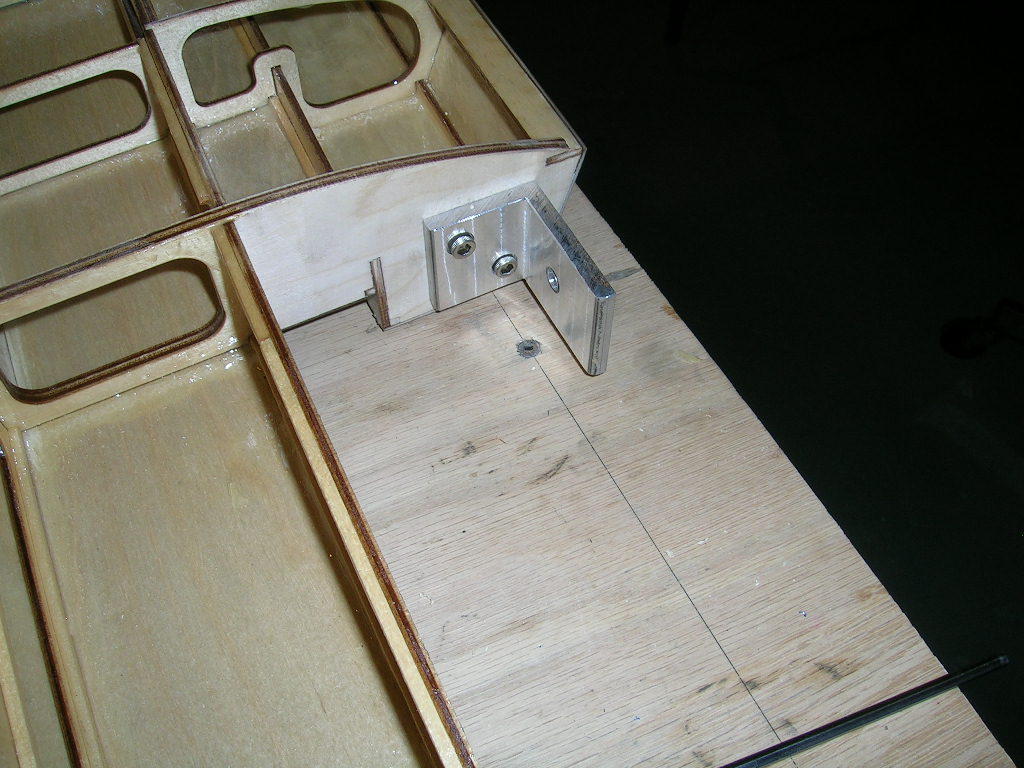
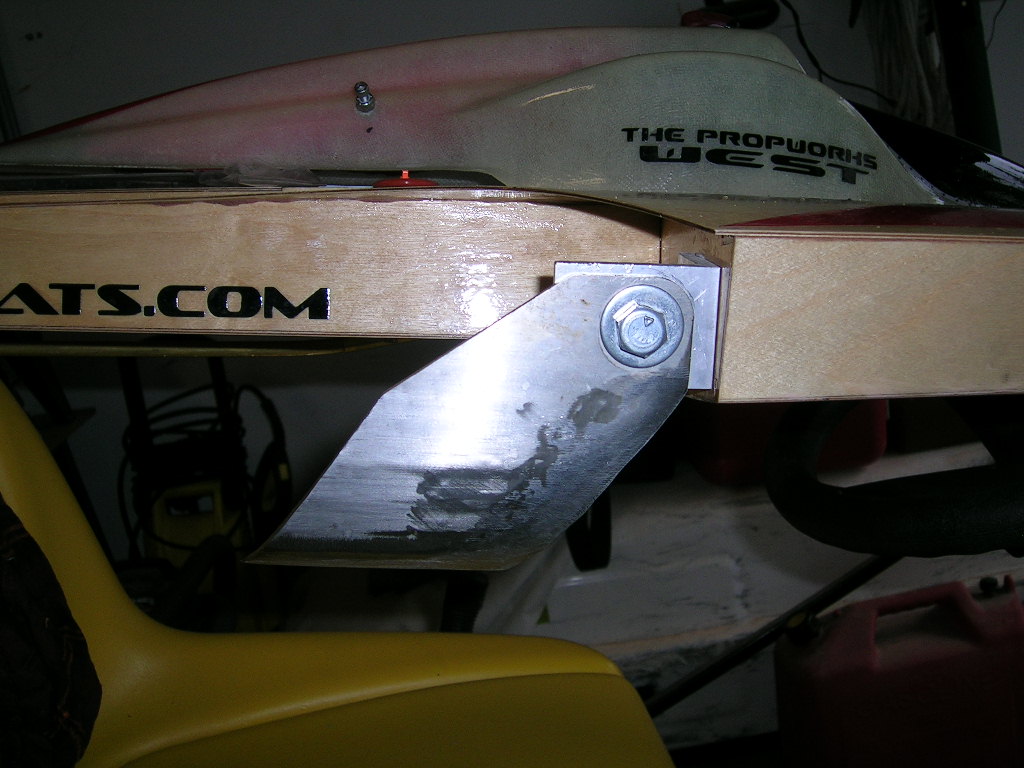
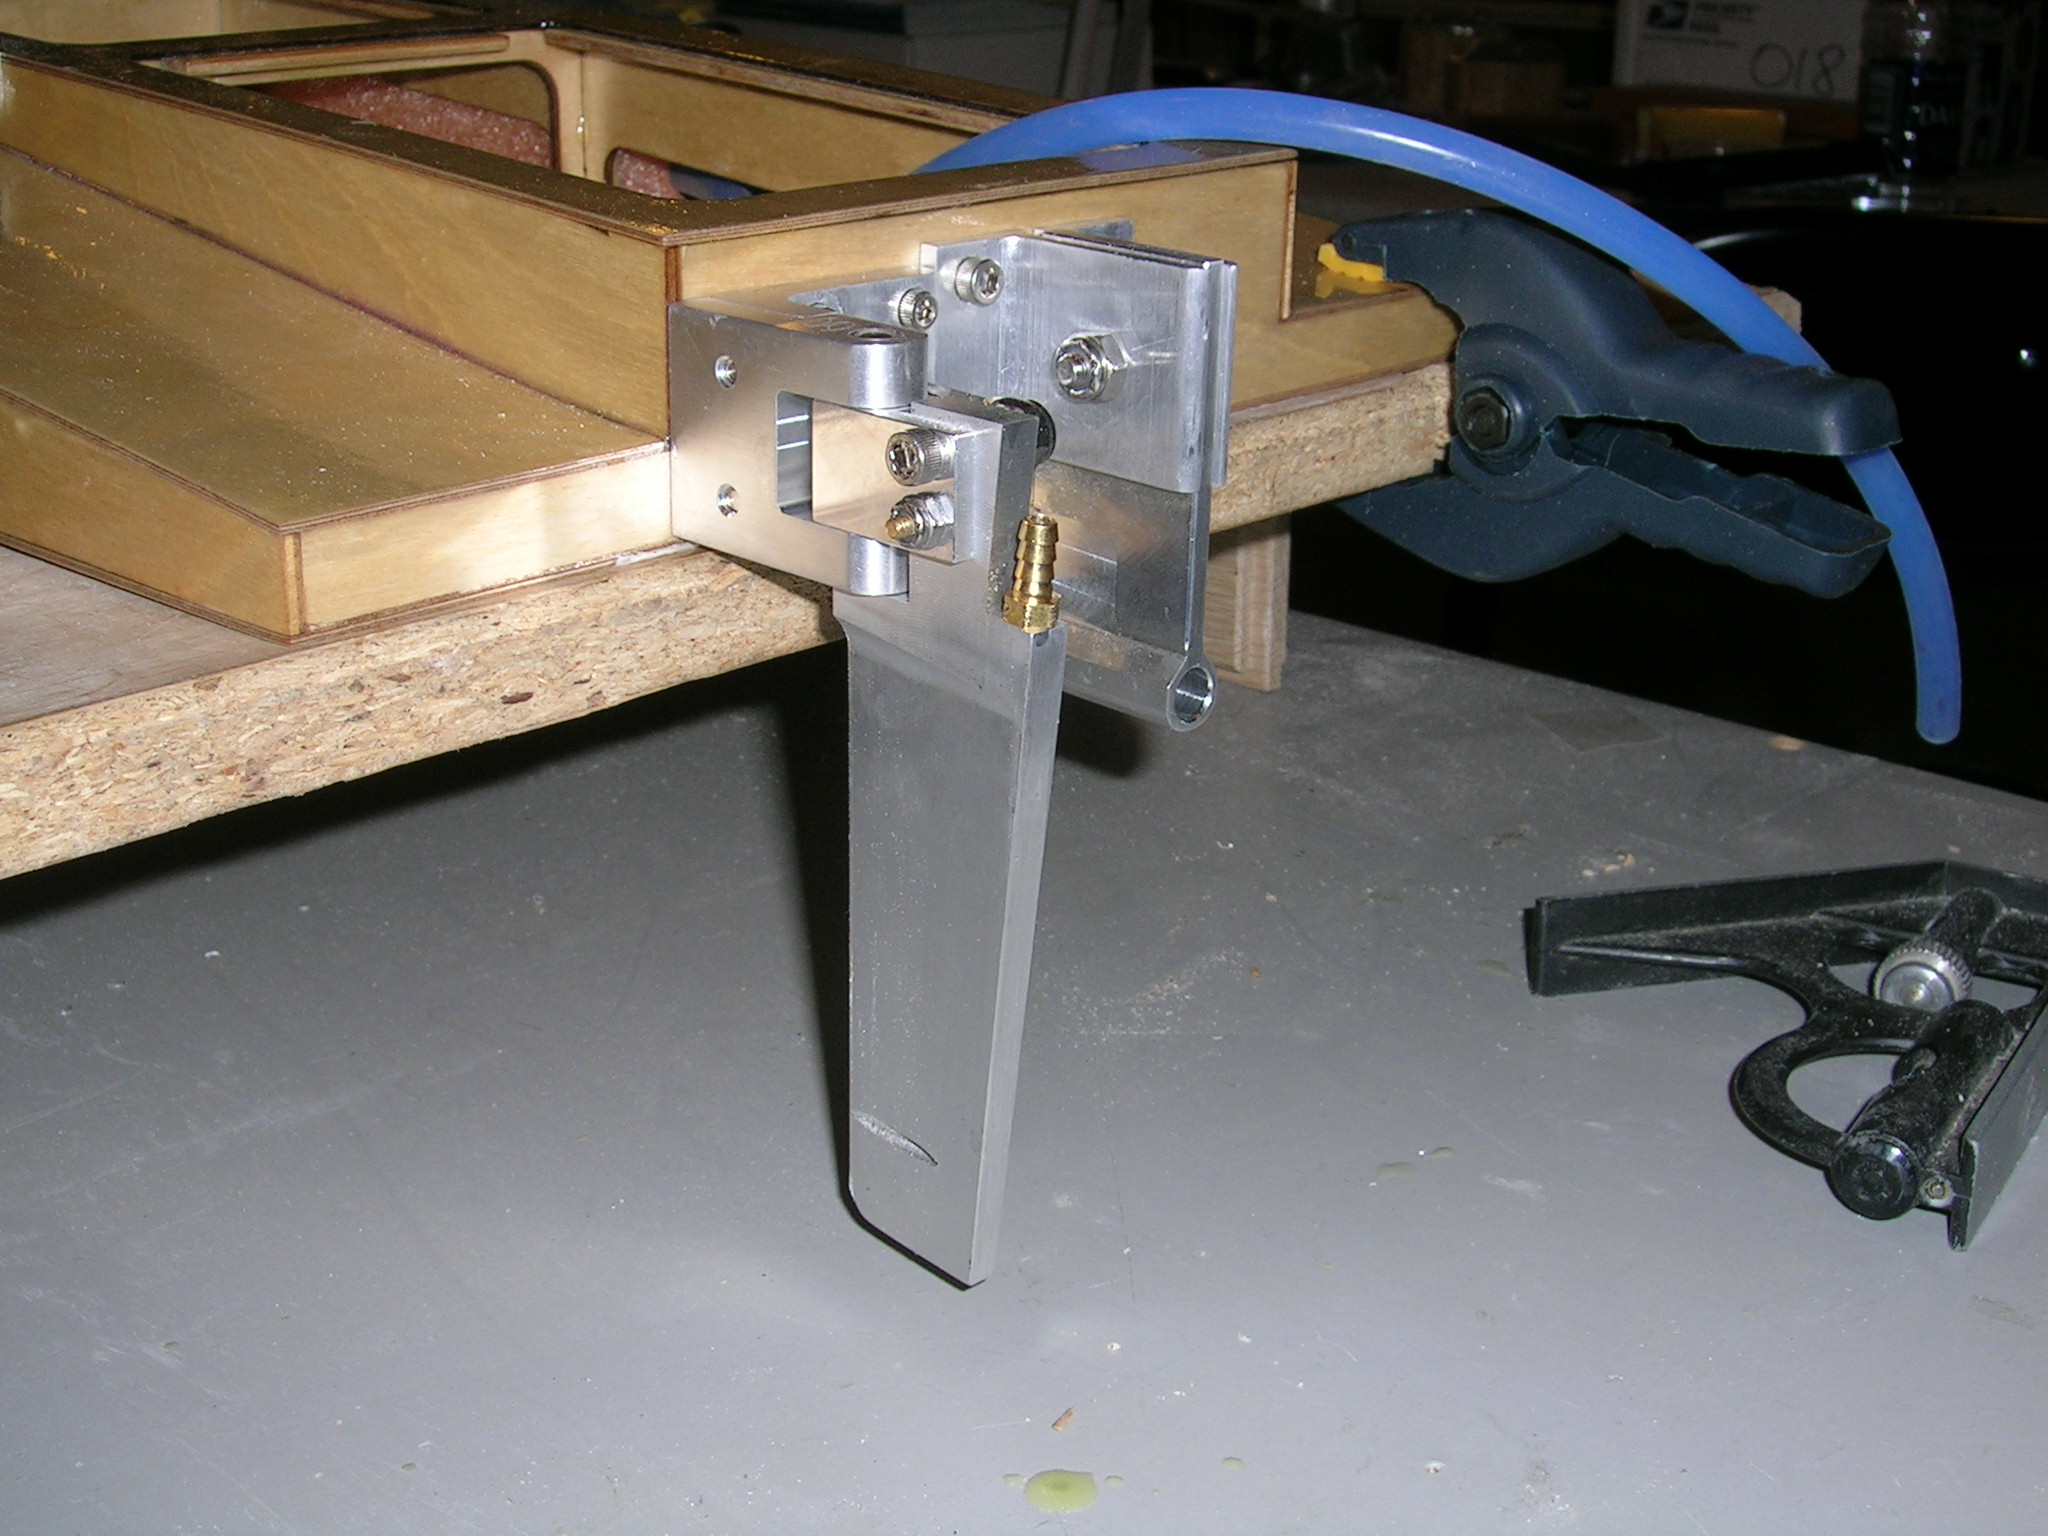
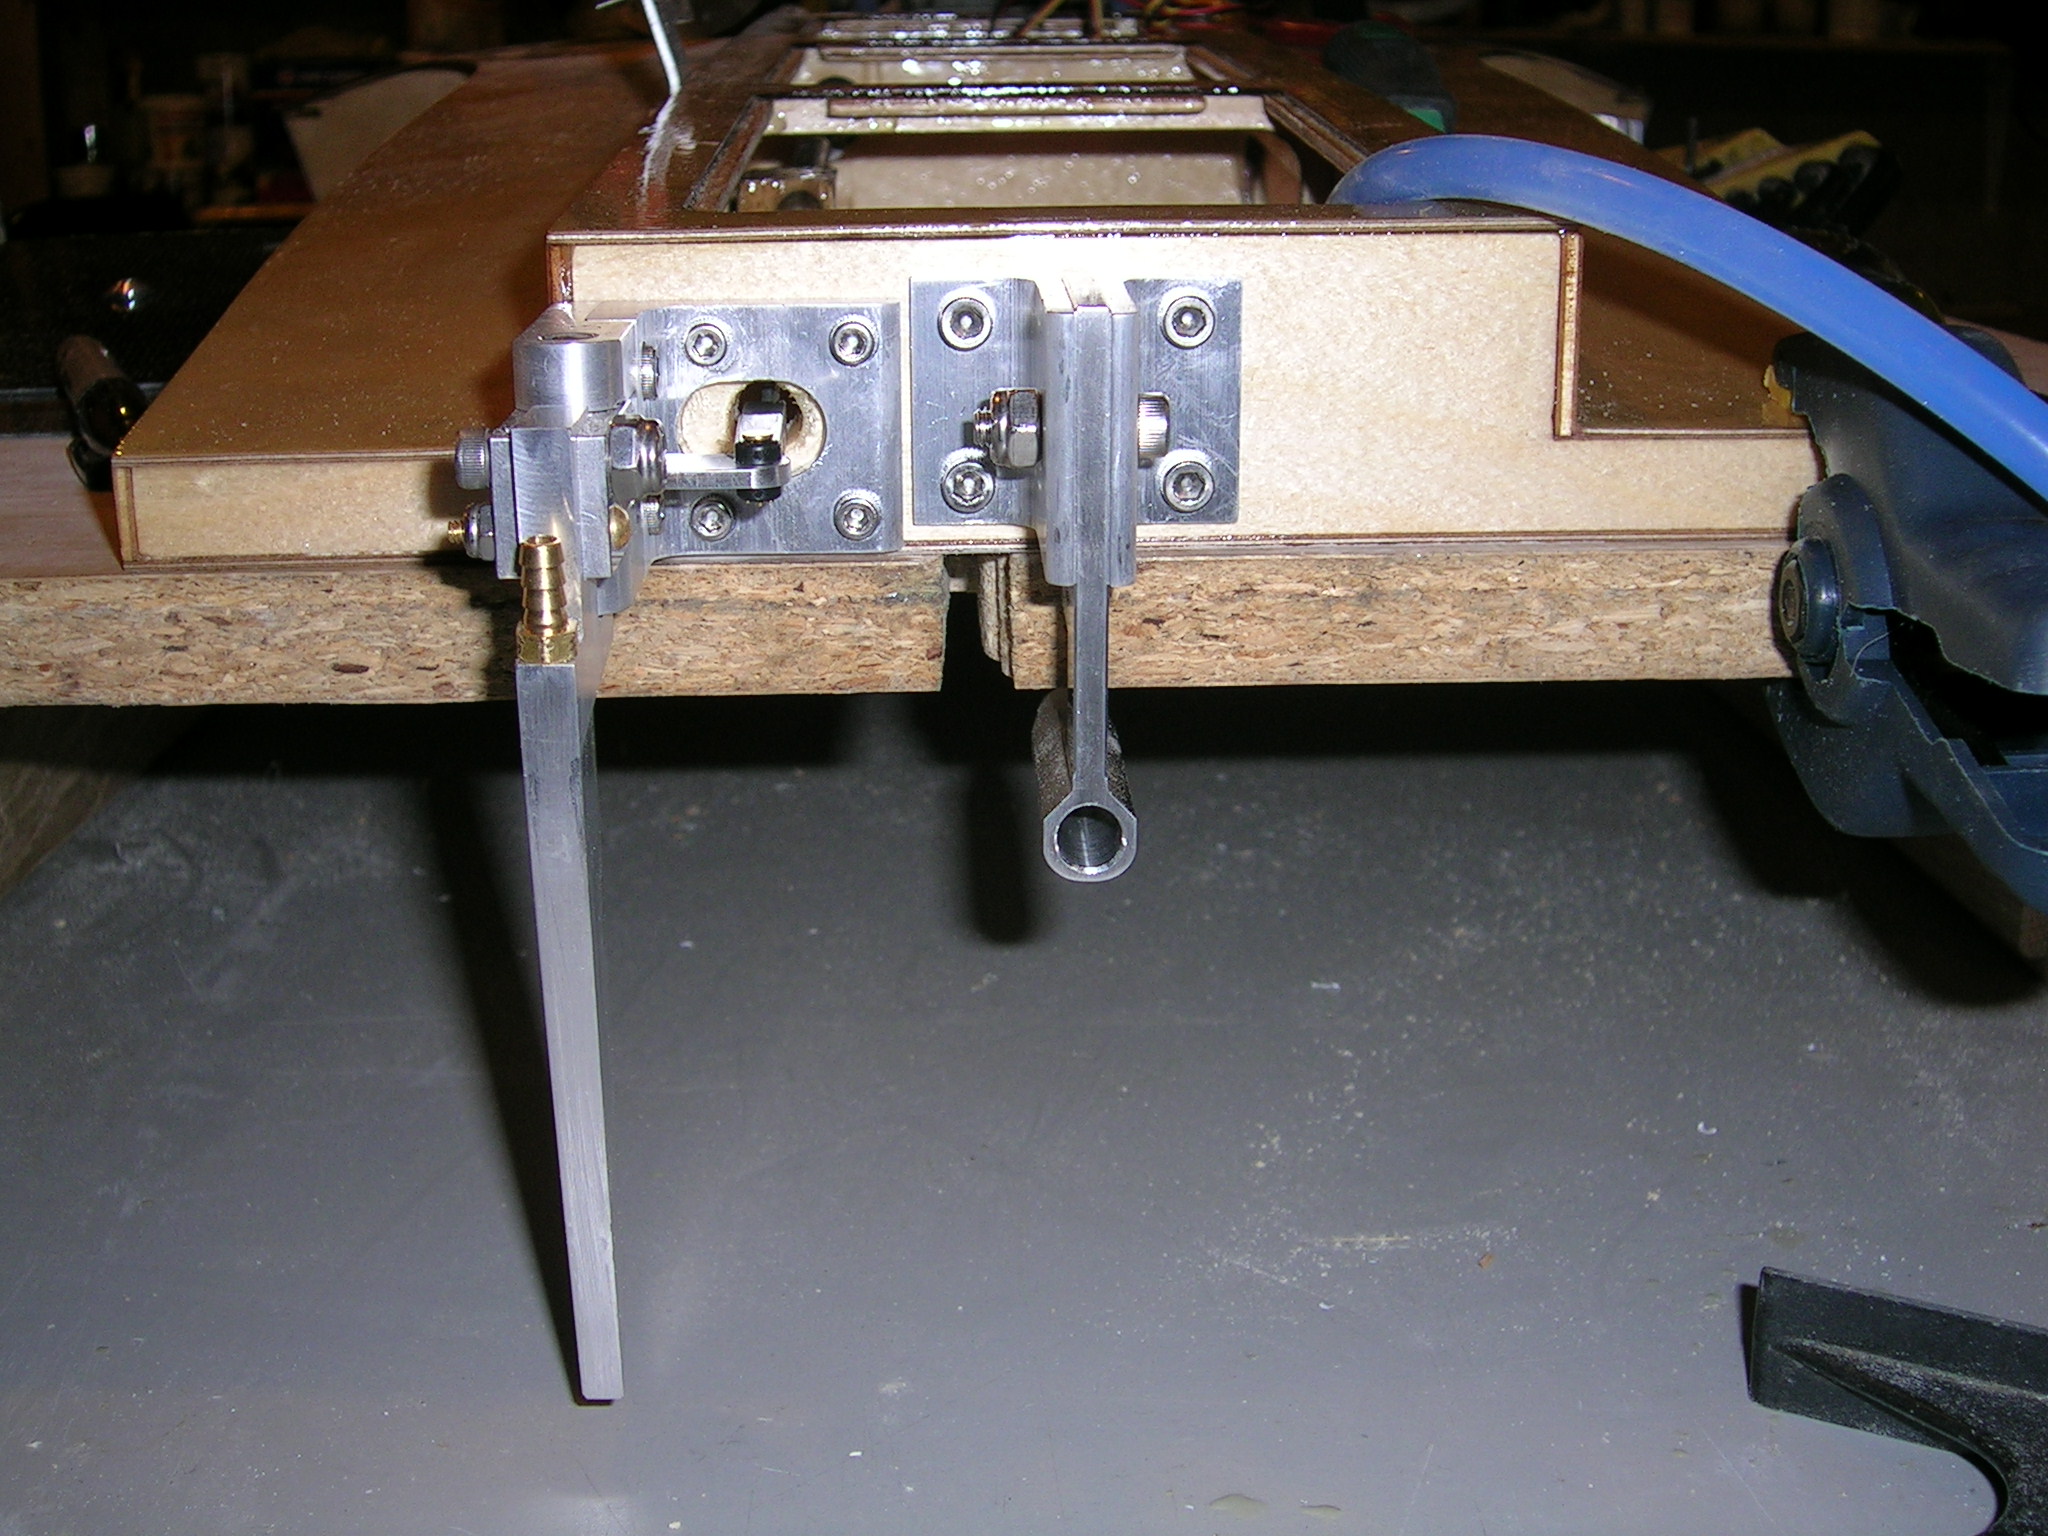
The turn fin bracket should be mounted so that the vertical side is perpendicular with the table the boat is sitting on. Test fit it with the fin mounted and position it so that the inside of the fin is in line with the outside of the sponson chine (where the bottom meets the side). Two bolts with T-nuts hold it in place. Epoxy was also added in the T-nut holes to hold them in securely. Some guys will add an extra layer of plywood on the inside of the sponson back for extra strength.
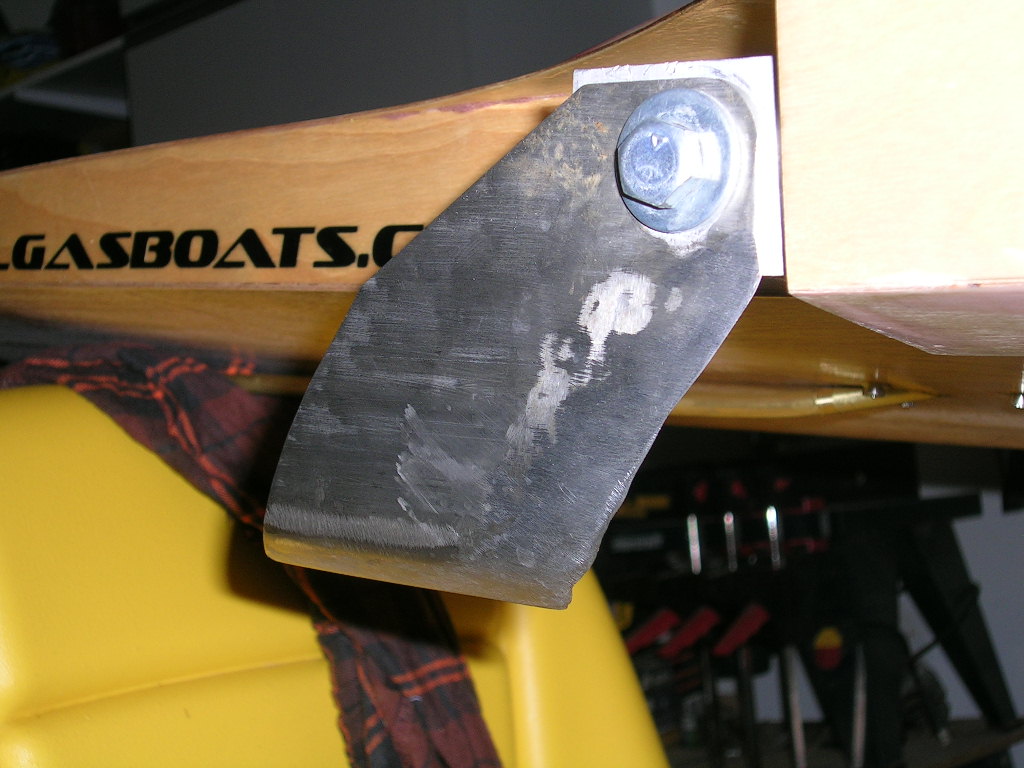
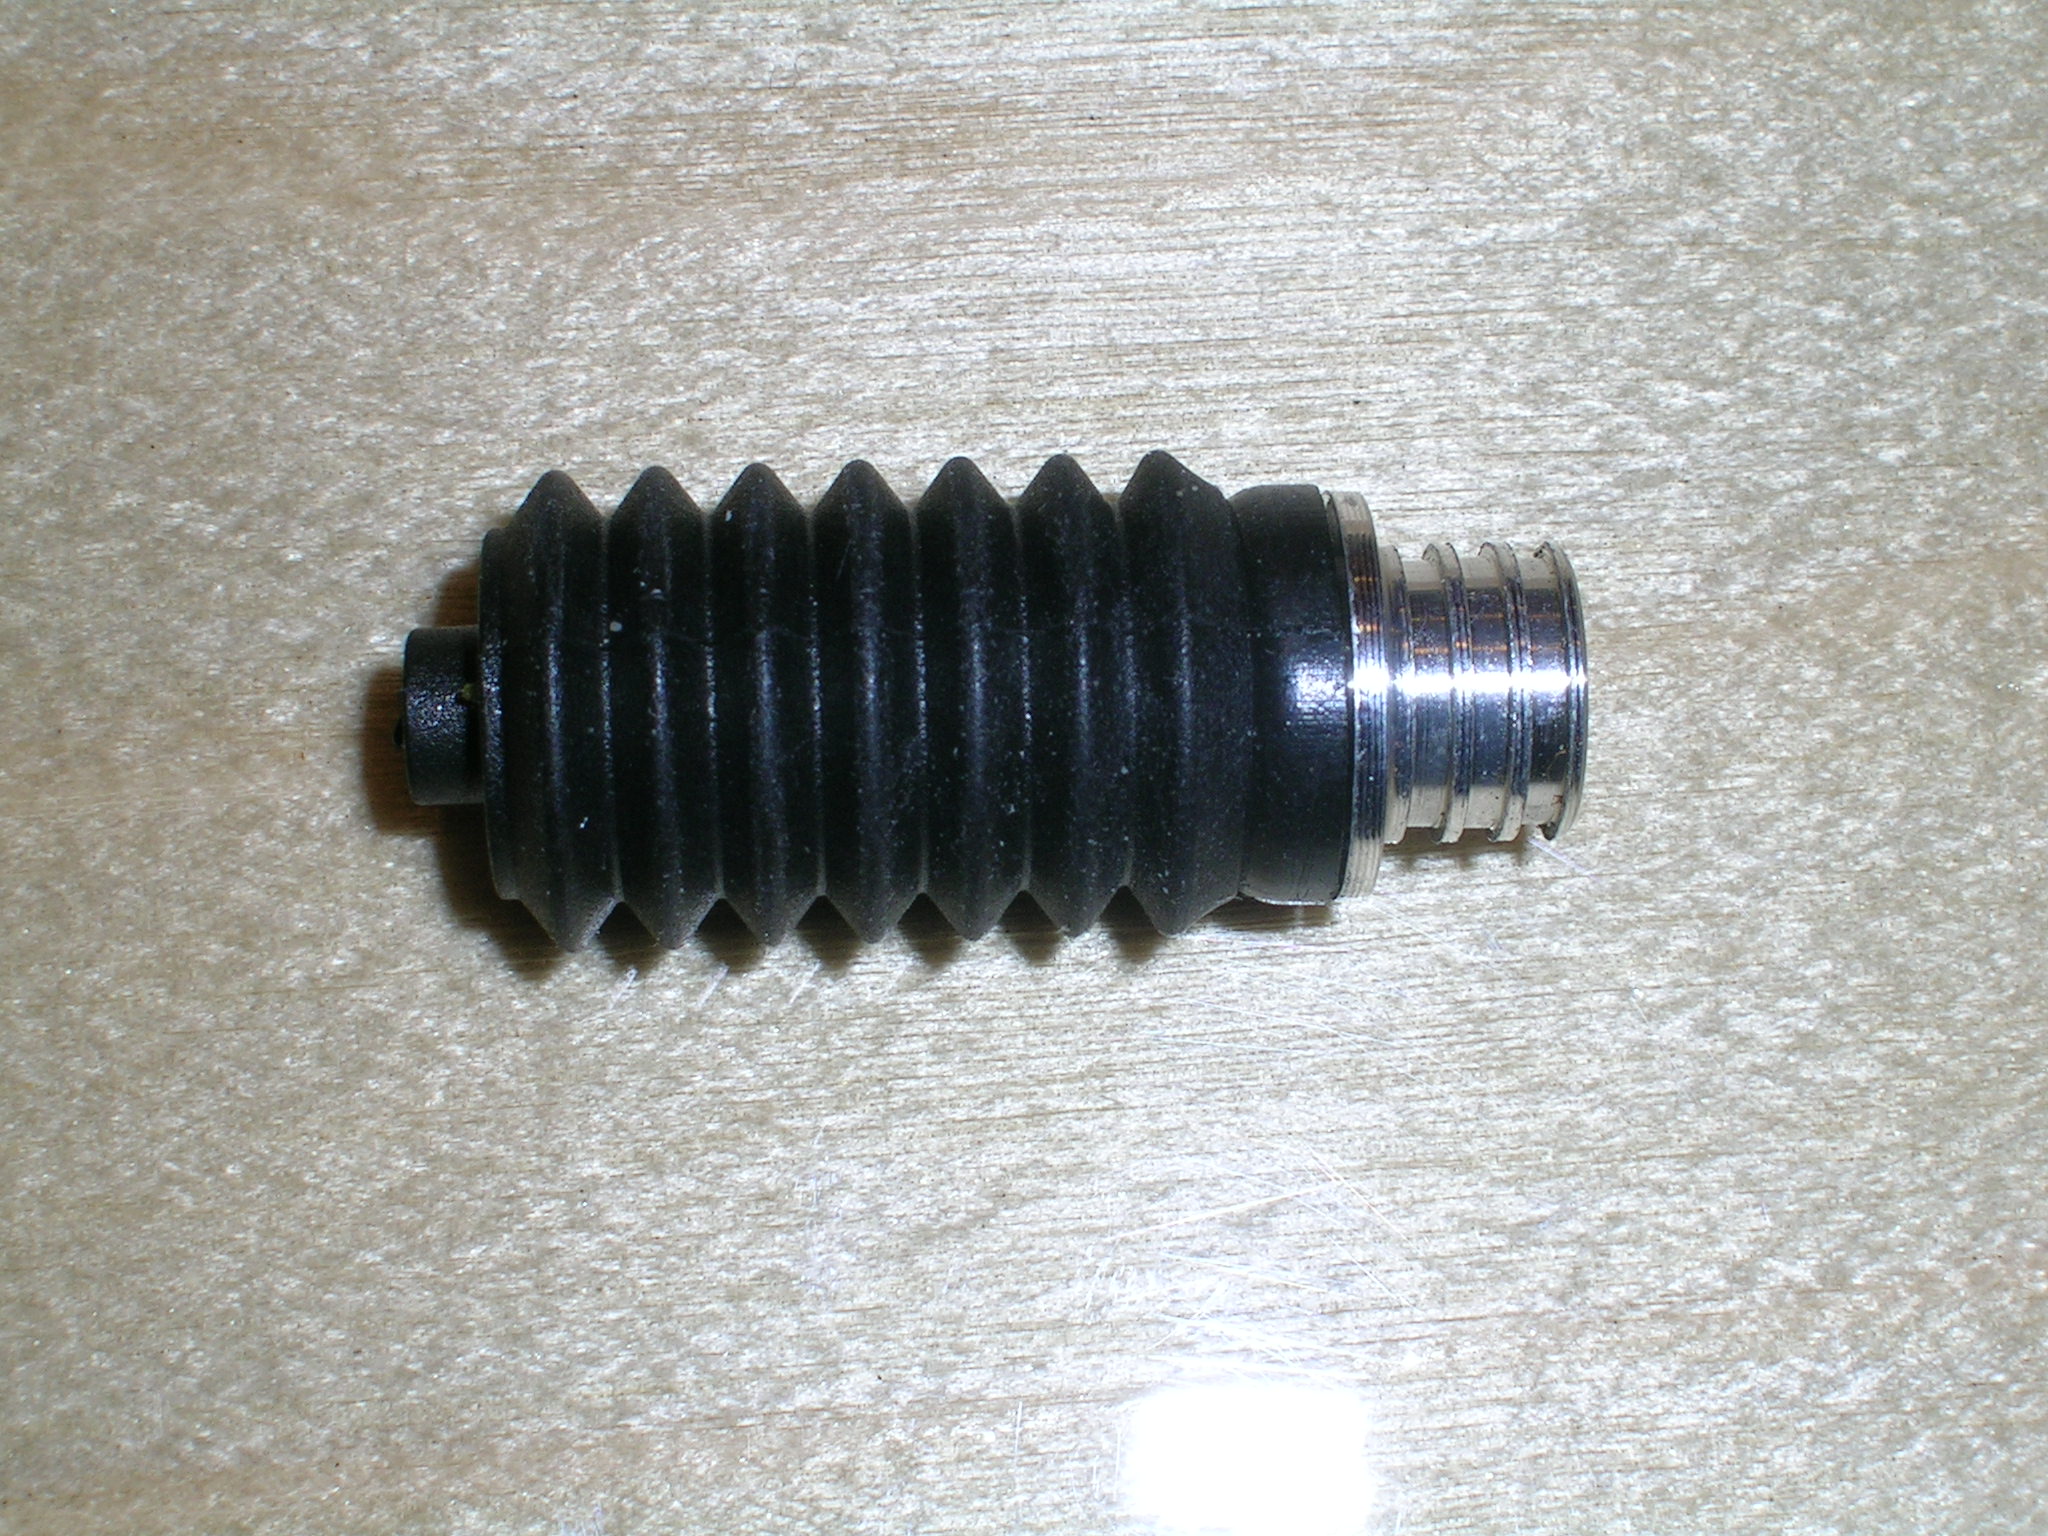
The turn fin is one of the most important pieces of hardware on the Whiplash. It will make or break the handling and performance of this boat. Below are some pictures of my turn fin. It is the stock Blazer Marine fin for the Whiplash. It's made of thick stainless steel and is VERY difficult to prepare correctly. It CNC bent and cut, but is delivered unsharpened, so be prepared to spend a good part of the day grinding and sharpening this fin. I included a few pictures of the fin as I had initially prepared it. After running the boat a few times and battling with hard right pulling, I got in touch with Brian to try and figure out what was wrong. Turned out the taper on the fin wasn't near as long and straight as it needed to be. The last few pics show it as it is now. Re-doing the taper to be about 3/4" long and straight took the pull out of the boat and it will now run straight with no rudder input. The fin looks pretty rough now though because it was involved in a collision and had to be re-worked fast at the last race. Still works great though. I will have to spend some time on it to get it looking pretty again.
I slotted the top mounting hole on my turn fin bracket to allow for changes in the vertical tilt of the fin. Seems to work better for me with the fin tilted in toward the boat. As for front/forward tilt, as the fin is
Tip: if your Whiplash is pulling to one side and you want to know if the turn fin is the culprit, remove the fin and make a few high speed passes with the boat to see if it tracks straight. If it does, the fin was your problem. If it still pulls, look for other problems.
Note: Blazer Marine now have a new turn fin available for the Whiplash which they claim makes it handle even better. I may have to give this one a try. Inquire with Blazer Marine for more details on this new fin.
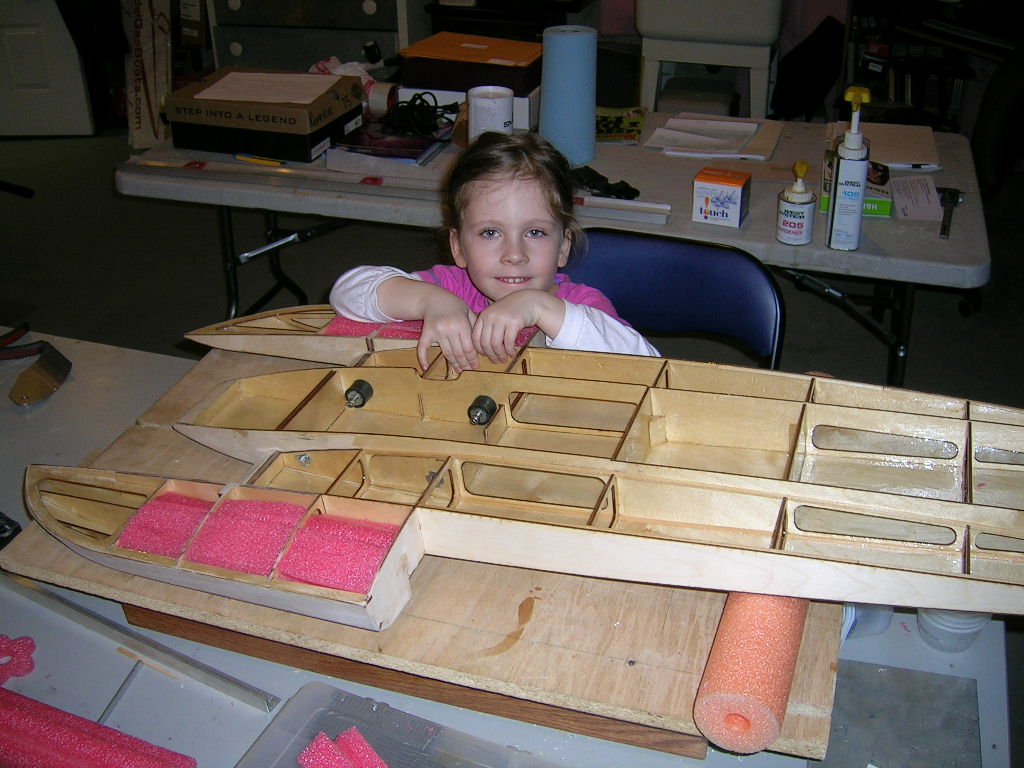
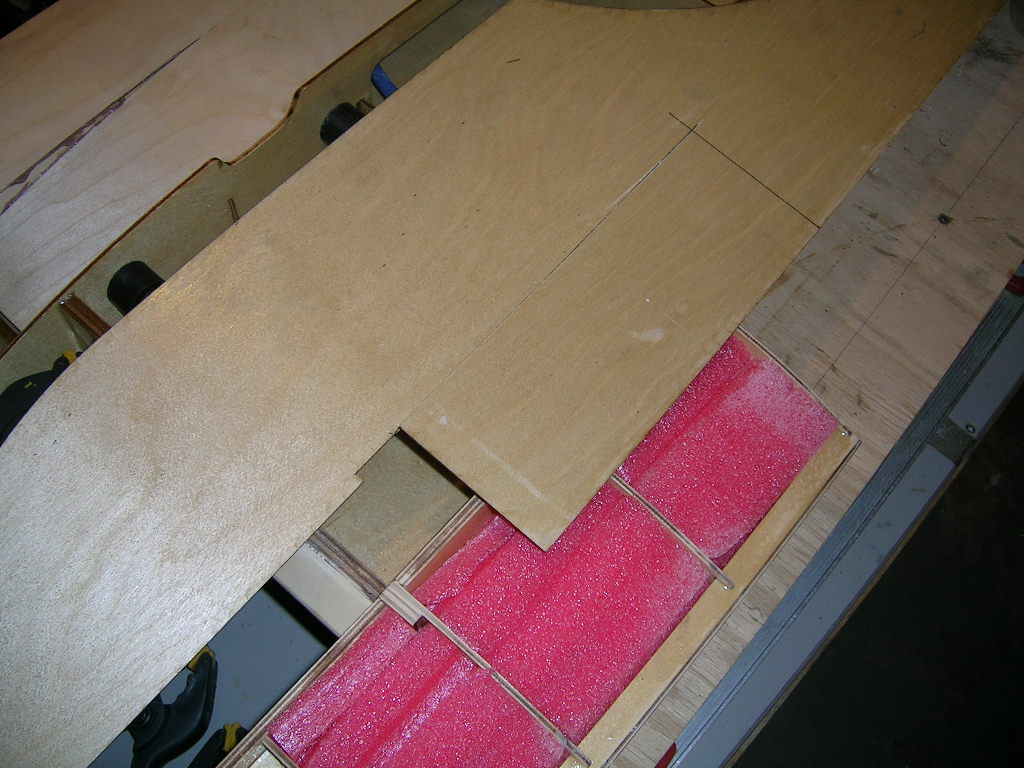
Floatation must be installed in the hull before the top sheeting is glued on. I used pieces of pool noodles cut to shape to fit the openings between bulkheads. My daughter helped me out with this. My girls love the boats! :)
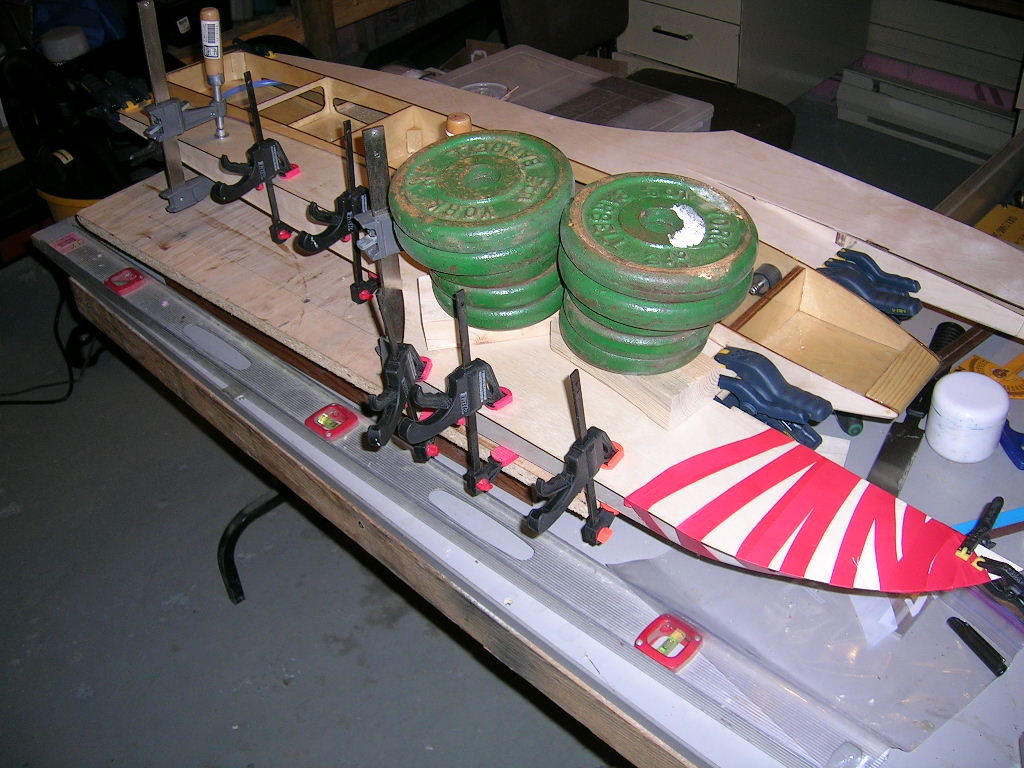
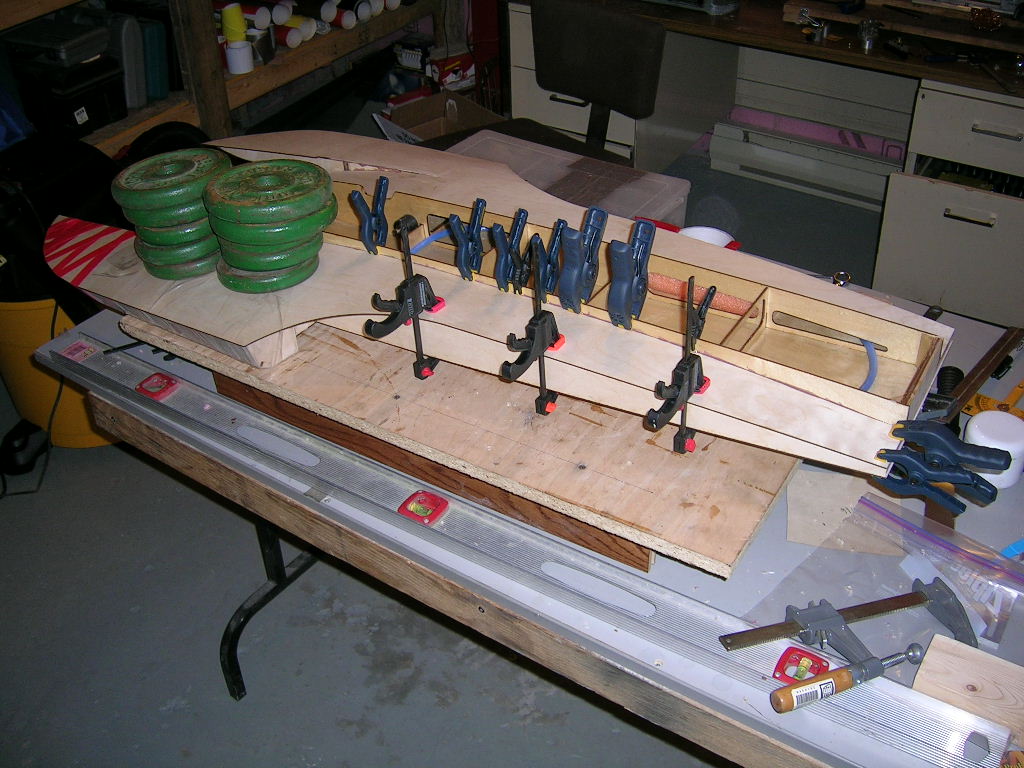
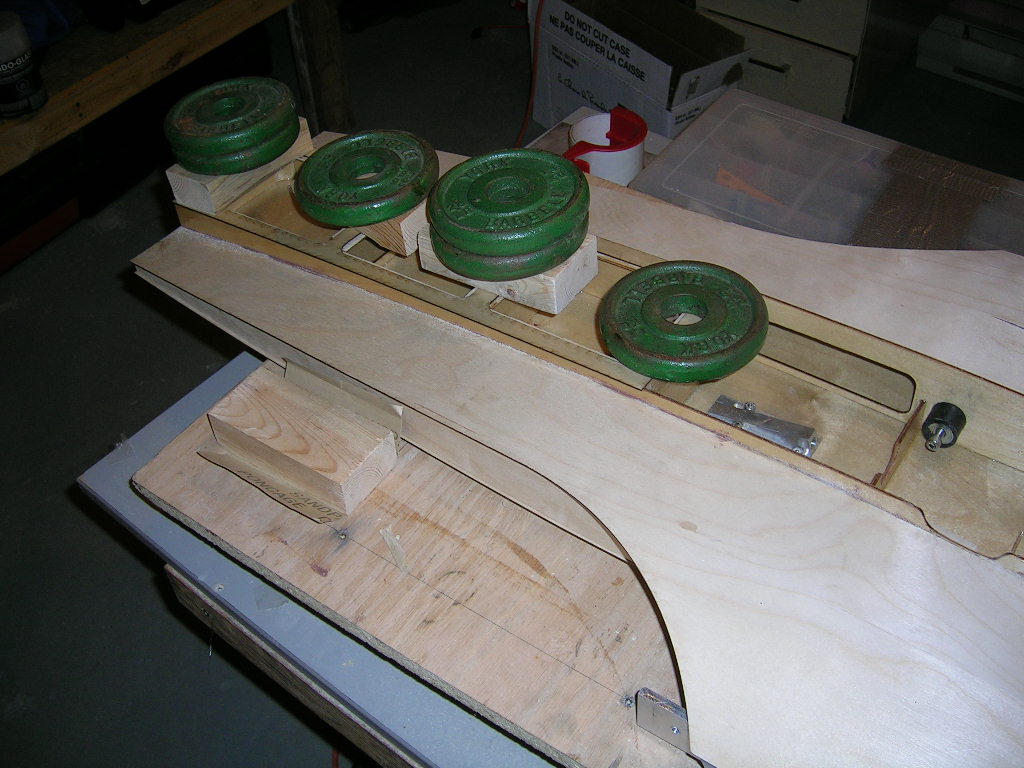
Gluing on the top sheeting. Before you put on the top sheeting you should seal it all on the inside with epoxy. This can be done in one step but I like to do it in two. I seal the inside of the sheeting and let it cure overnight. The next day I lightly sand it where it will contact the hull framing for glue. I used a little bit of filler in the West Systems epoxy to make it a bit thicker so it would stay put on the framing as I coated it all. I then put the sheeting in place and secured it into its final position using tape, clamps and weights.
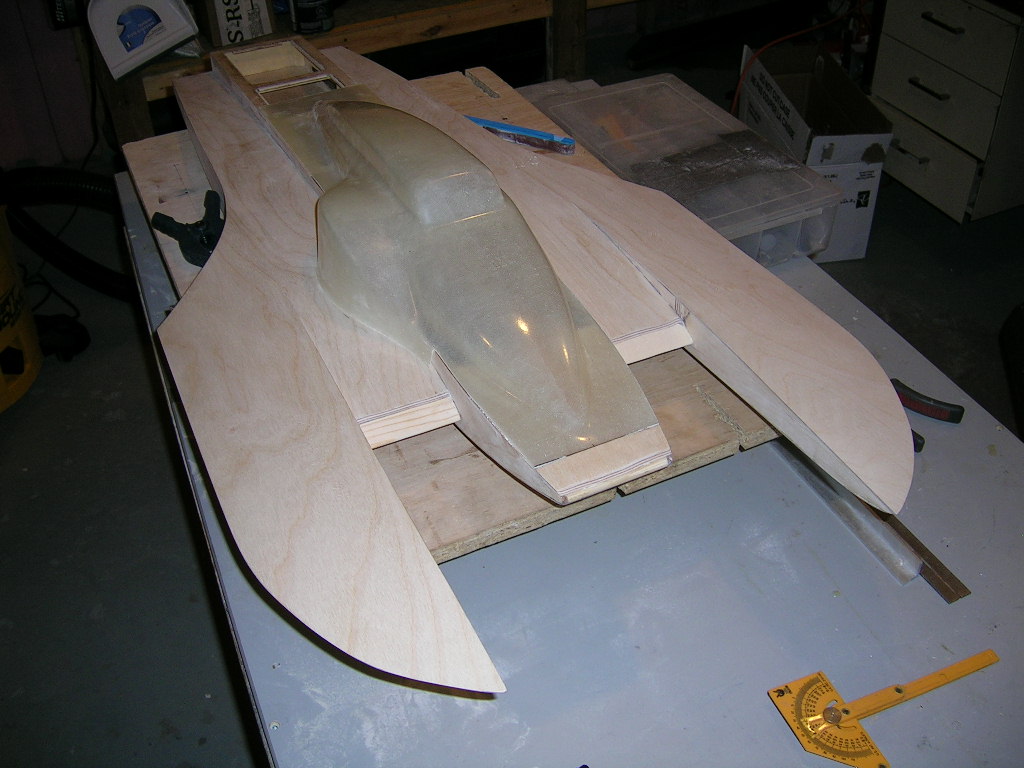
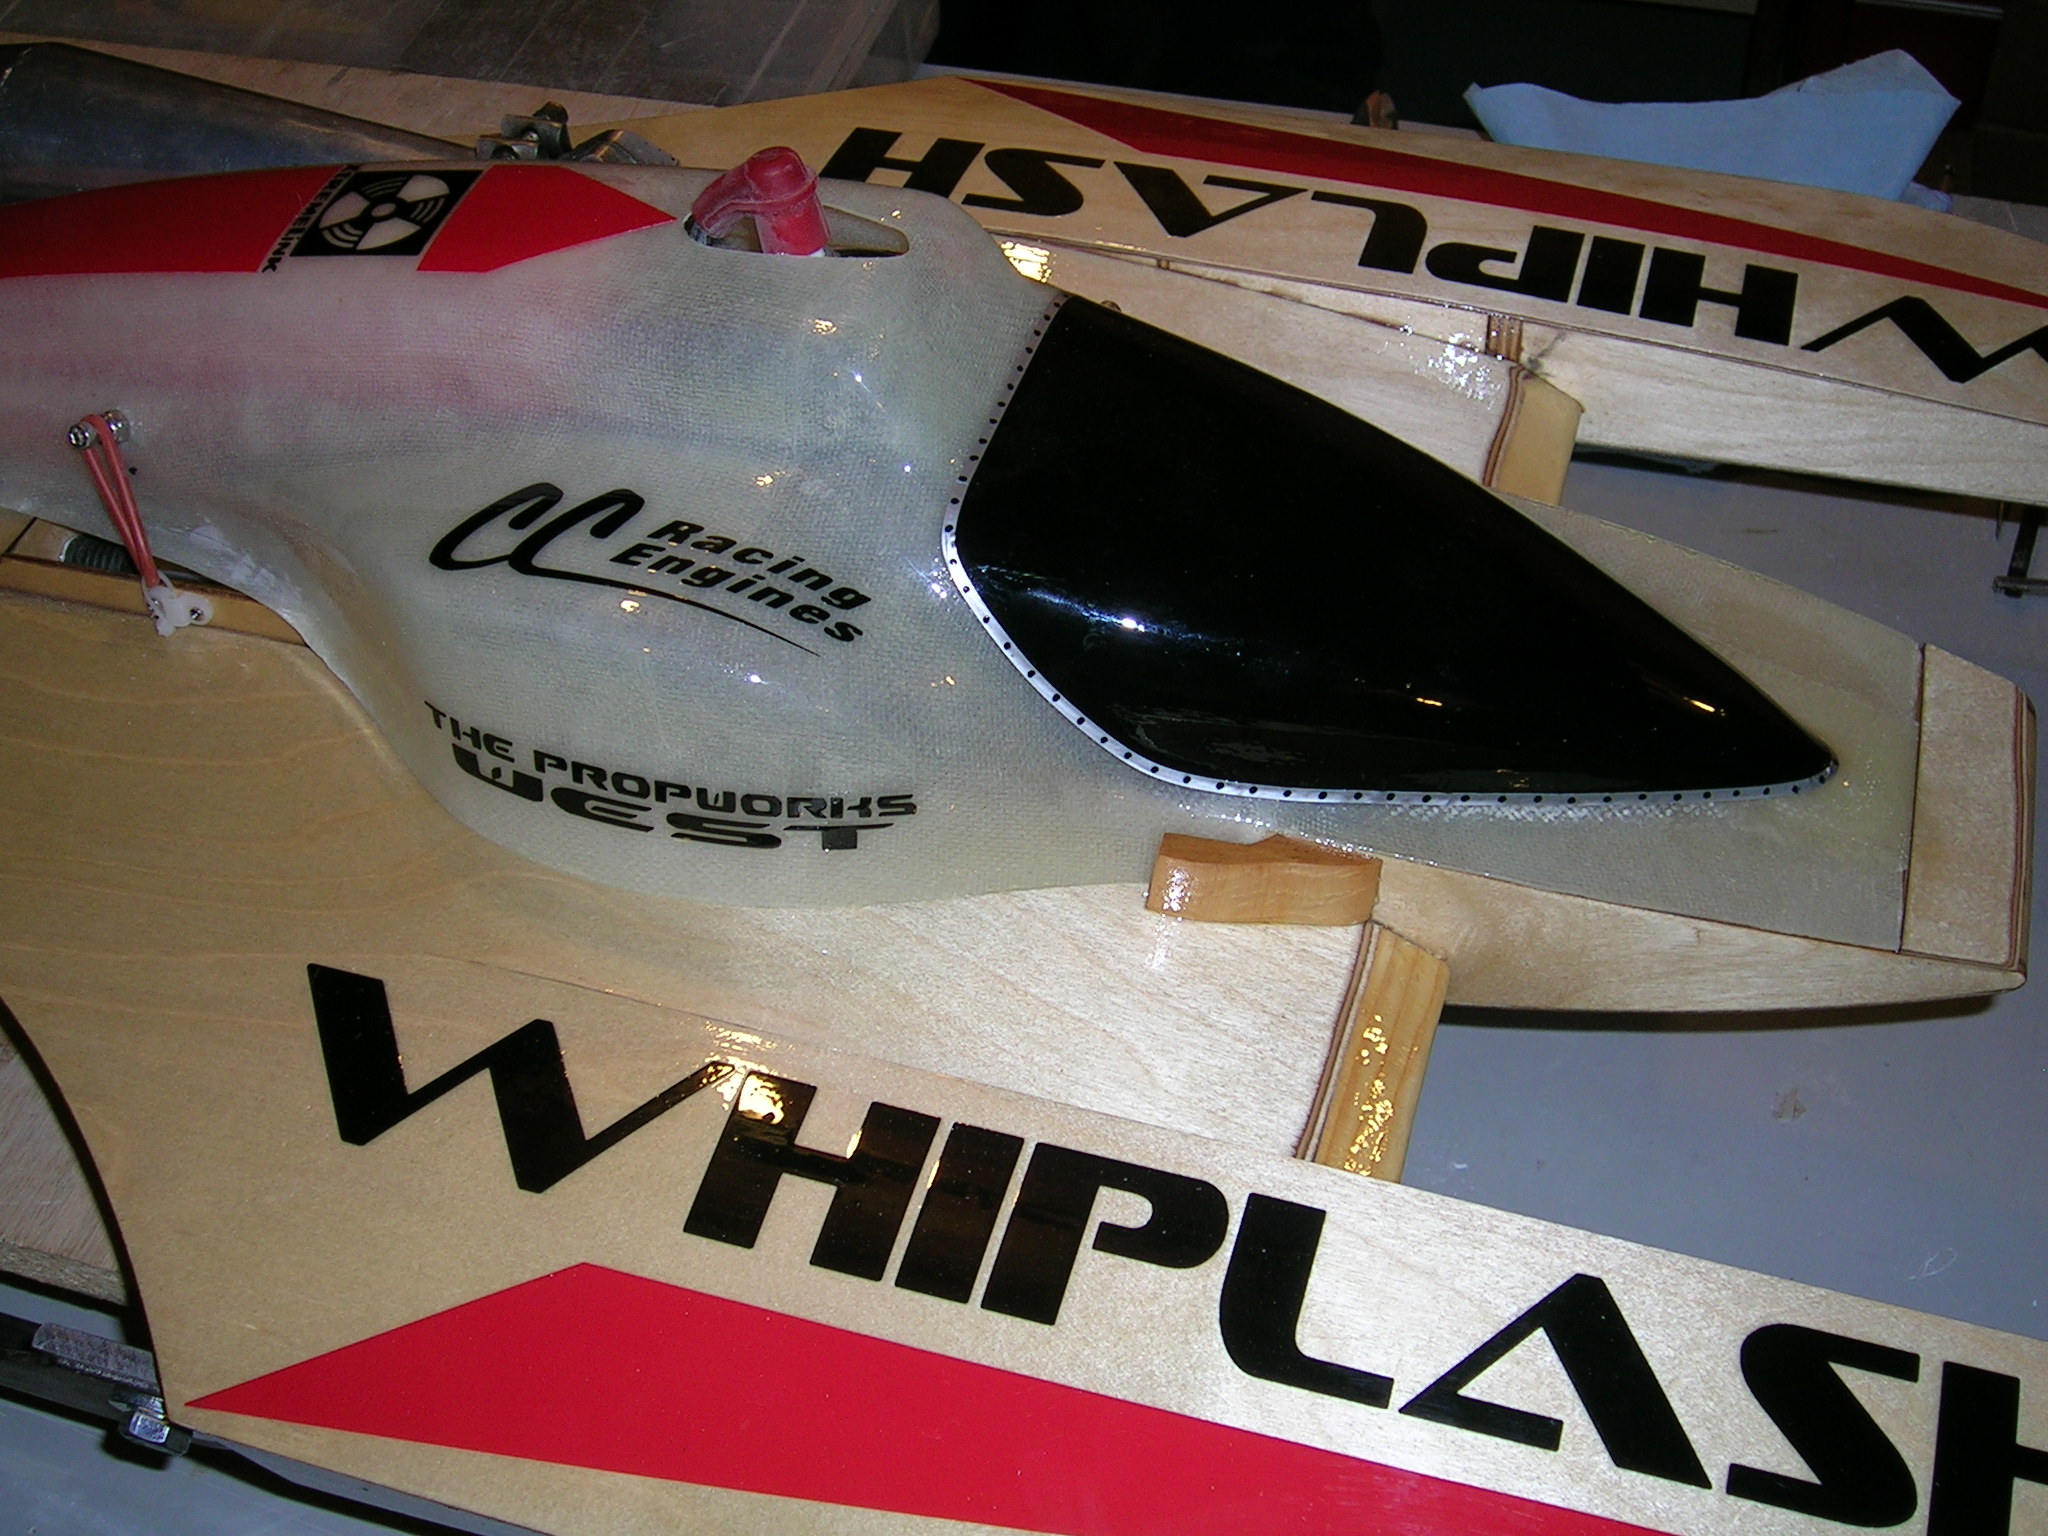
After the epoxy for the top sheeting cured, I sanded all the edges flush and fitted the cowl. I was impressed at the fit of the cowl on my Whiplash. It required very little trimming to fit perfectly. Actually all the trimming was done by sanding some high areas. The front portion of the cowl (the flat area at the very front) was a little bit raised on one side. This was easily fixed by heating it with a hair dryer on high heat for a minute or so and bending it back down. Worked perfectly. Thanks to Tom Tetrault for this tip.
For mounting the cowl I used a method that is slightly different than the one outlined in the new manual. It has worked nicely for me, but either method will do fine.
I marked the center of the cowl and the nosepiece and made a slot in the nosepiece with a wood chisel as seen in the pictures. I then put the cowl over the nosepiece and traced the outline of the slot onto the semi-transparent cowl. I trimmed the front of the cowl leaving a tab on the end, the same size as the notch in the nosepiece. Then I cut a piece of 1/16" plywood to fit over the nosepiece and epoxied it into place and sanded it to blend in. This left a cavity for the tab in the cowl to fit into. I reinforced the front and tab of the cowl with 2 extra layers of fiberglass using West Systems epoxy as resin. Note: the Whiplash cowl is made of epoxy so you do not want to use polyester resin on it. Use epoxy resin.
The cowl is held down with 2 O-rings, as will be seen in pictures later.


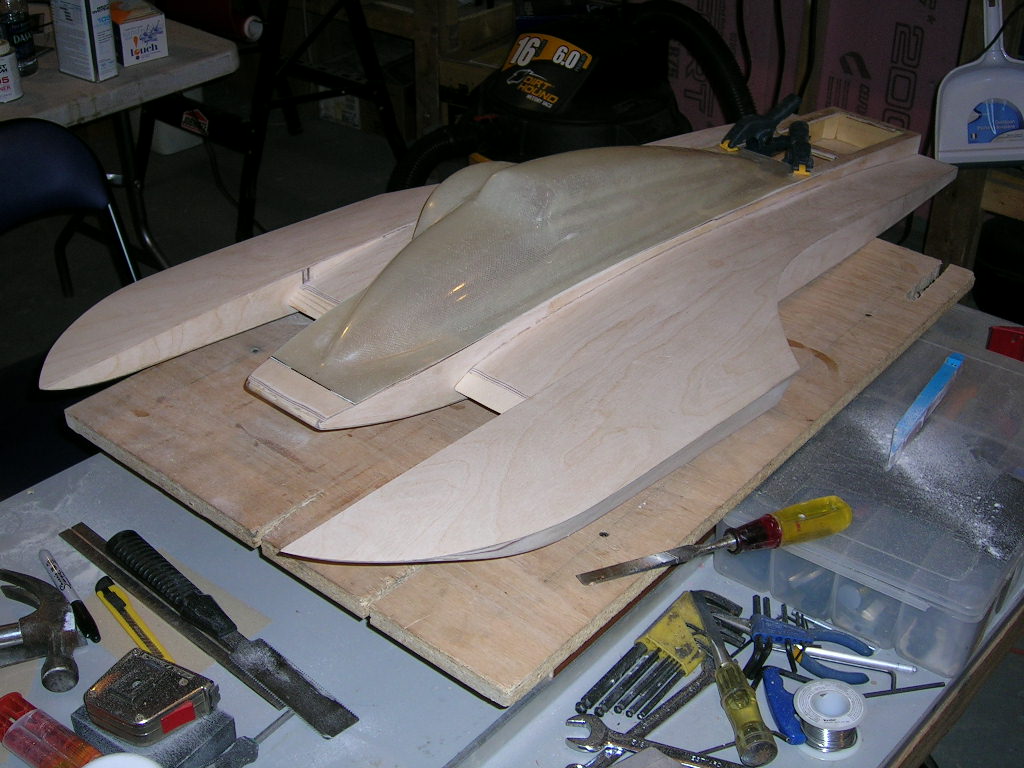
Some pictures of the cowl on the boat after final adjustments and nosepiece slot completed. Notice the clean flush finish of the nosepiece-cowl junction. The 1/16" ply is about the same thickness as the cowl, just slightly thicker, which is good to prevent water infiltration, yet still keep it all smooth and aerodynamic.

Next I made a water deflector to prevent water that might creep under the cowl on the carb side to find its way to the carburetor. The deflector is actually two pieces of 1/16" plywood. The first layer is about 1/2" high. The second layer is about 1/4" high and glued to the outside TOP of the of the first piece to create a "lip" at the top of the deflector so water will tend to follow along the deflector and out to the back of the cowl where it can exit onto the top deck of the boat. So far this has worked great.
I used some tape on the deck to transfer the outline of the cowl onto the deck so that I could know the space I had for gluing the deflector once the cowl was removed. The deflector was initially tacked in place with medium CA and then permanently glued and sealed with epoxy. Lastly I made a small transition block from a piece of oak to seal off the small gap in the front of the cowl from the boat hull. The cowl fits outside of the deflector and inside of this block. Any water coming onto the deck is directed away from the cowl by this piece. If any water still gets under the cowl, it should be deflected to the back and out of the cowl by the deflector.


Hardware Installation...
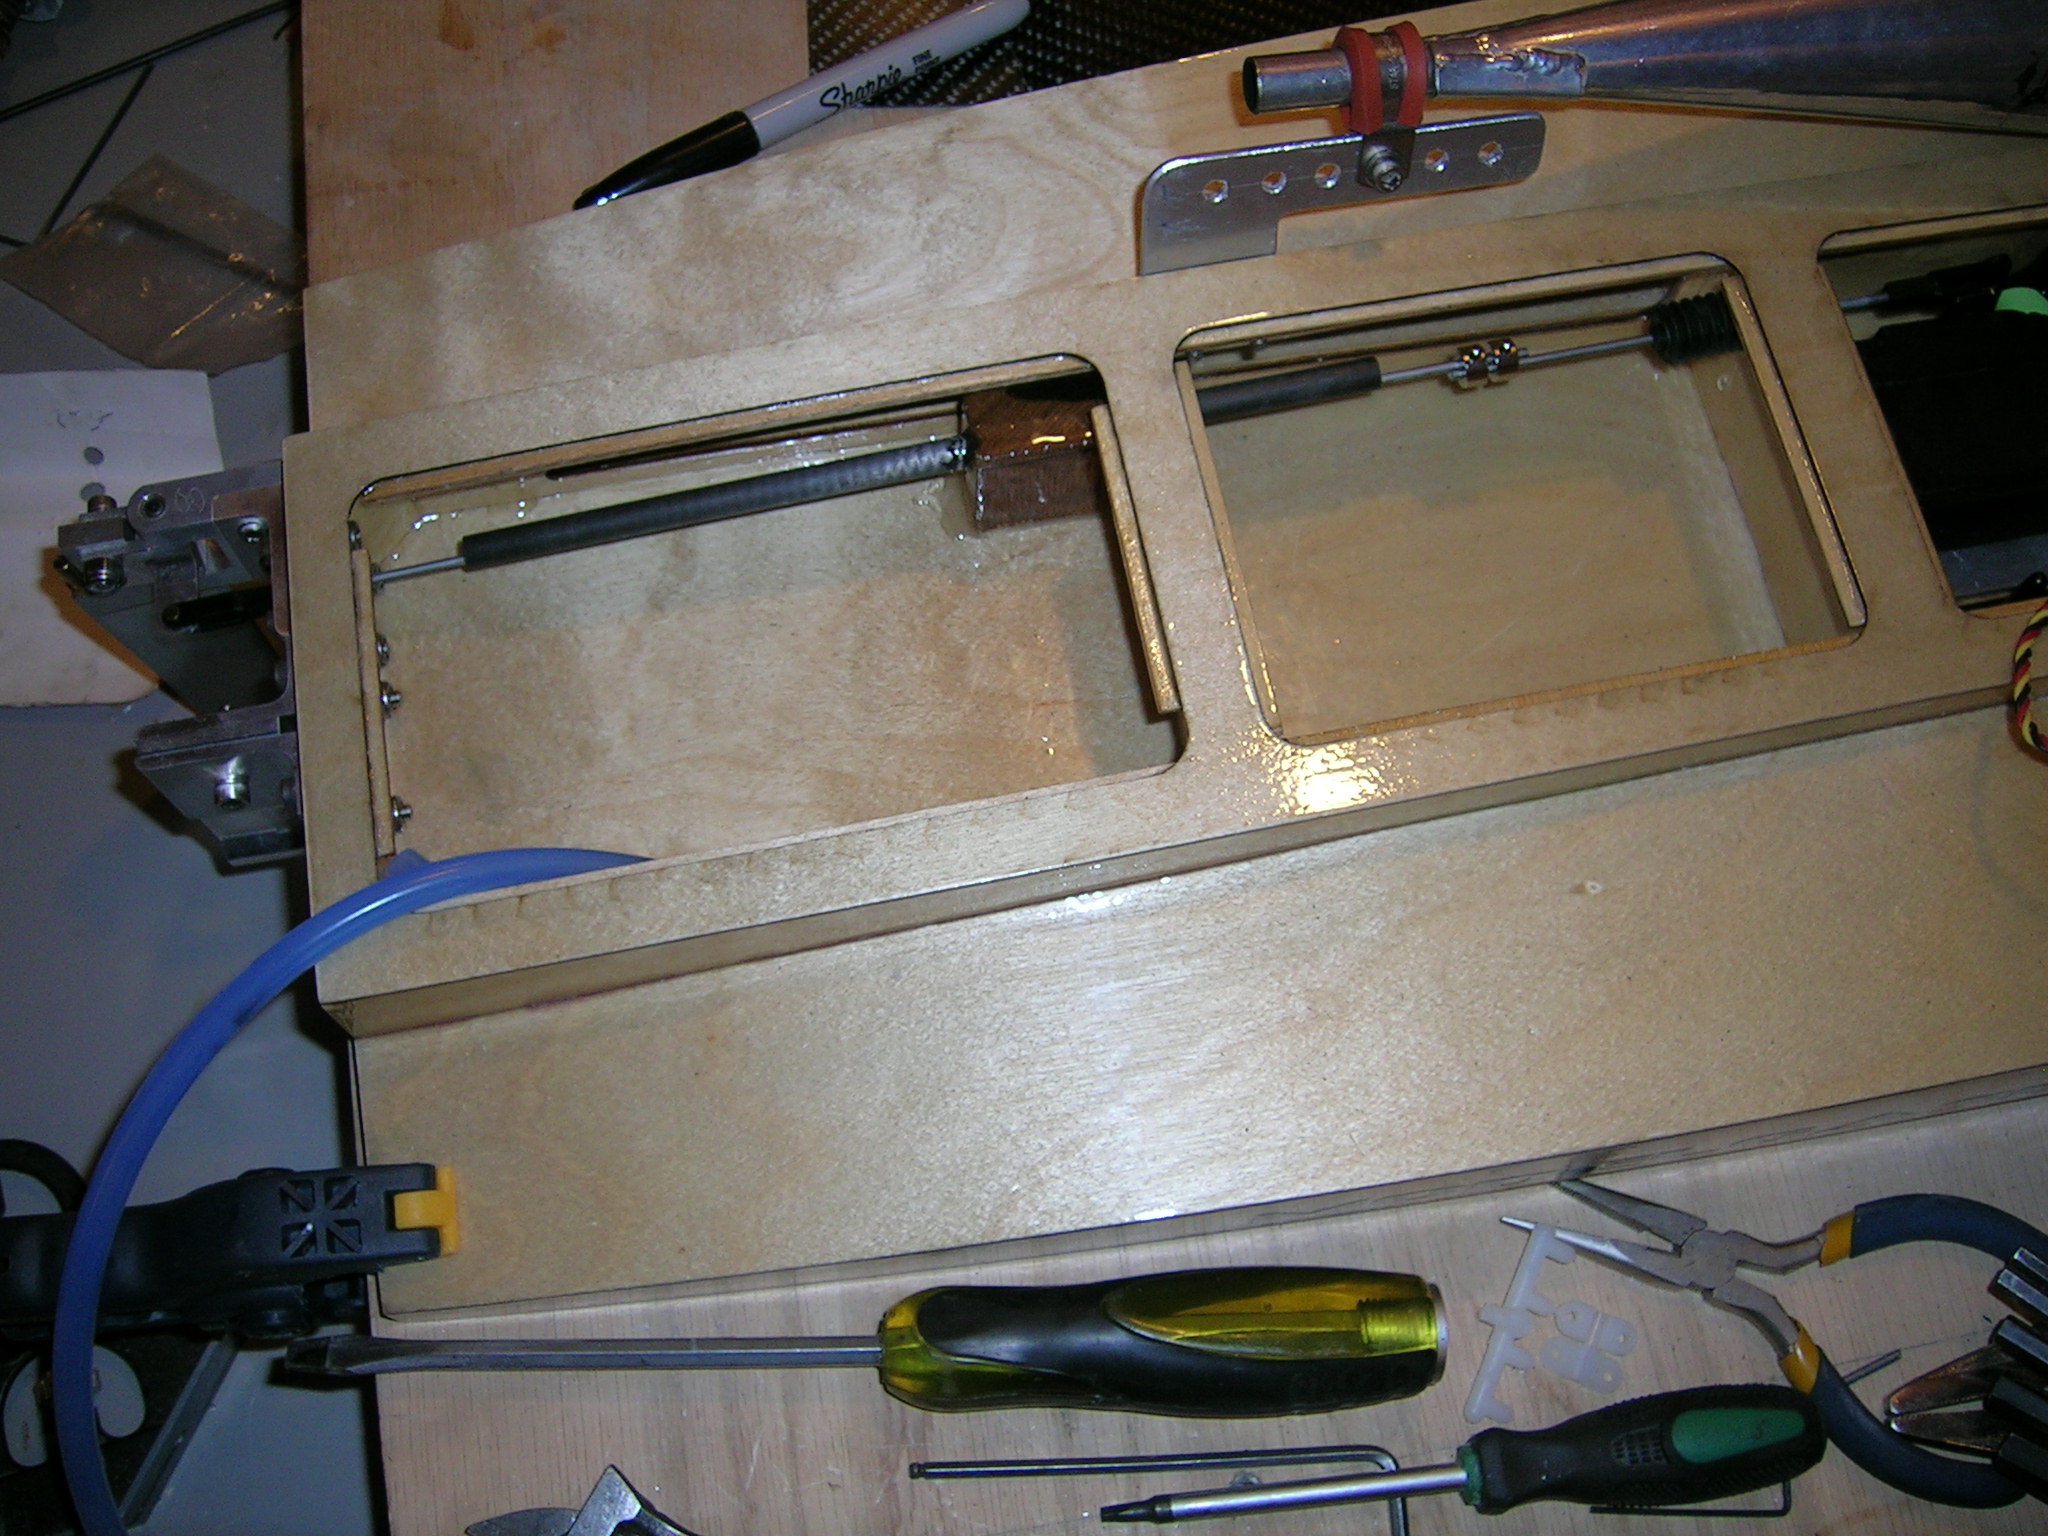
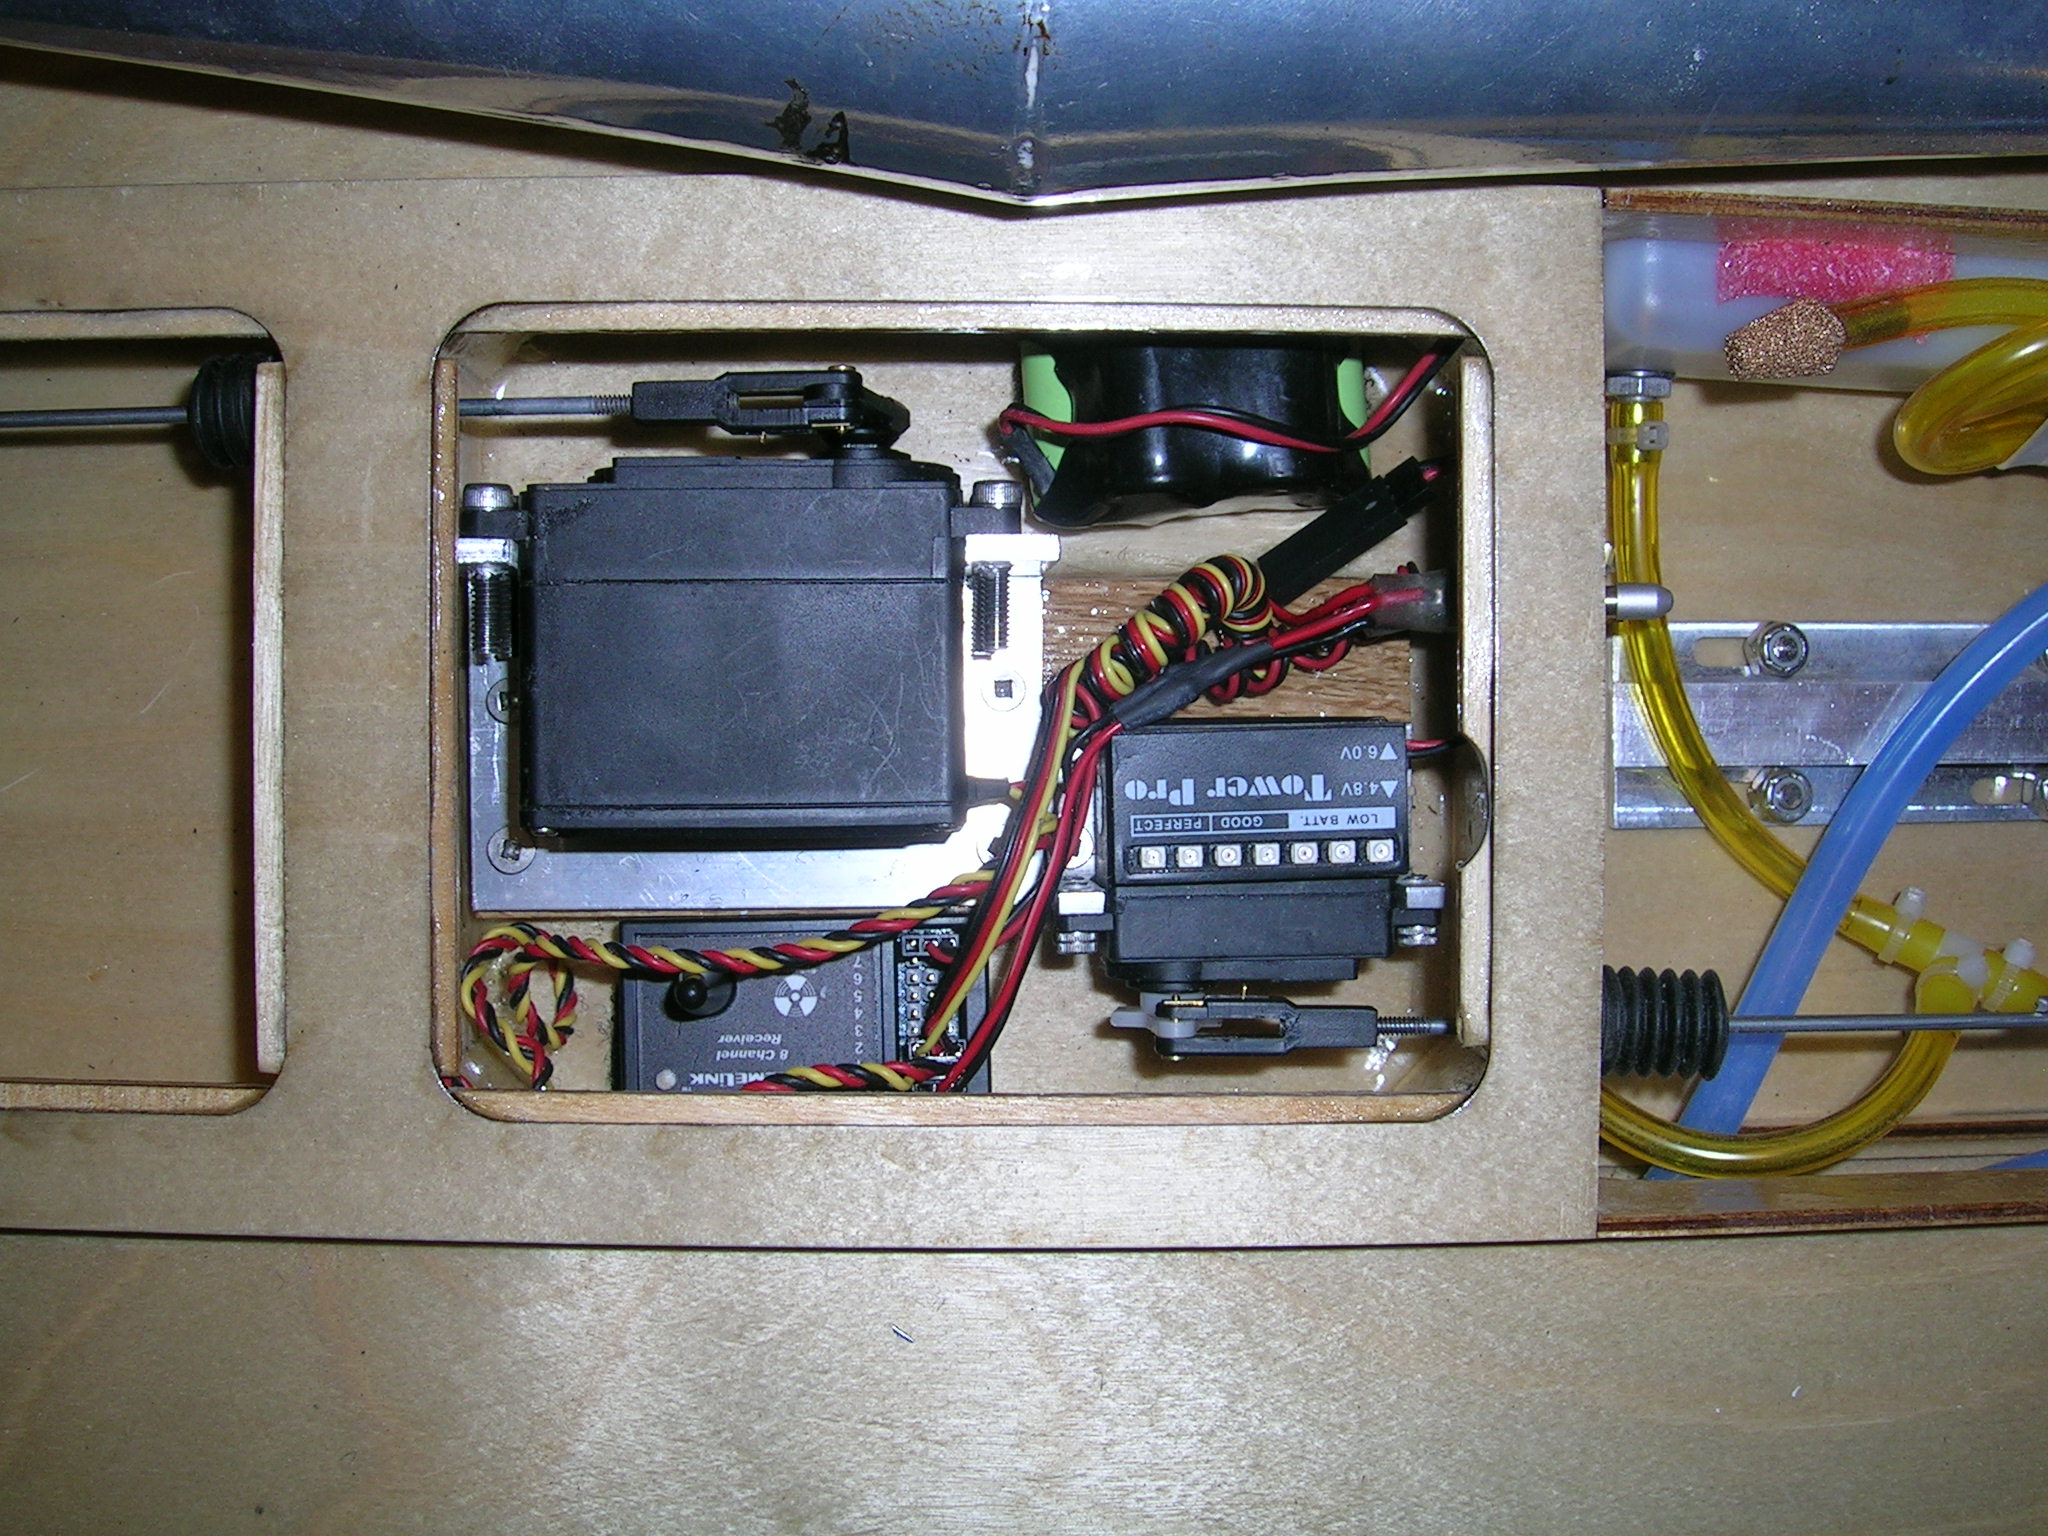
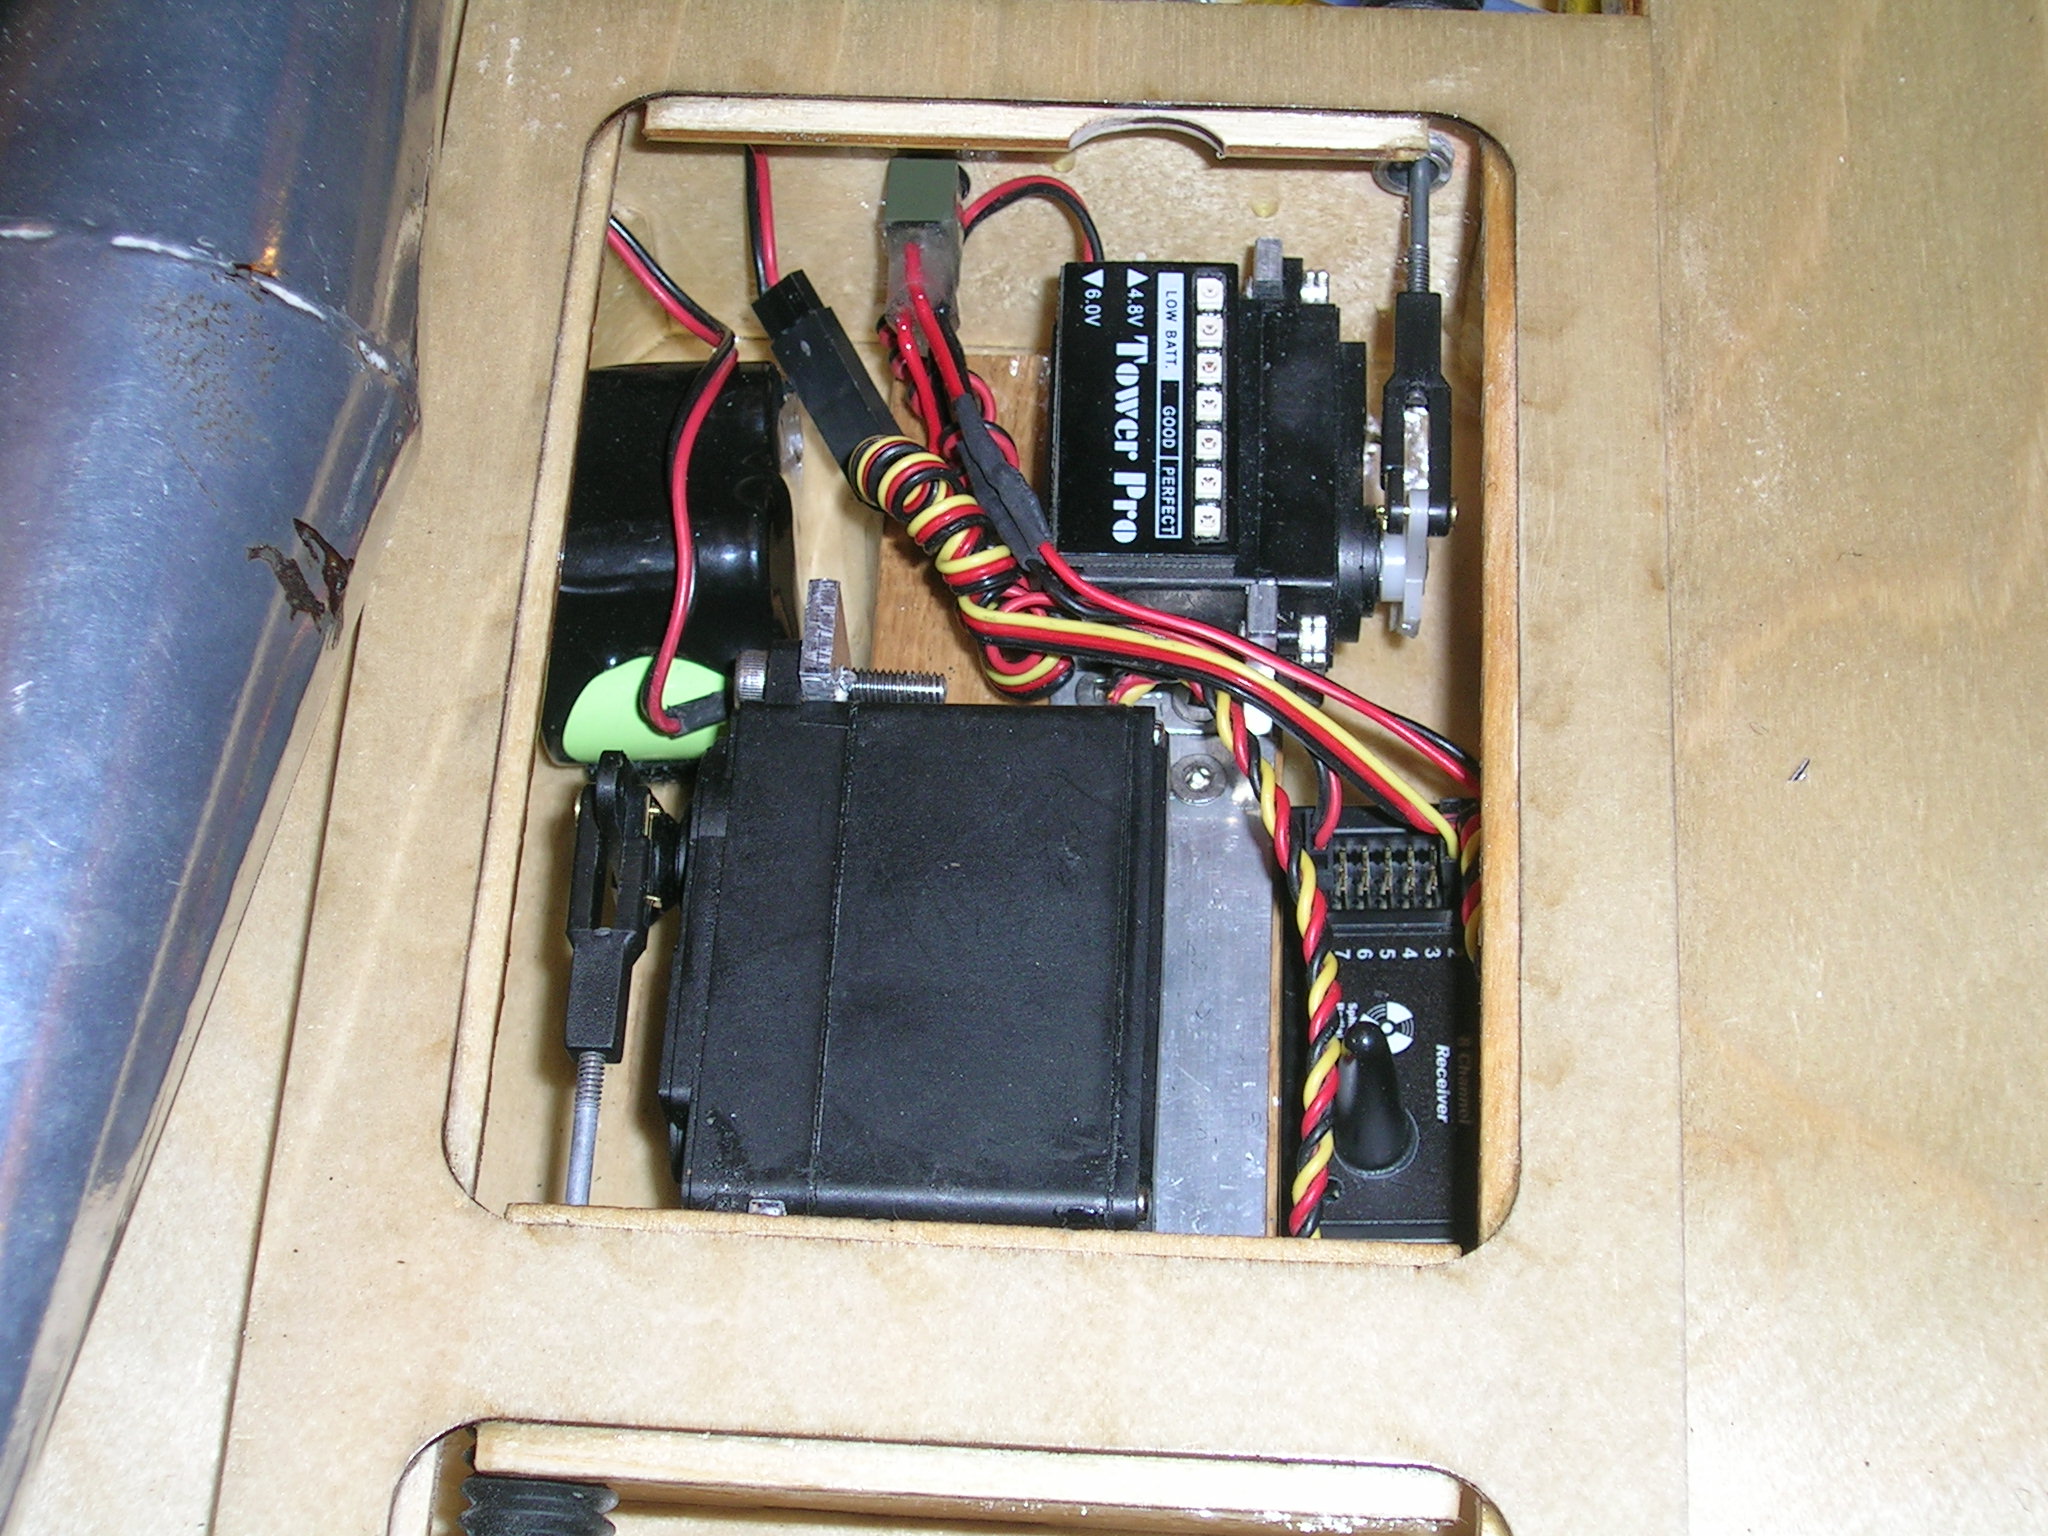
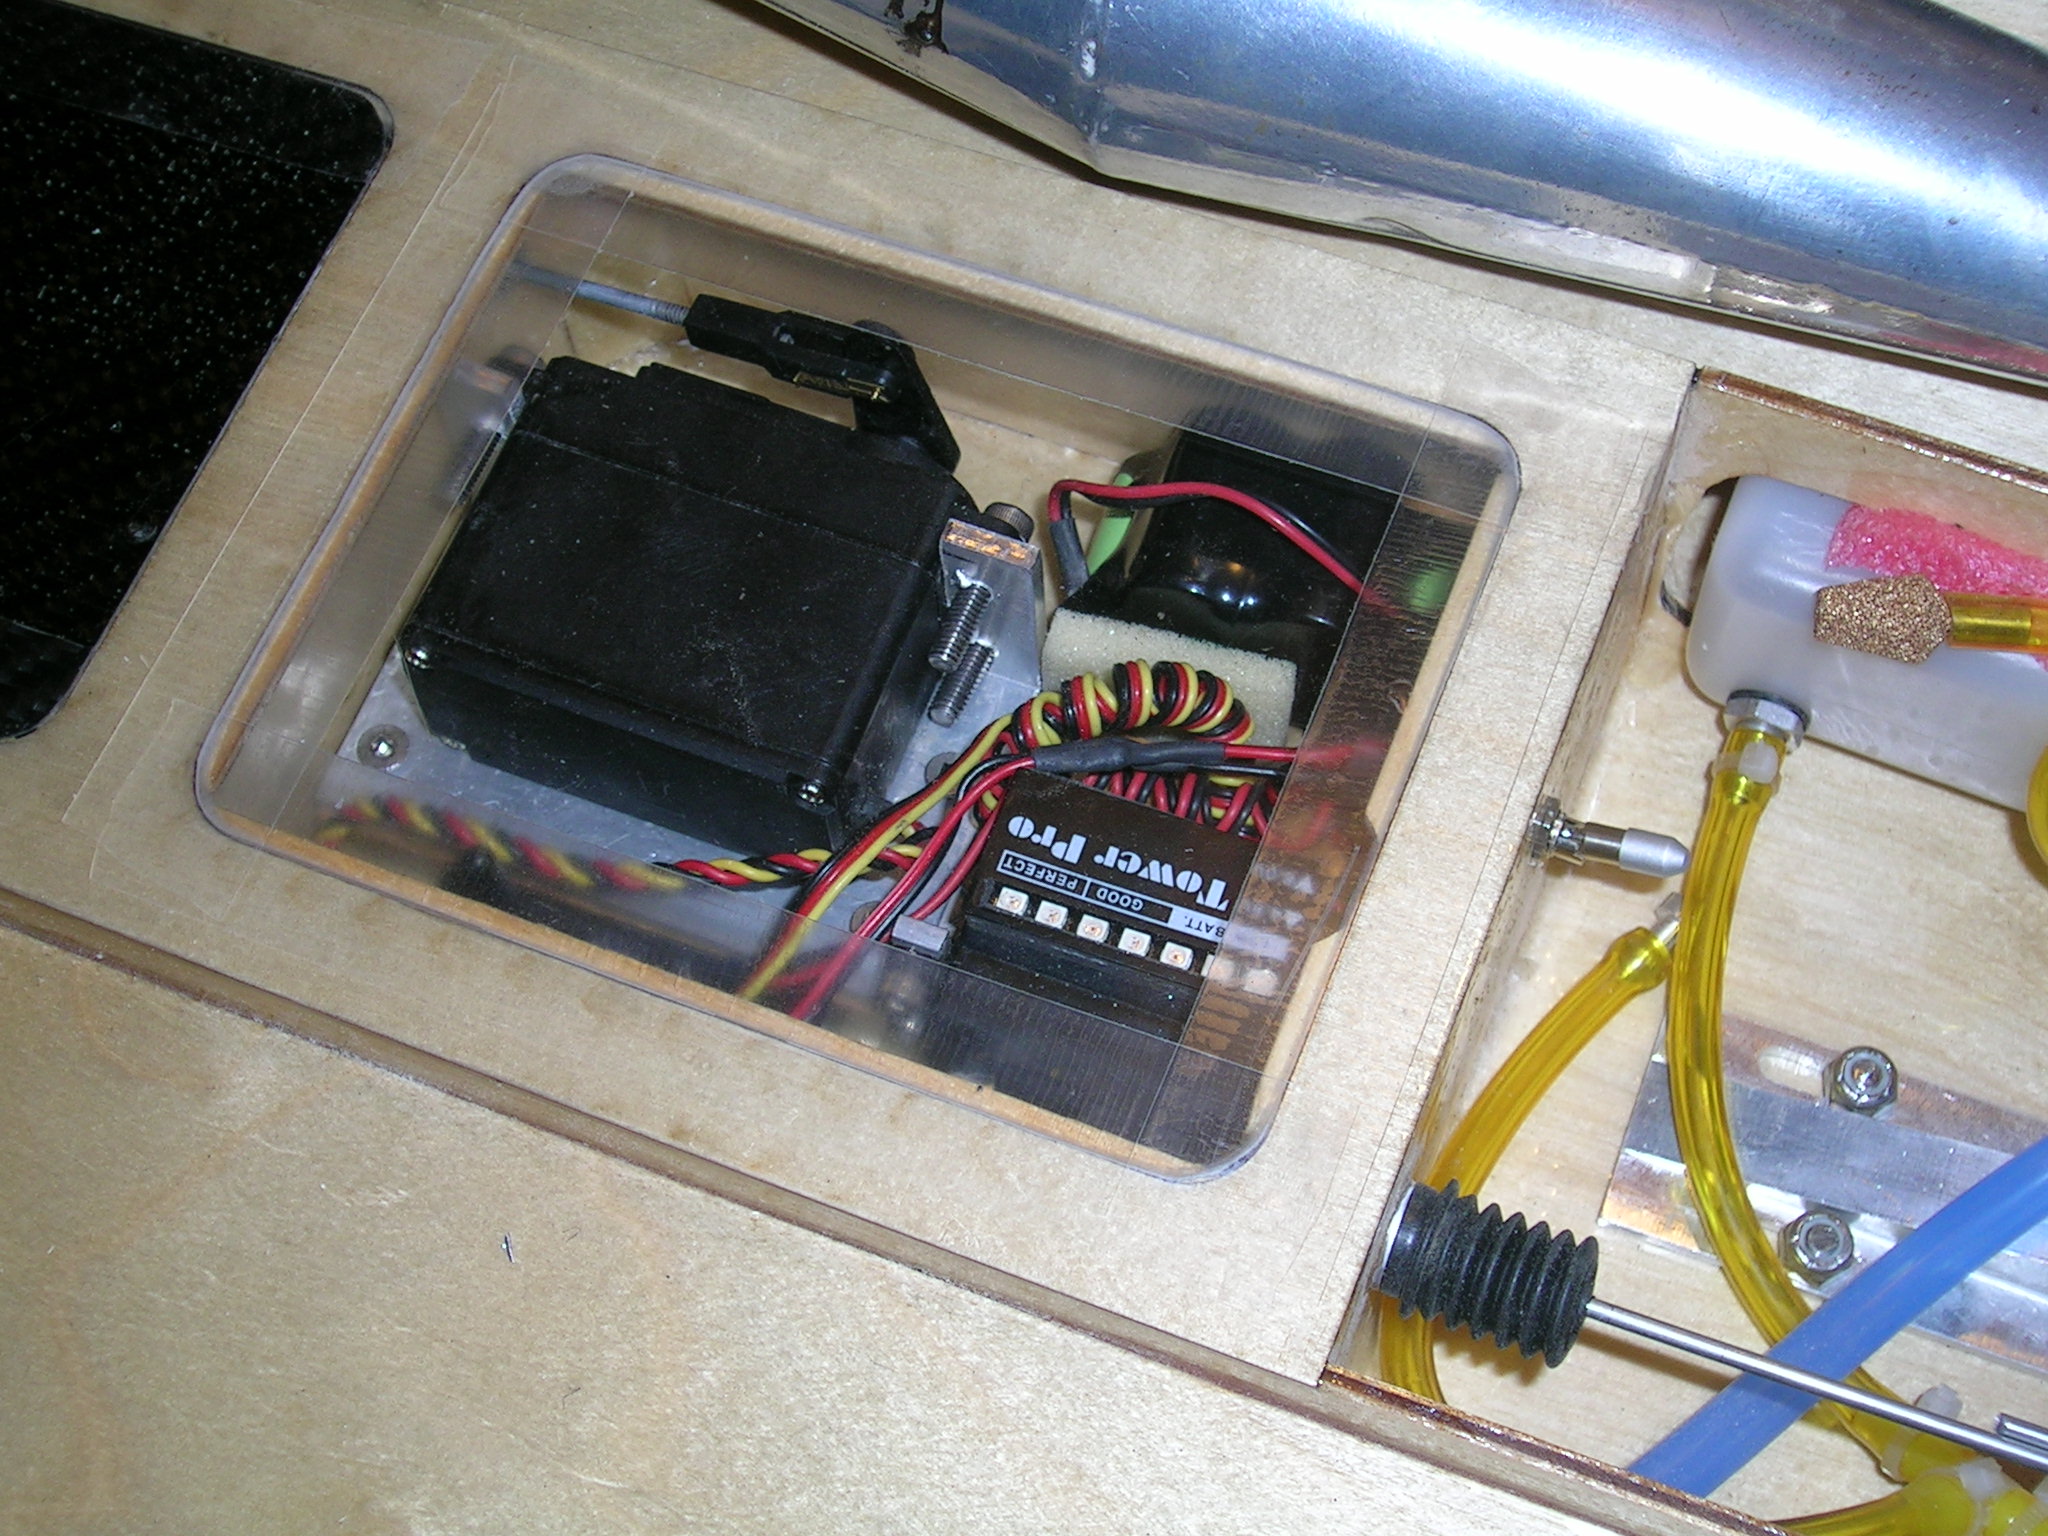
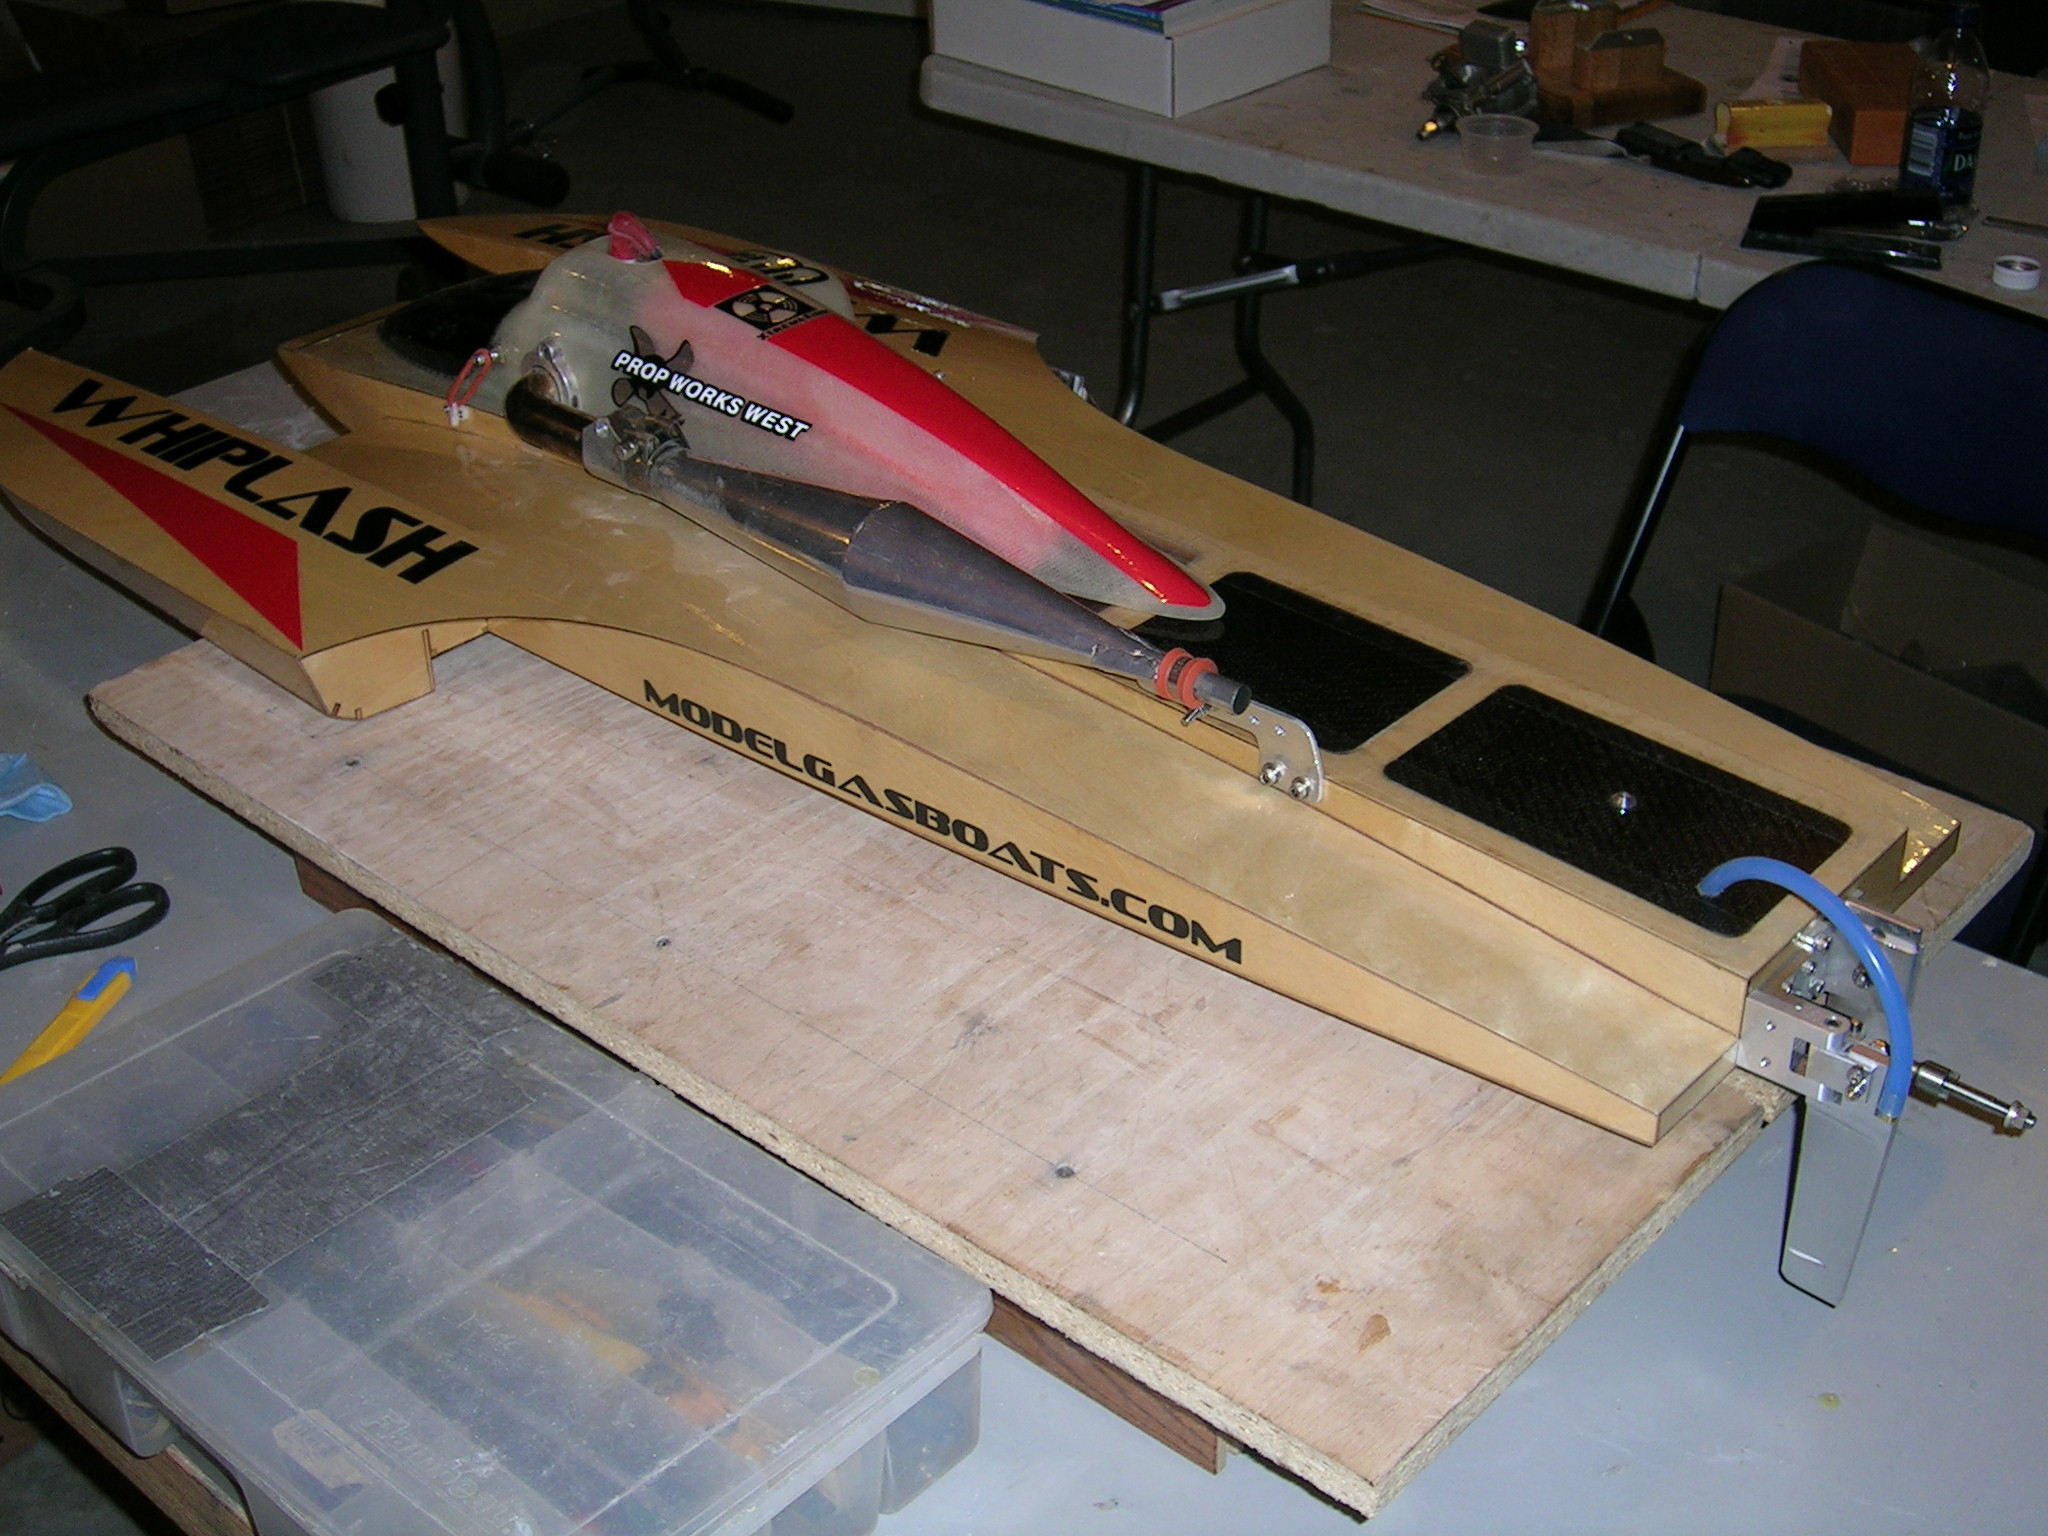
The radio box is built into the Whiplash so make sure this area is sealed properly with epoxy when you build the boat. I used Aeromarine pushrod seals with Redline pushrod seal mounts. To mount the servos, I epoxied and sealed a piece of 1/4" thick oak to the bottom of the radio box compartment and made some aluminum servo mounts that were screwed into the oak piece with stainless steel screws. The radio system I use is 2.4 GHz from Xtremelink, so no external antenna is required. The water line was routed from the rudder into the back compartment cover to the engine, then to the pipe and back out the boat through the same back compartment cover. I made the two back covers from a sheet of carbon fiber. The radio box lid was made from a piece of Lexan so that I can see the electronics without having to open the box. The radio switch is a waterproof self locking switch from Gas RC Products.
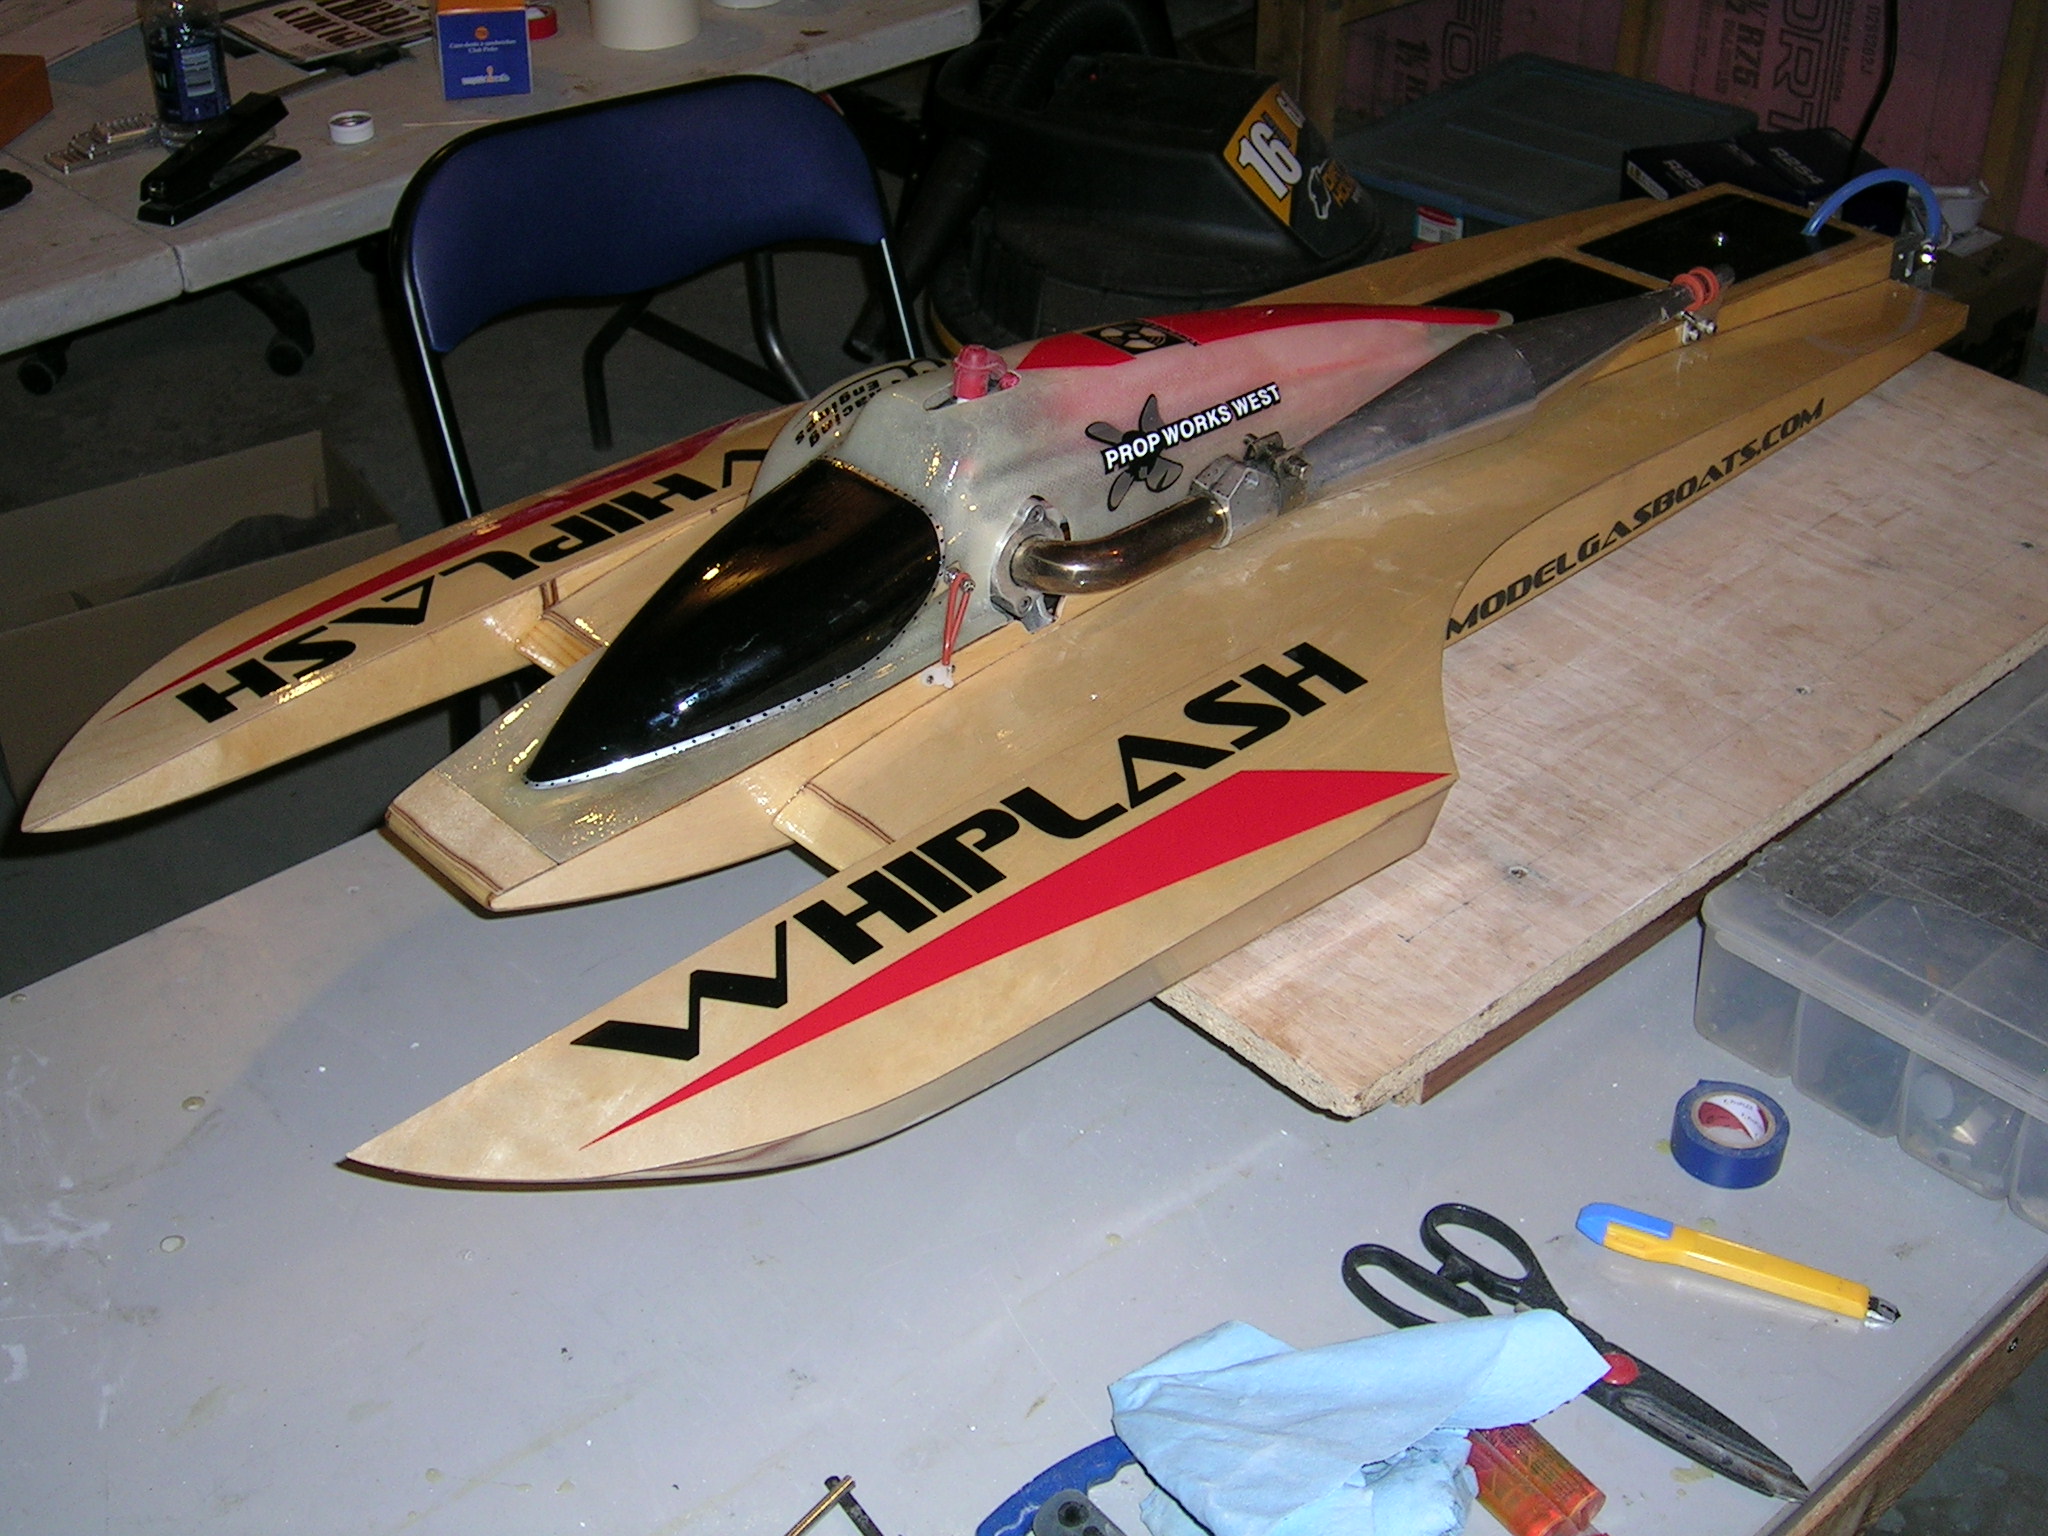
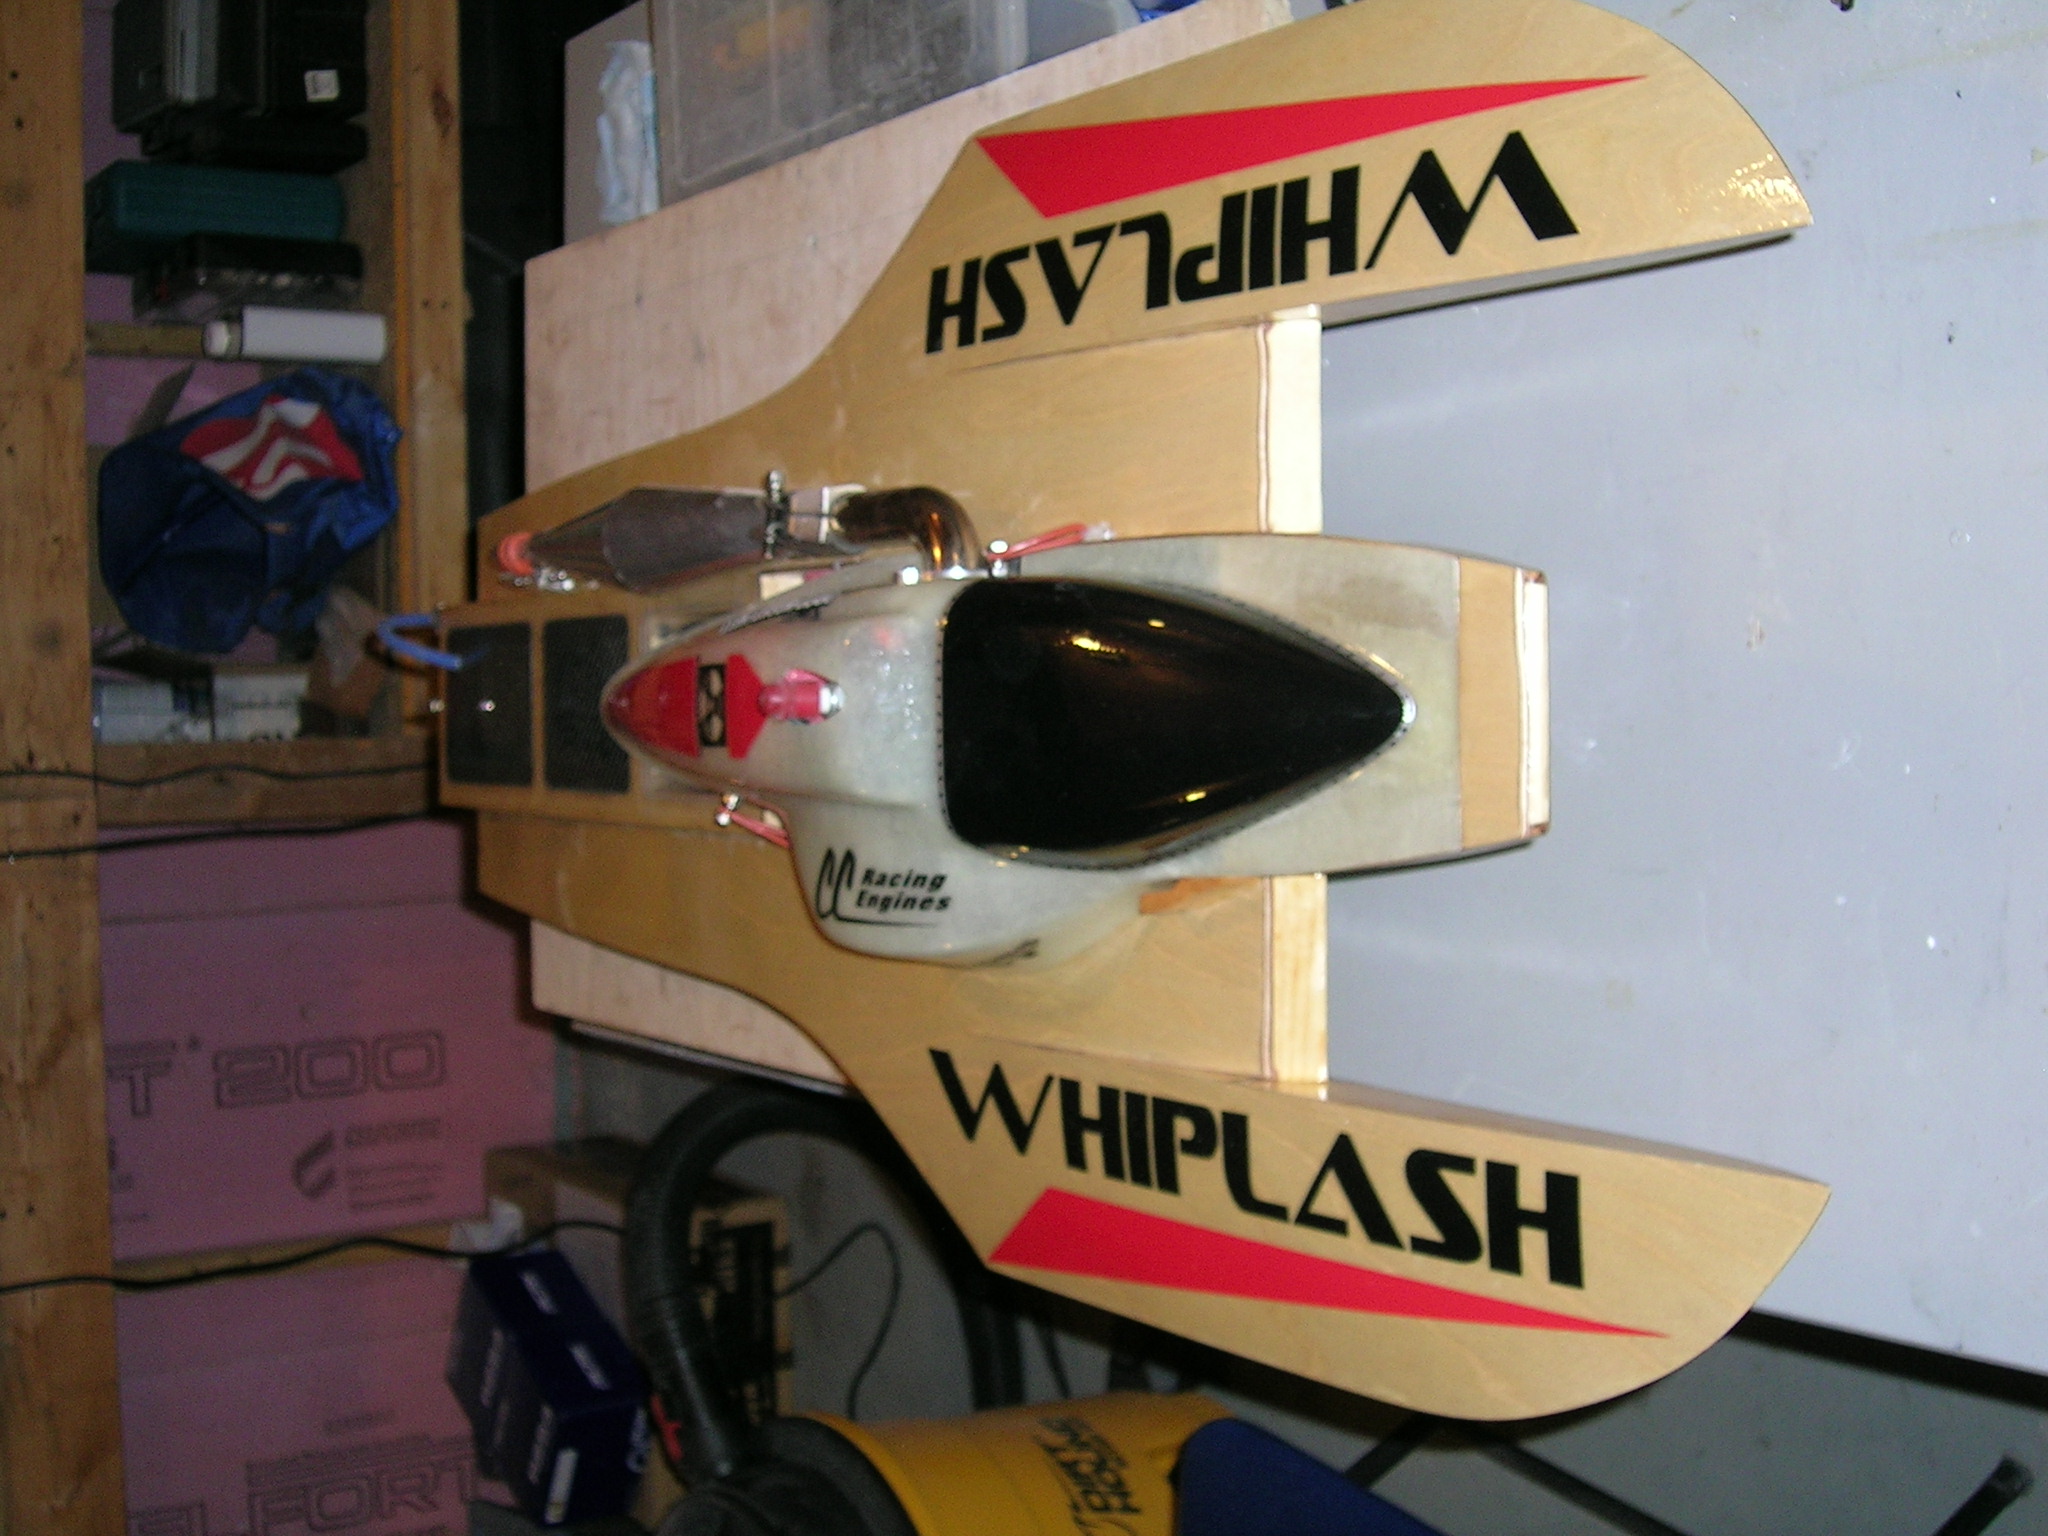
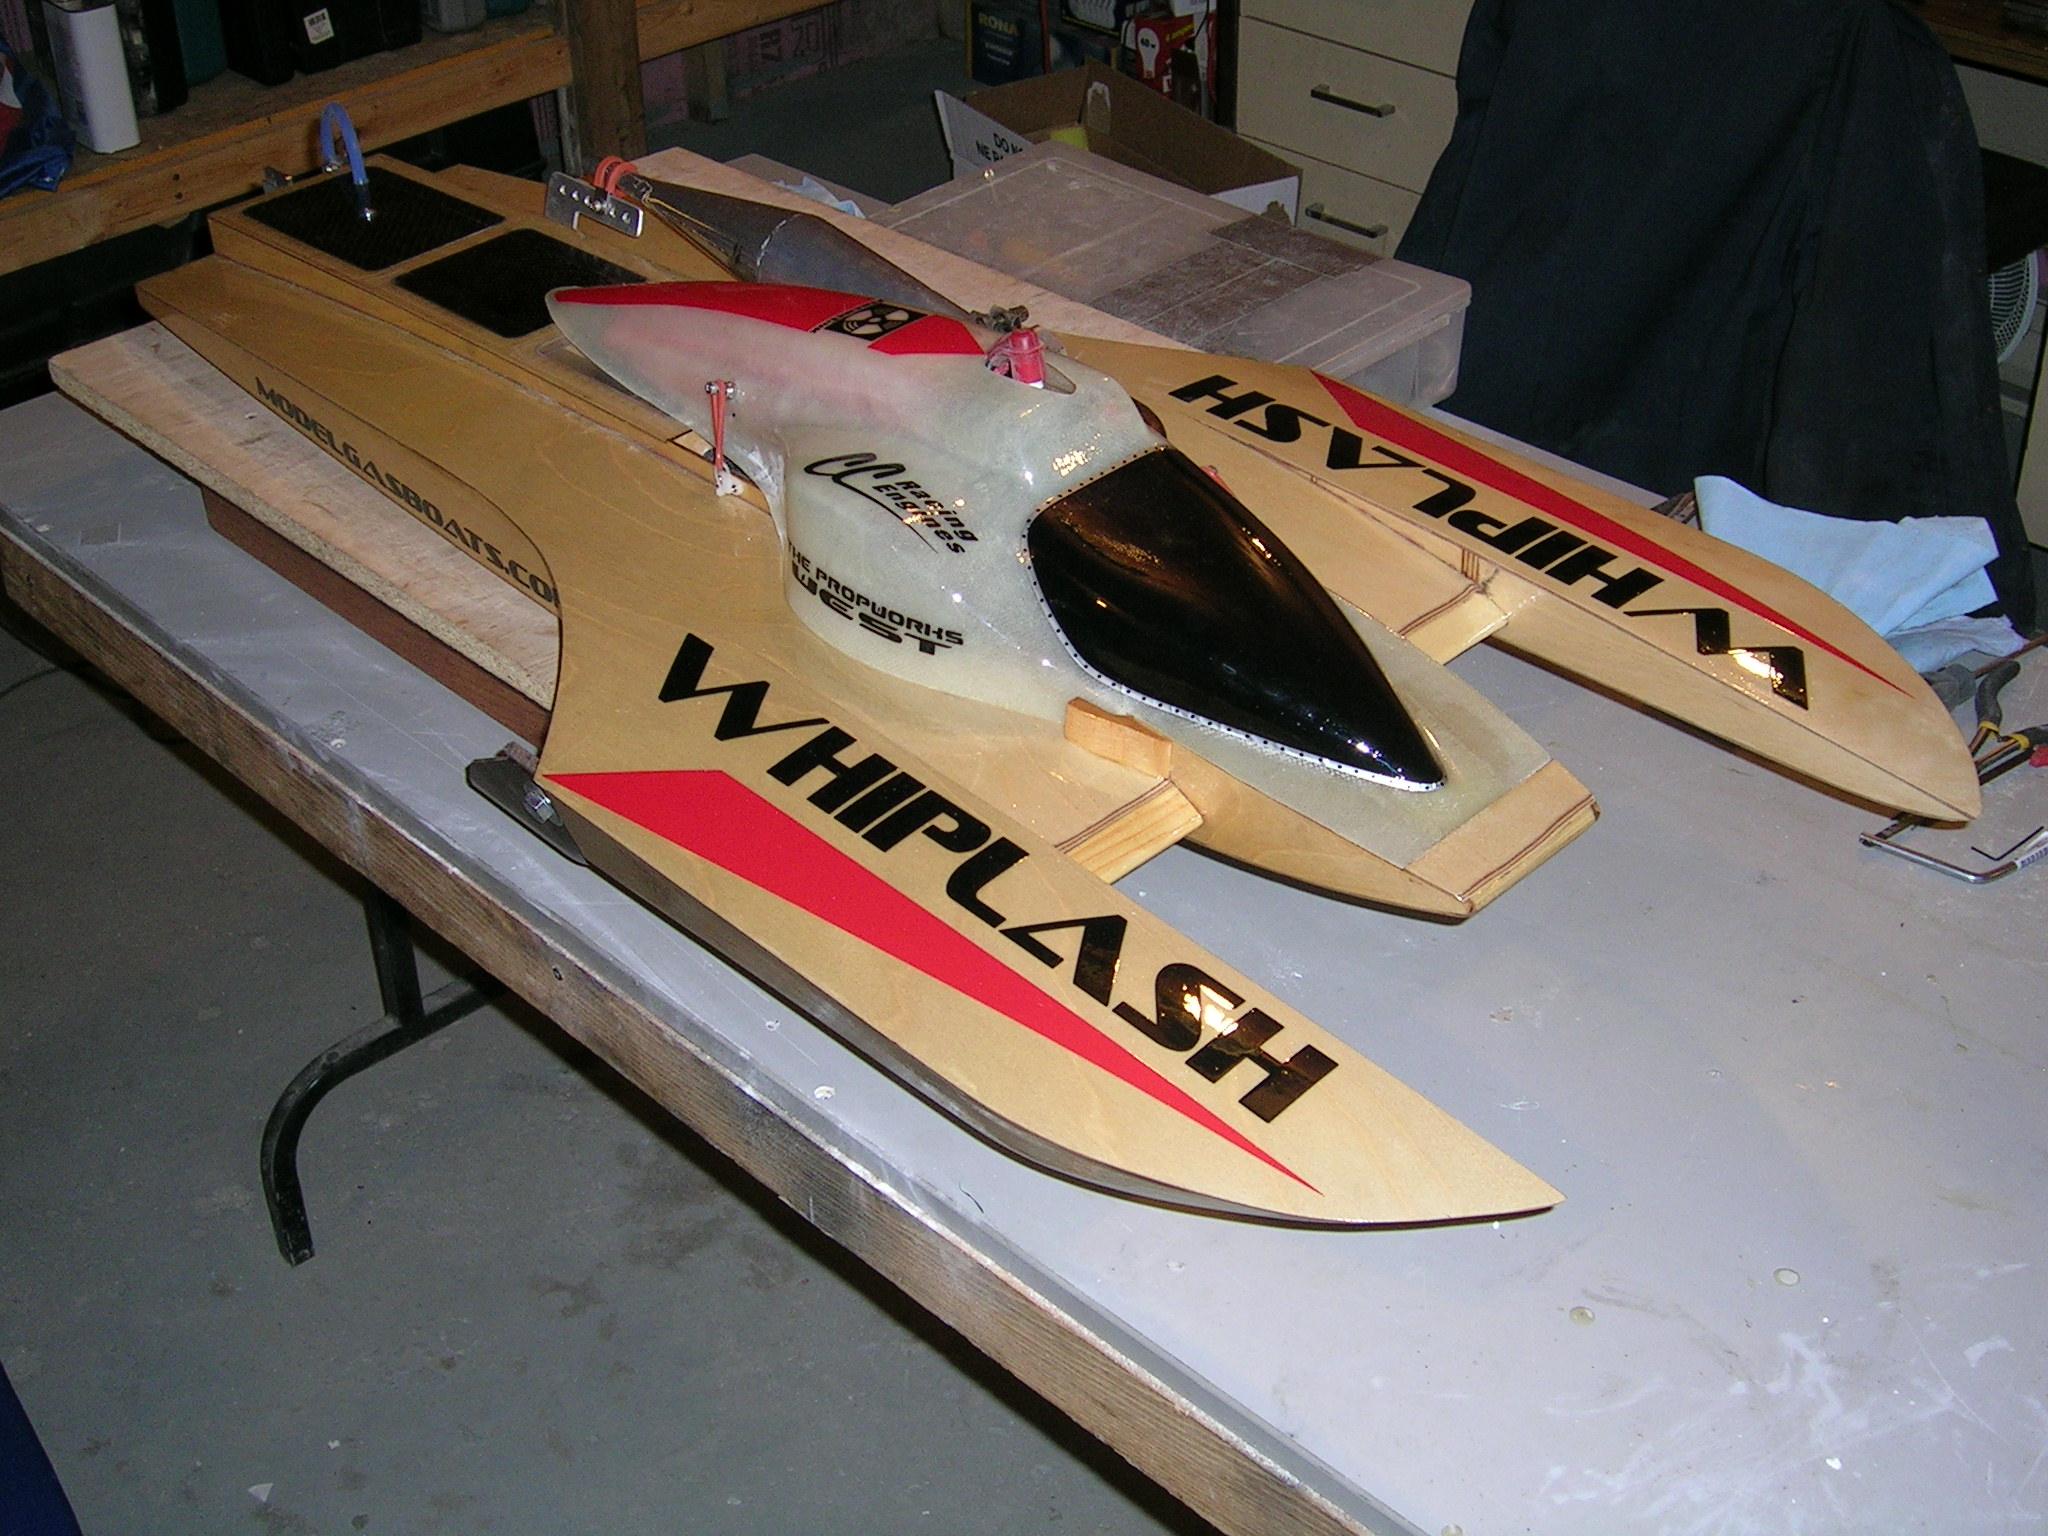
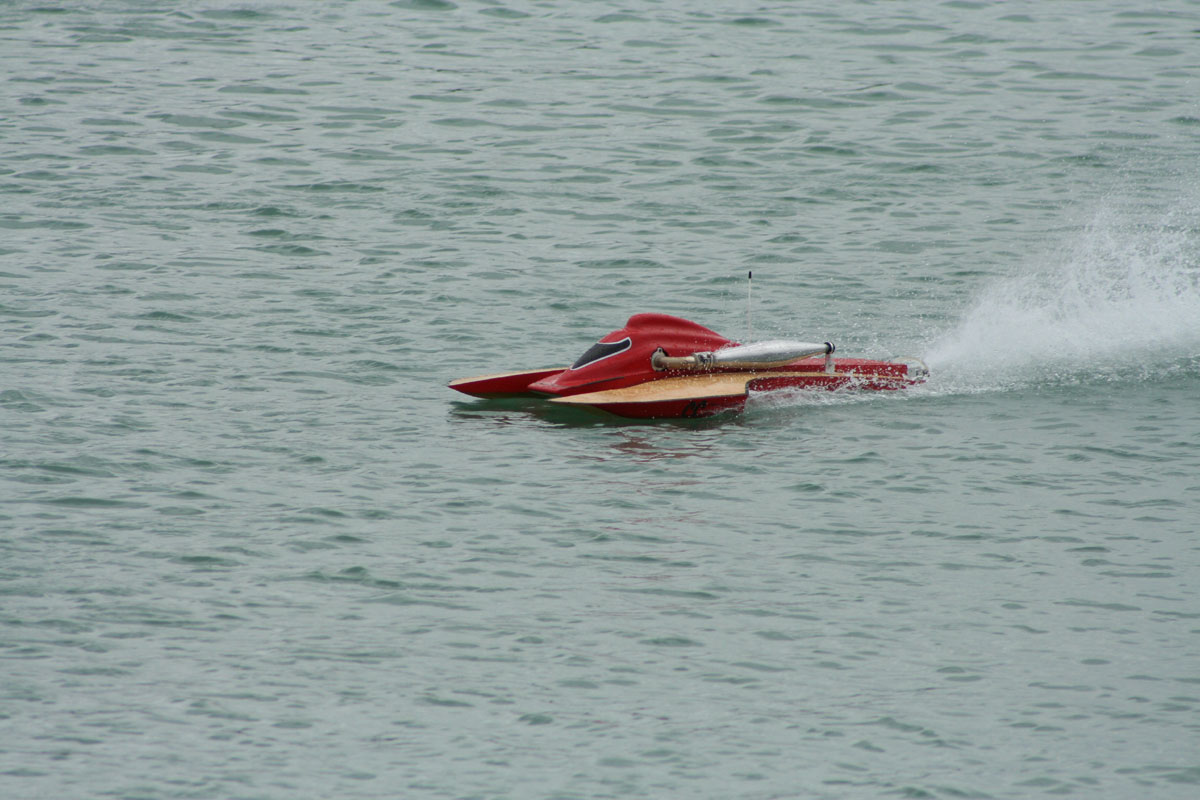
Here are a few pictures of the finished boat. I made some vinyl for the boat and clearcoated over them with West System 105 resin with 207 clearcoat hardener.

Here as some pictures of wood Whiplash boats taken at the 2009 Northern Nats
My Whiplash...


Eric Lis Whiplash wood - 1rst Place LS27 Sport Hydro 2009 Northern Nats


Antron Brown Whiplash wood - 3rd Place LS27 Sport Hydro 2009 Northern Nats


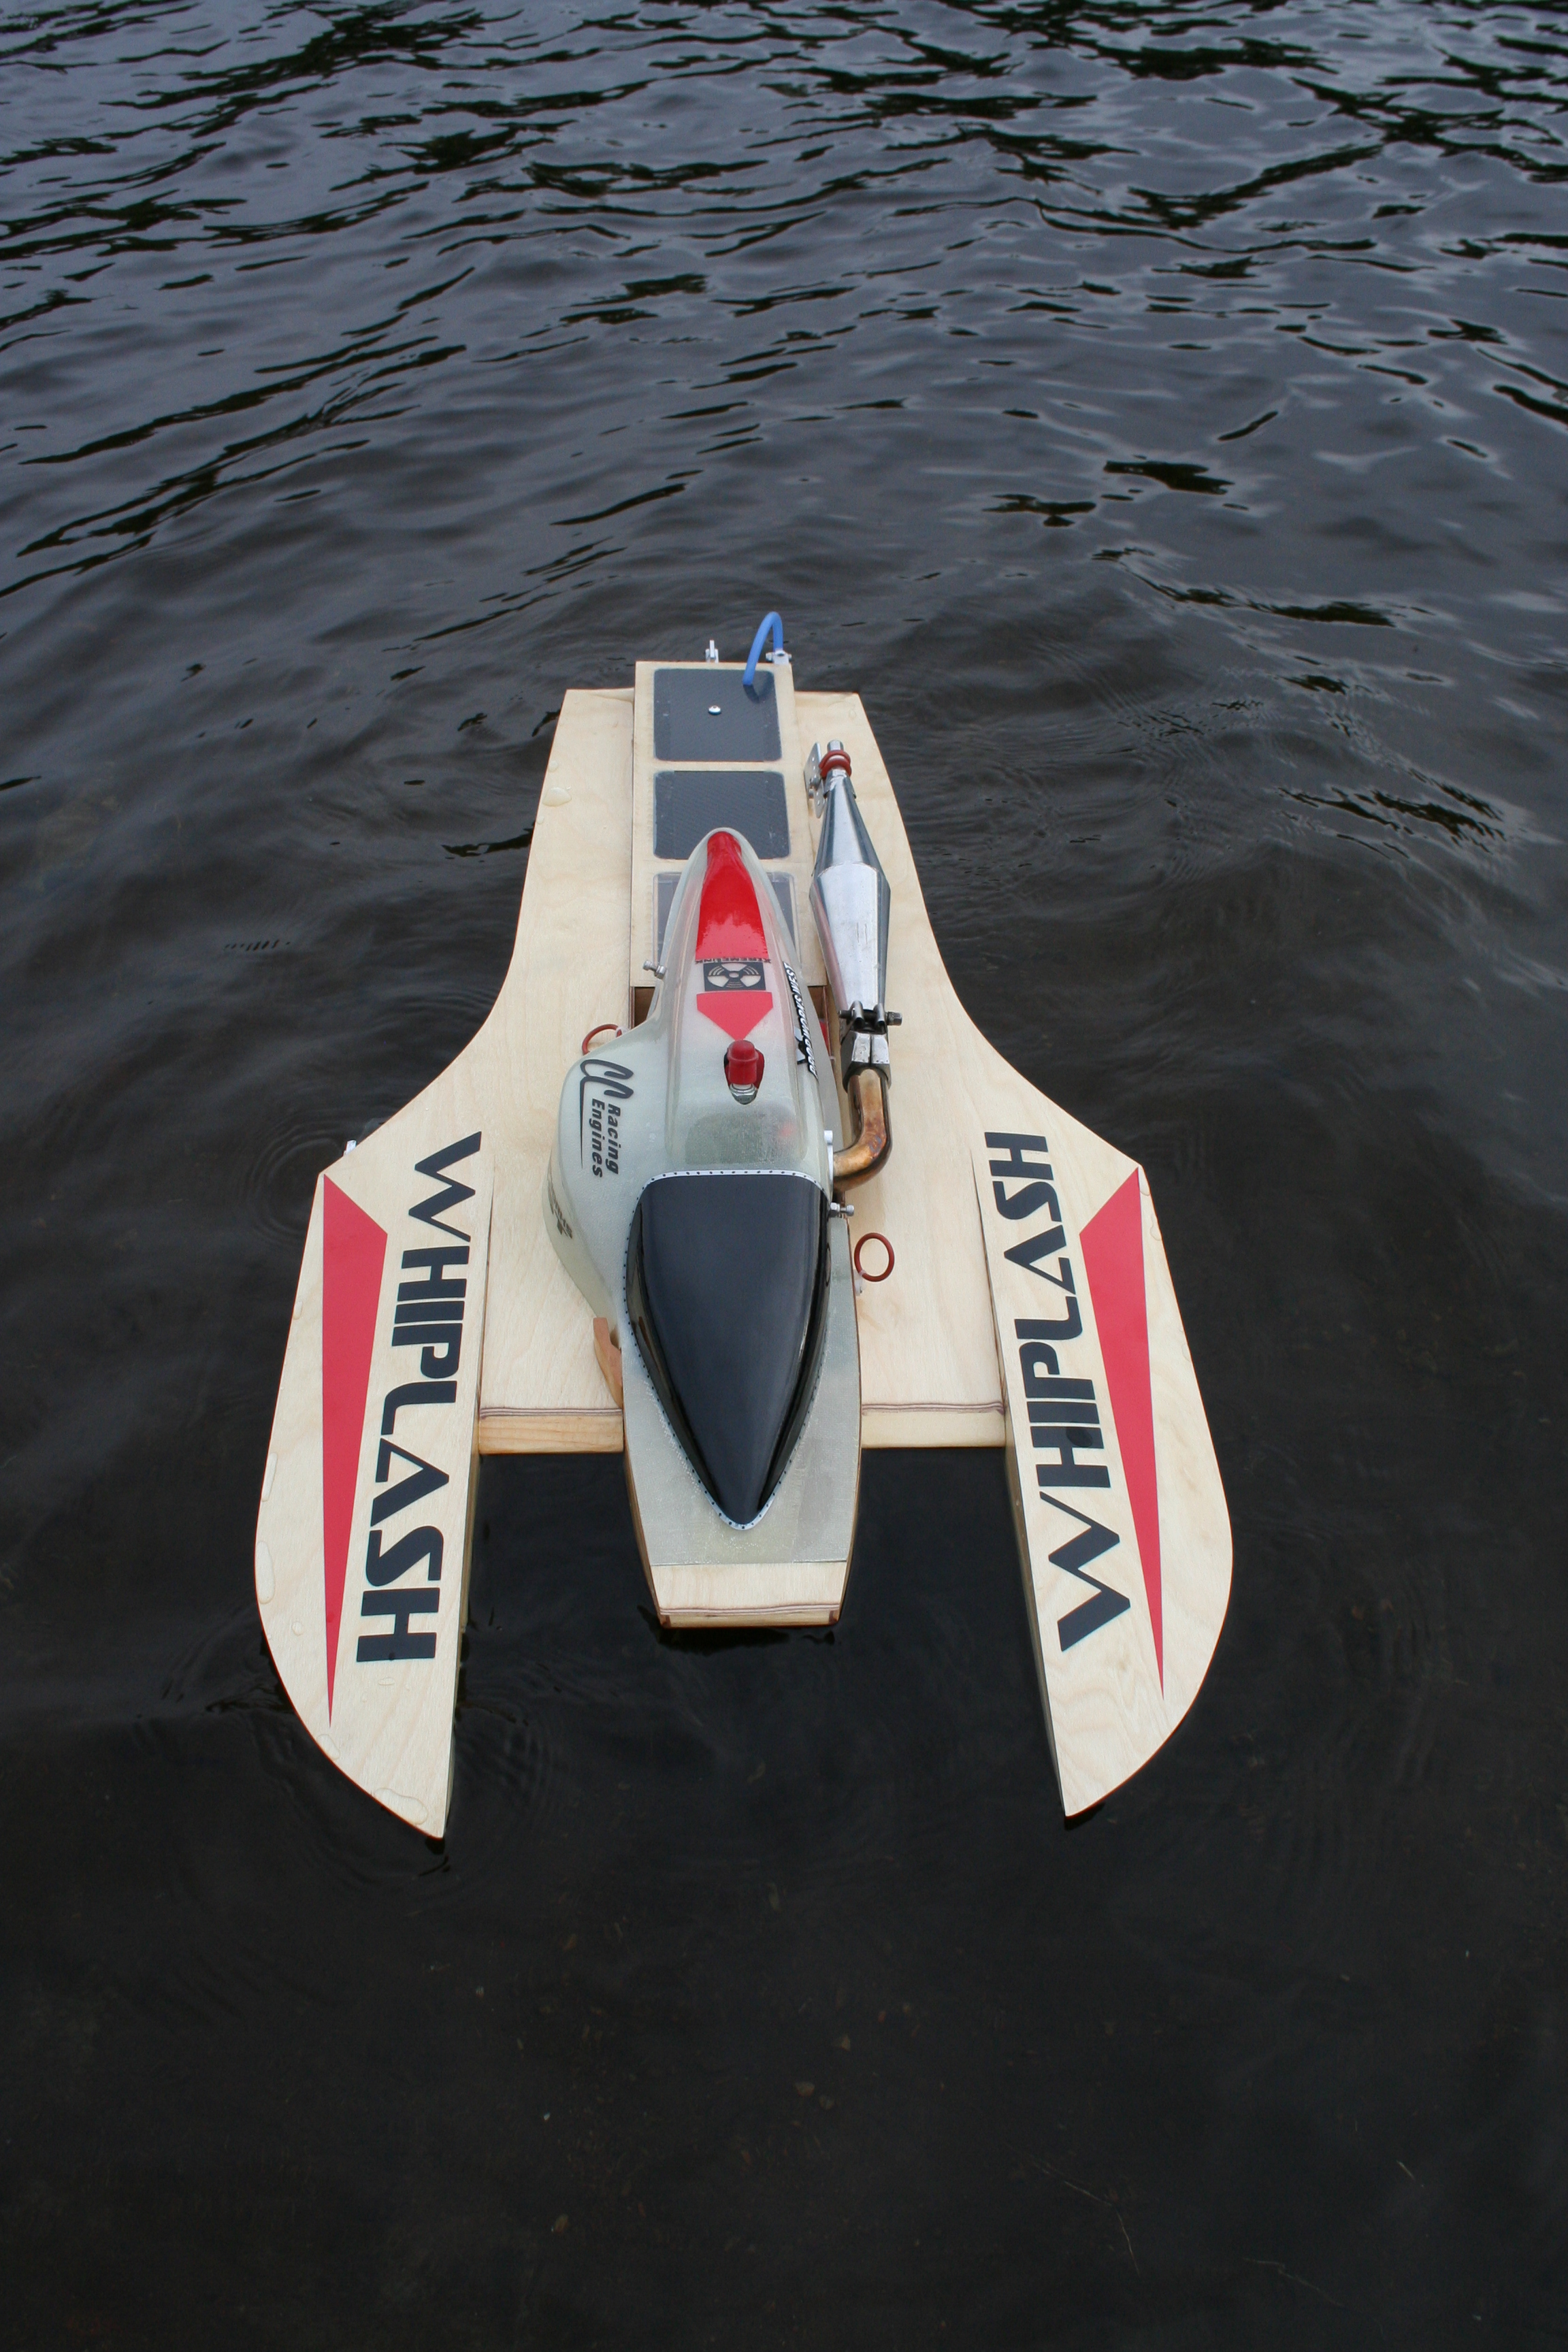
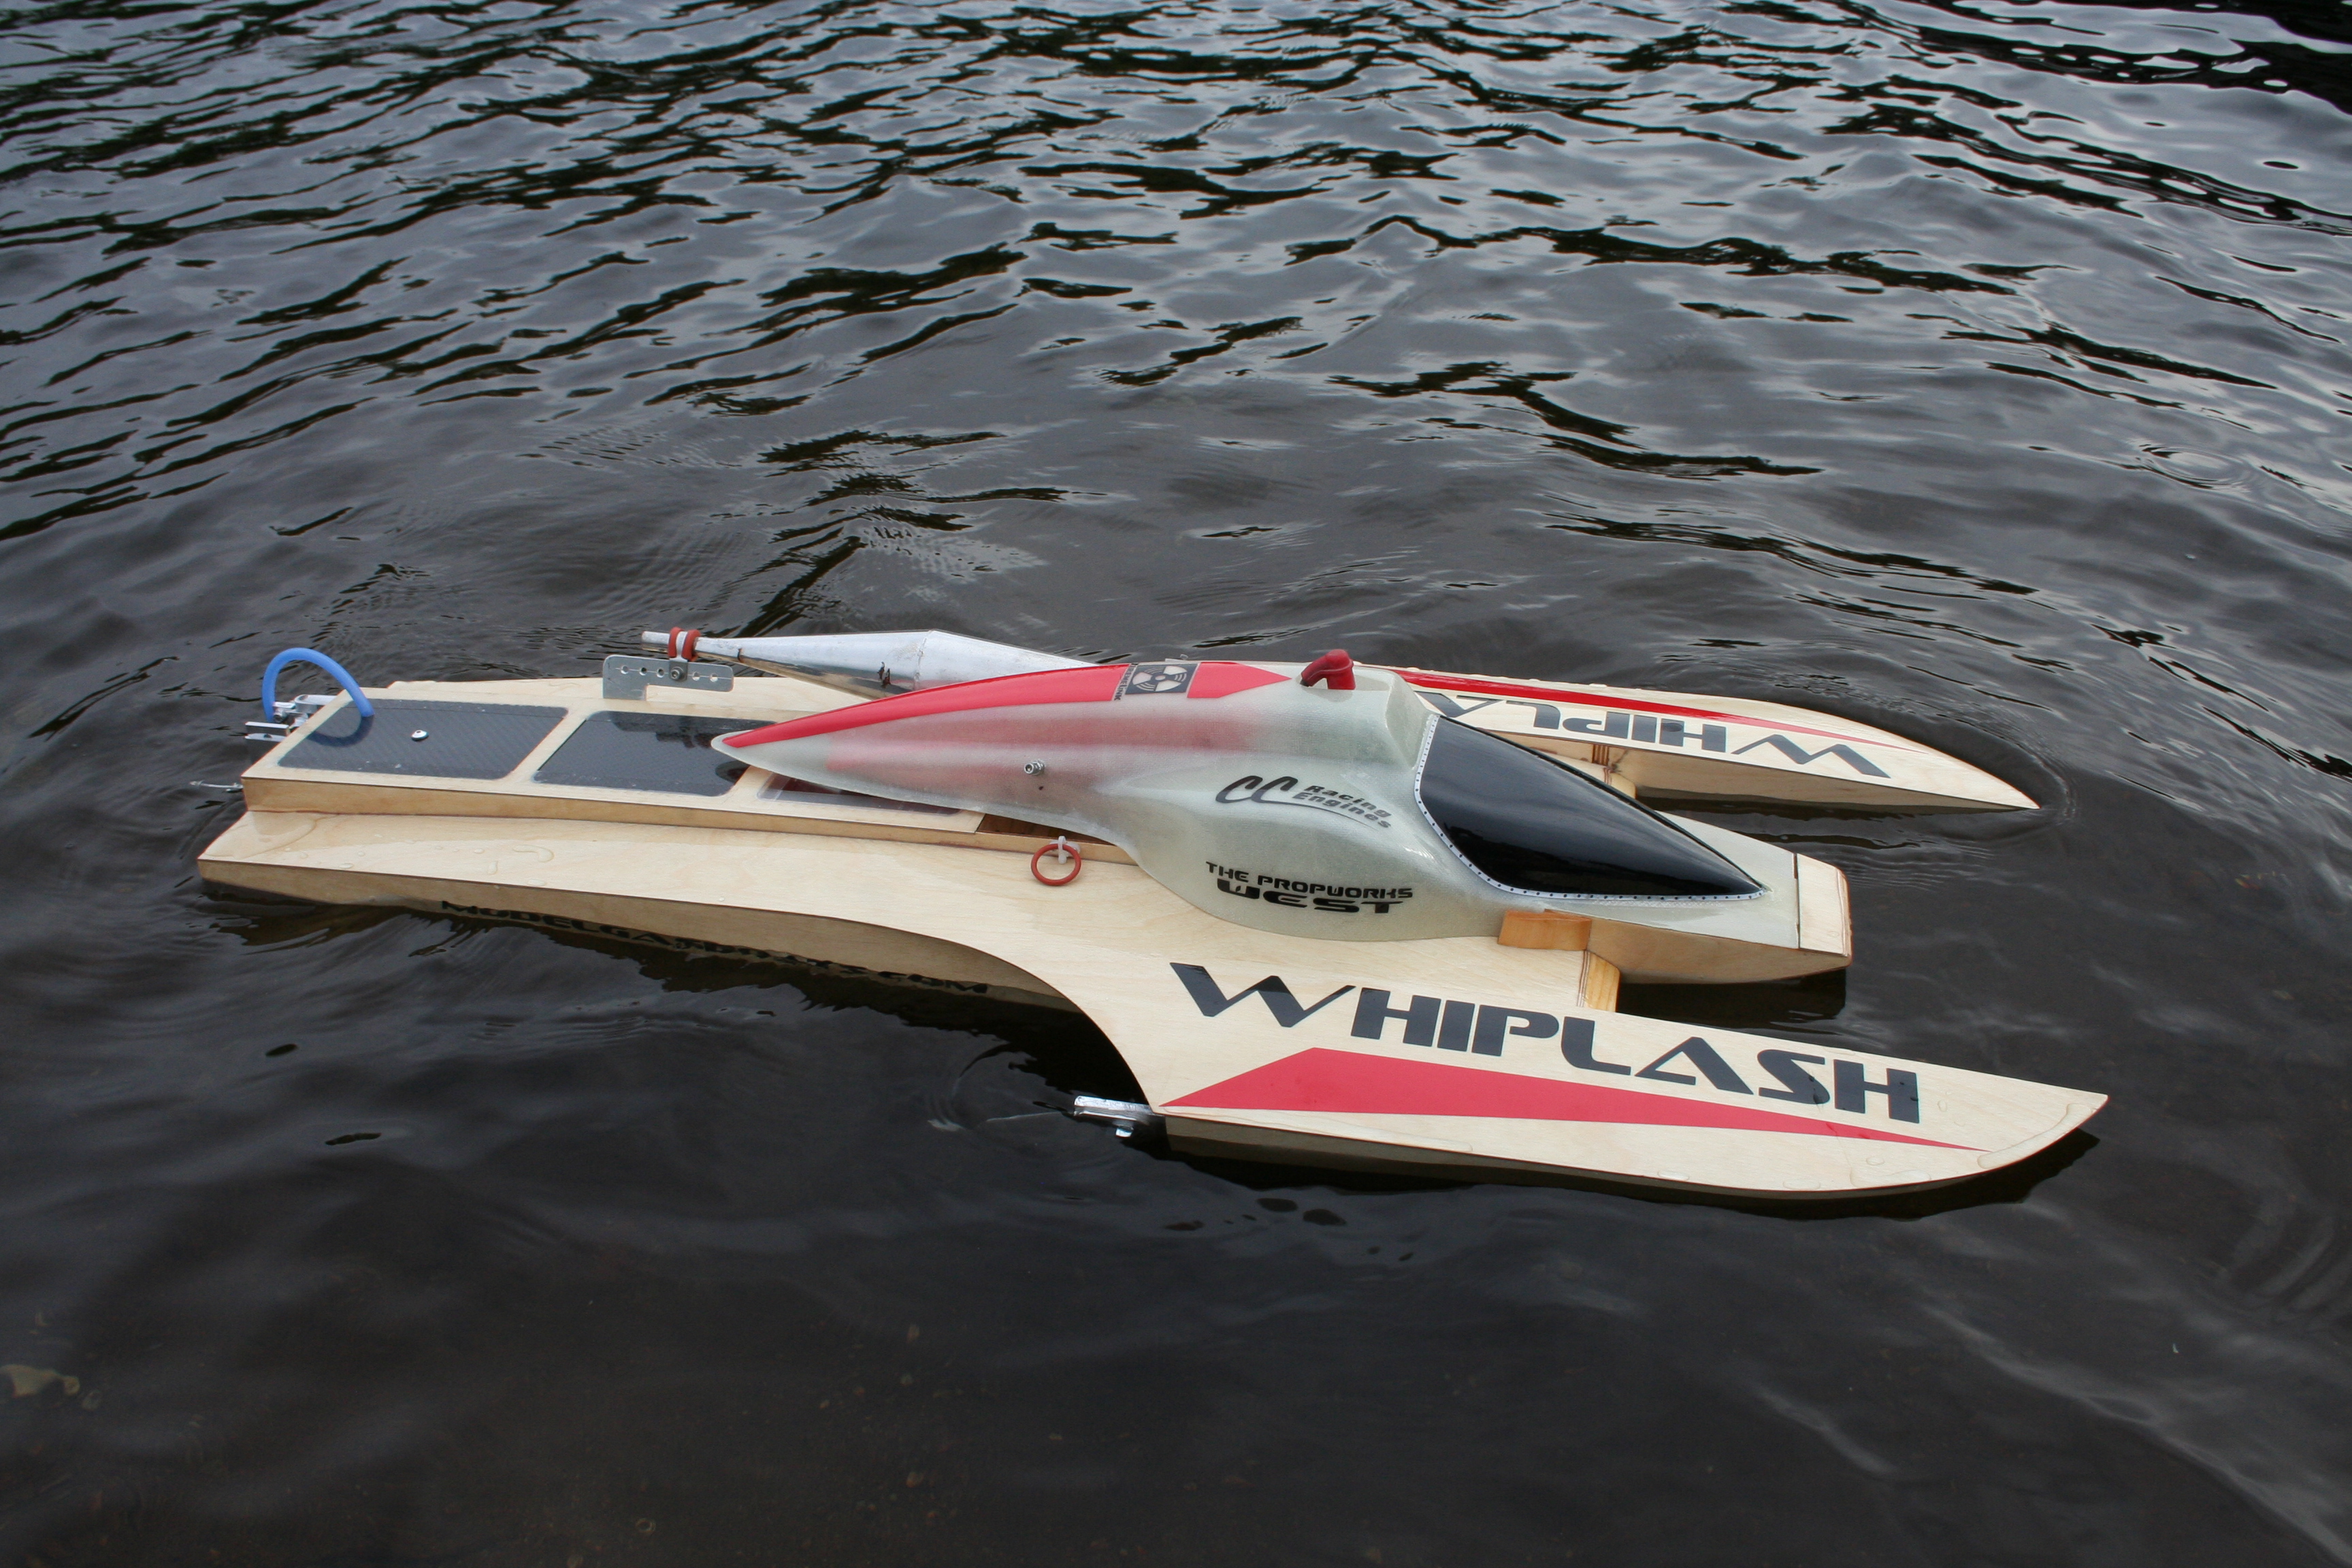
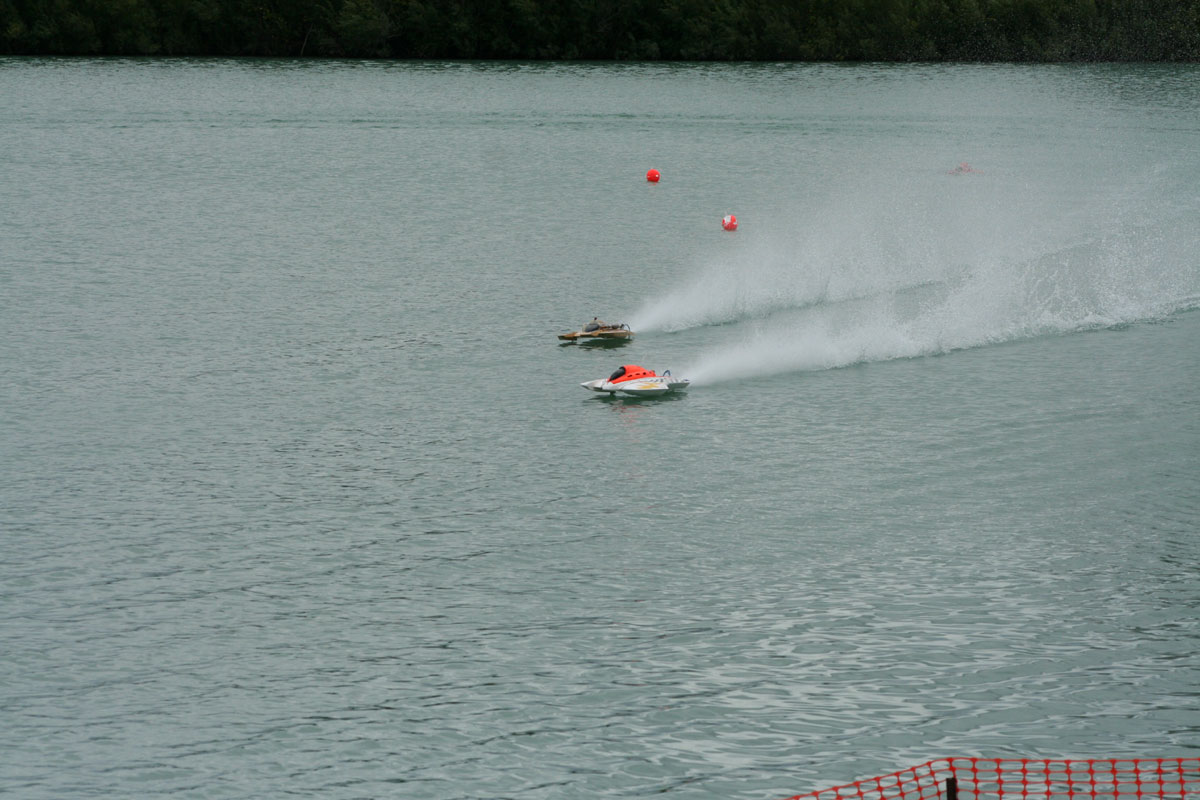
The Whiplash truly is an awesome Sport Hydro. The first thing you will notice when running it is how flat it runs and how fast it corners. My Whiplash actually seems to accelerate through turns. I'm not just talking about the prop slipping and engine RPMs going up, I mean really pick up speed! It feels just like driving a fast outrigger. The turns is where many of the races are won, and if you can pilot your Whiplash well around the buoys you can really take advantage of its cornering speed to win races. Do not think that this means the Whiplash is slow in the straights though, by no means is it anywhere near slow! This really is a great boat and if built and setup correctly you will love it!
Although there are new instructions available, I still think the level of difficulty of the build is a bit high for people building a wood kit boat for the first time. Not to discourage people from trying it, but just suggesting that first time builders should be prepared to spend a few weeks on the build. As noted before, read the instructions carefully, study the diagrams and pictures and above all, take your time and build it correctly, it will pay off in the end.
Boat hardware setup...
Setup was pretty easy. I basically followed the instruction with the exception for tilting the turn fin inwards a bit. You can fine tune this at the pond to get the best setting possible on your Whiplash. The strut is set at between 15/16" to 1" from bottom of the strut to bottom of boat. I run my strut flat, but you can set a little bit of negative (prop end down), no more than 1 degree.
Propwork West (Brent Daily): Racer's Edge propellers ( 6719/3 - 654 ) - another good prop is the ABC 2716/2
Xtreme Power Systems : 2.4 GHZ radio equipment for JR-R1 radio
Happy Boating!
Contact / Purchase Information:
Blazer Marine
Cincinnati, OH USA
Tel: 513-598-1769
Email: This email address is being protected from spambots. You need JavaScript enabled to view it.
Website: www.blazermarine.com
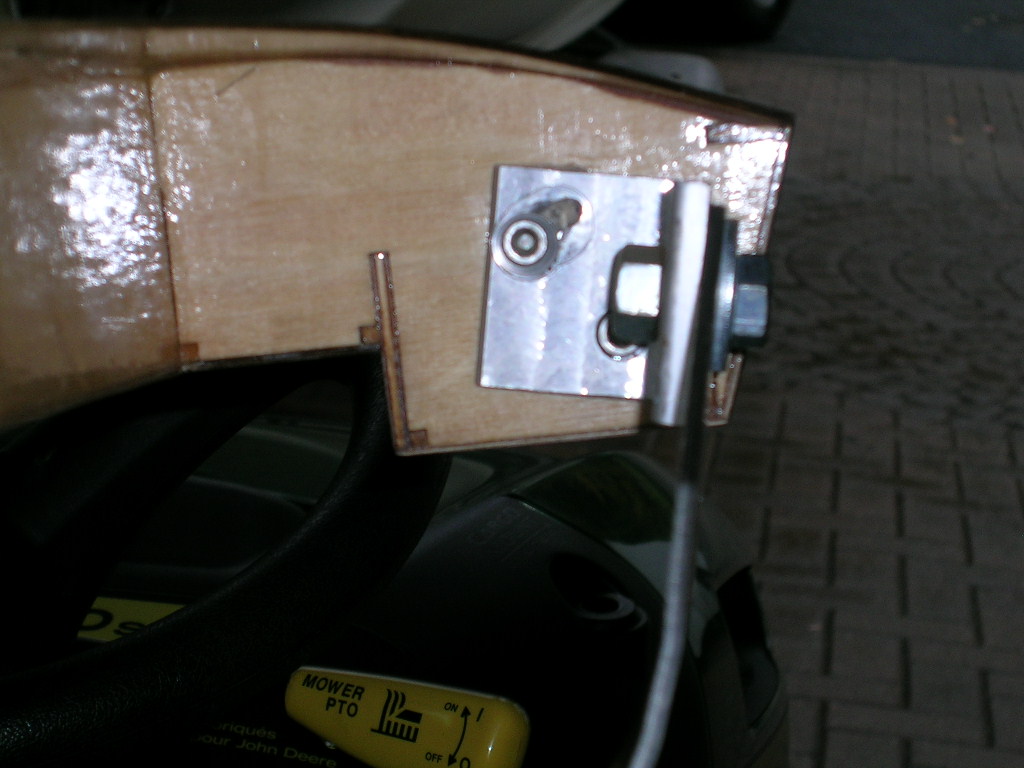
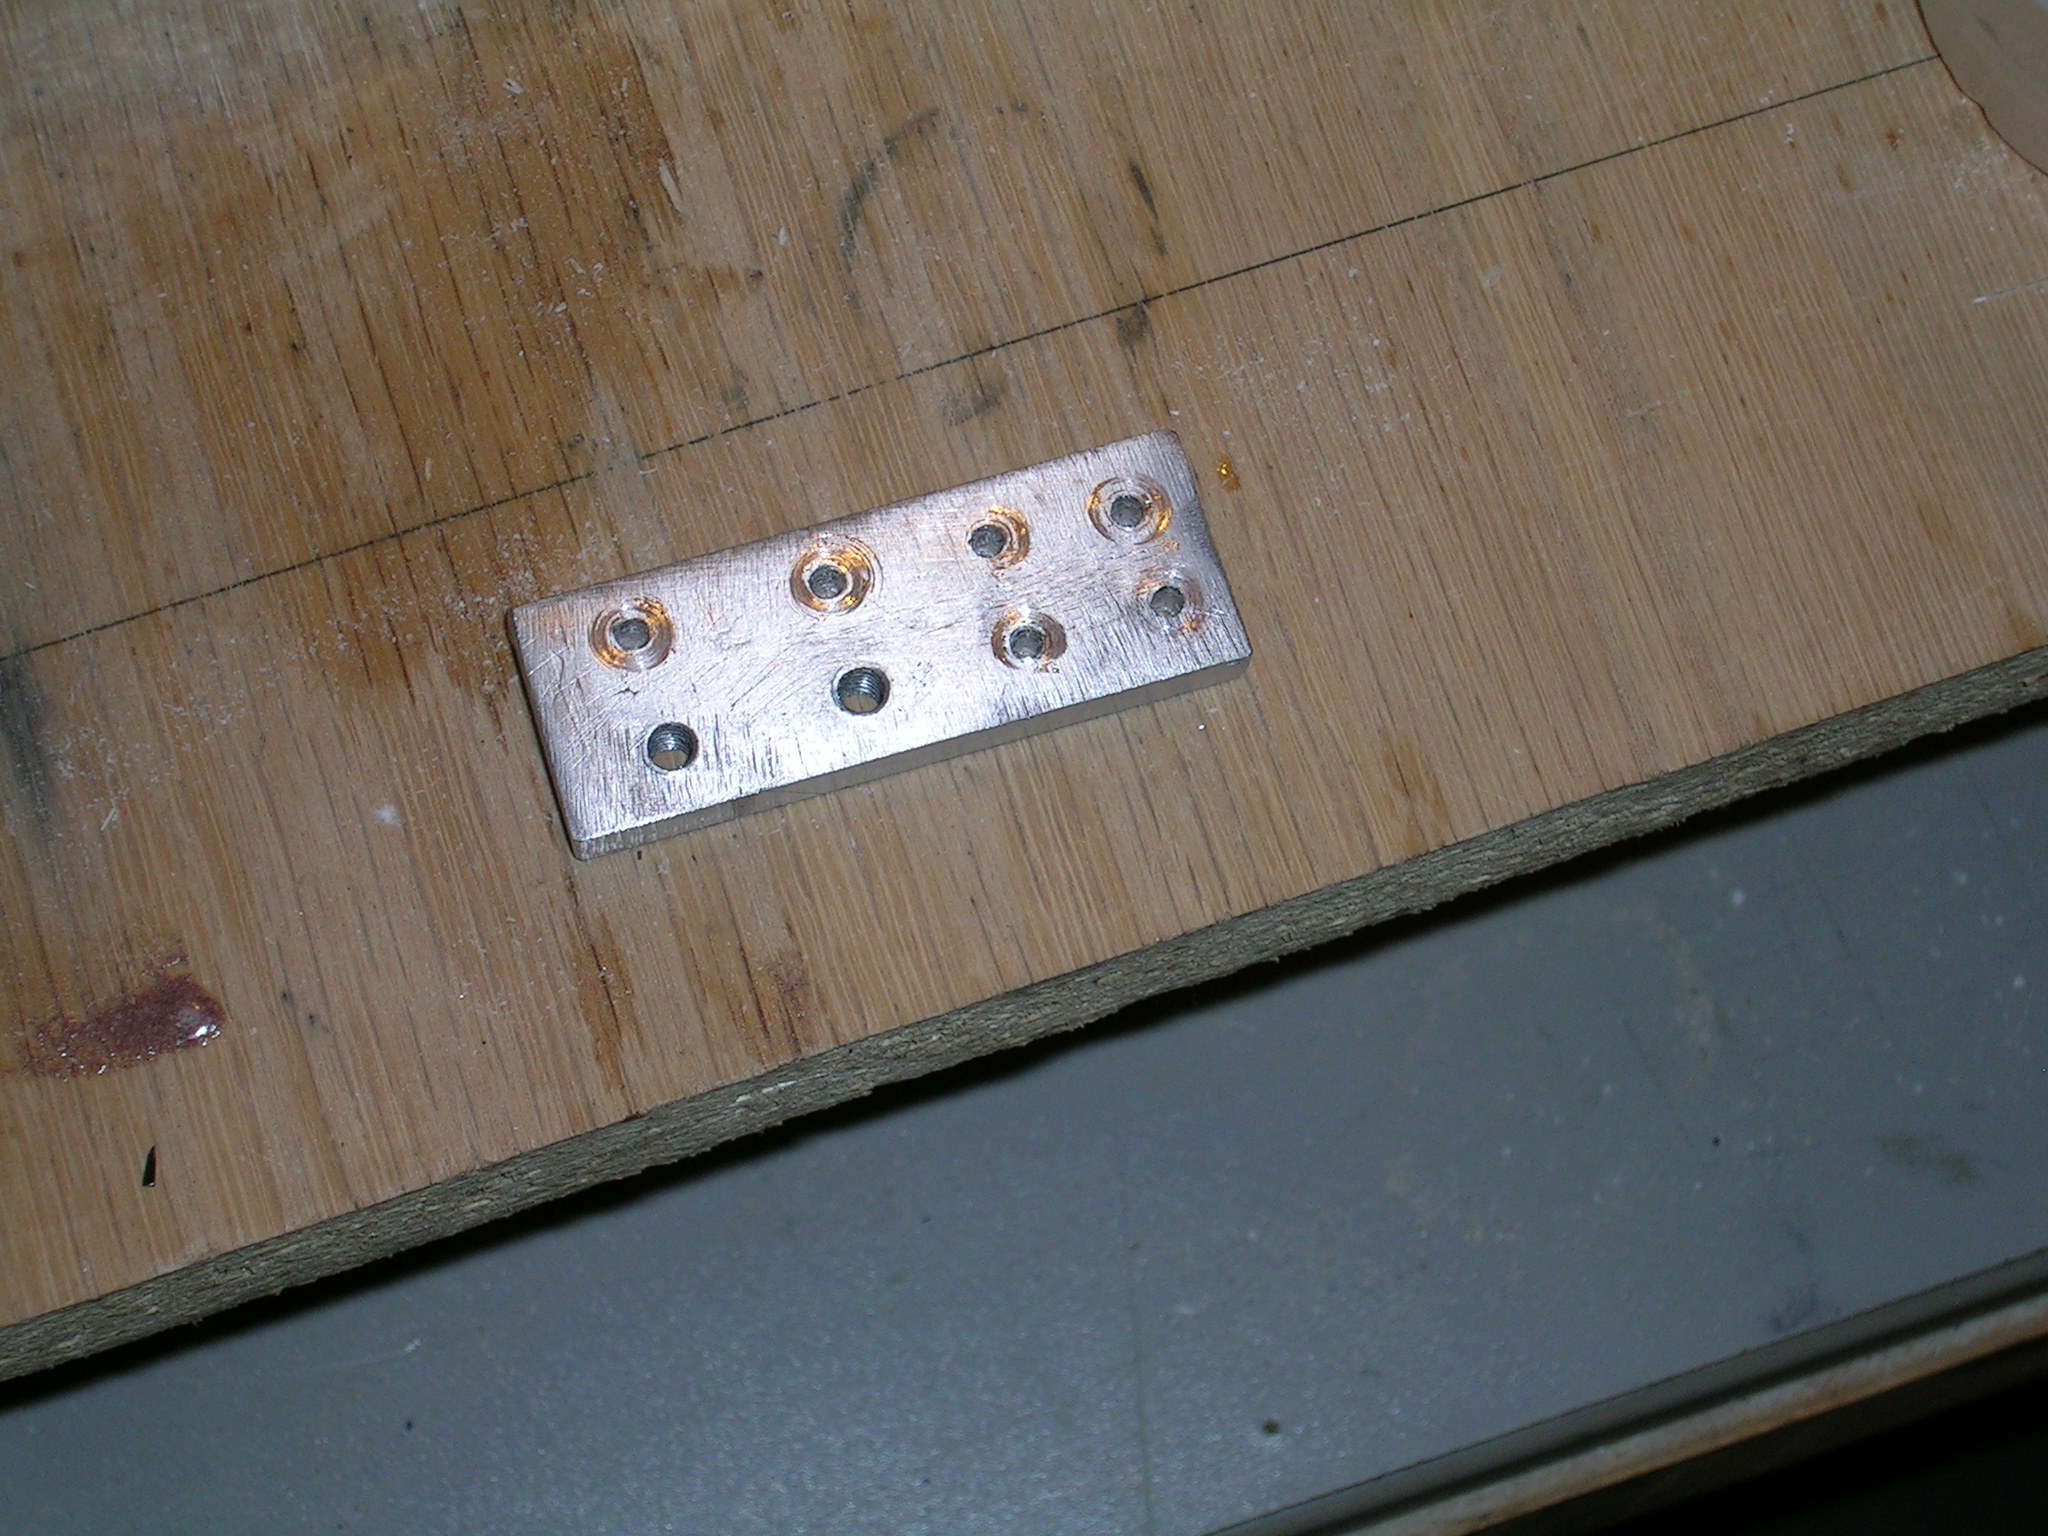
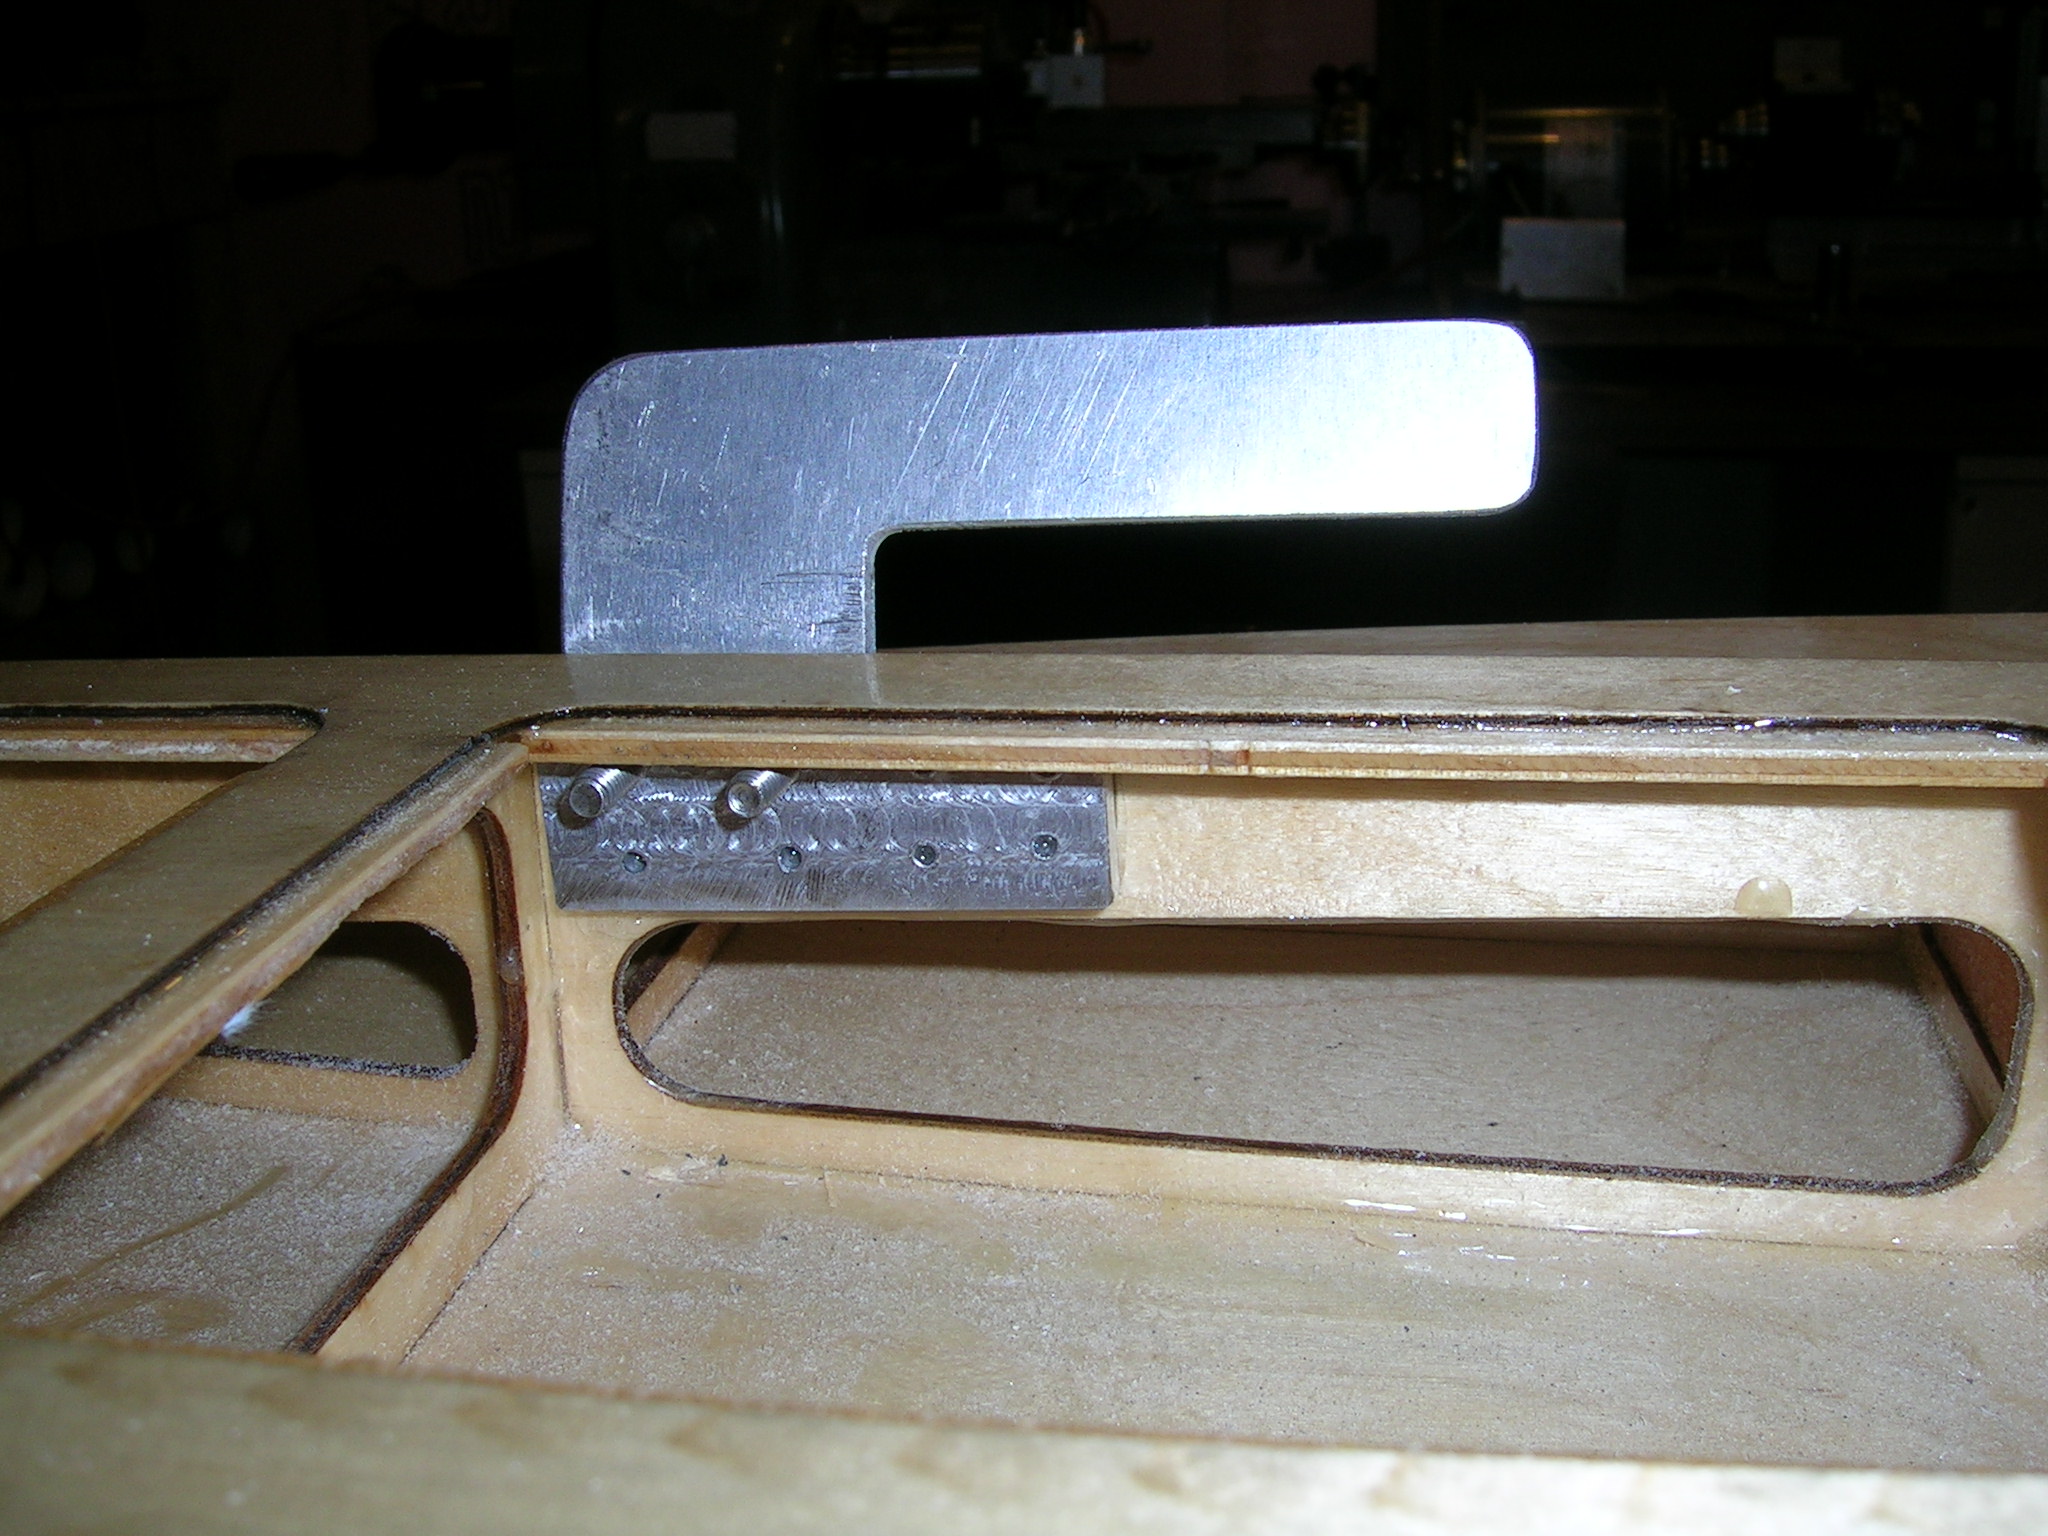
I made my own tuned pipe bracket out of aluminum plate. I made an aluminum backplate for the tuned pipe bracket. This place fits inside the hull and is threaded for the two mounting screws. It is epoxied into the hull. All the small holes and rough finish in the plate are for extra adhesion of the epoxy.
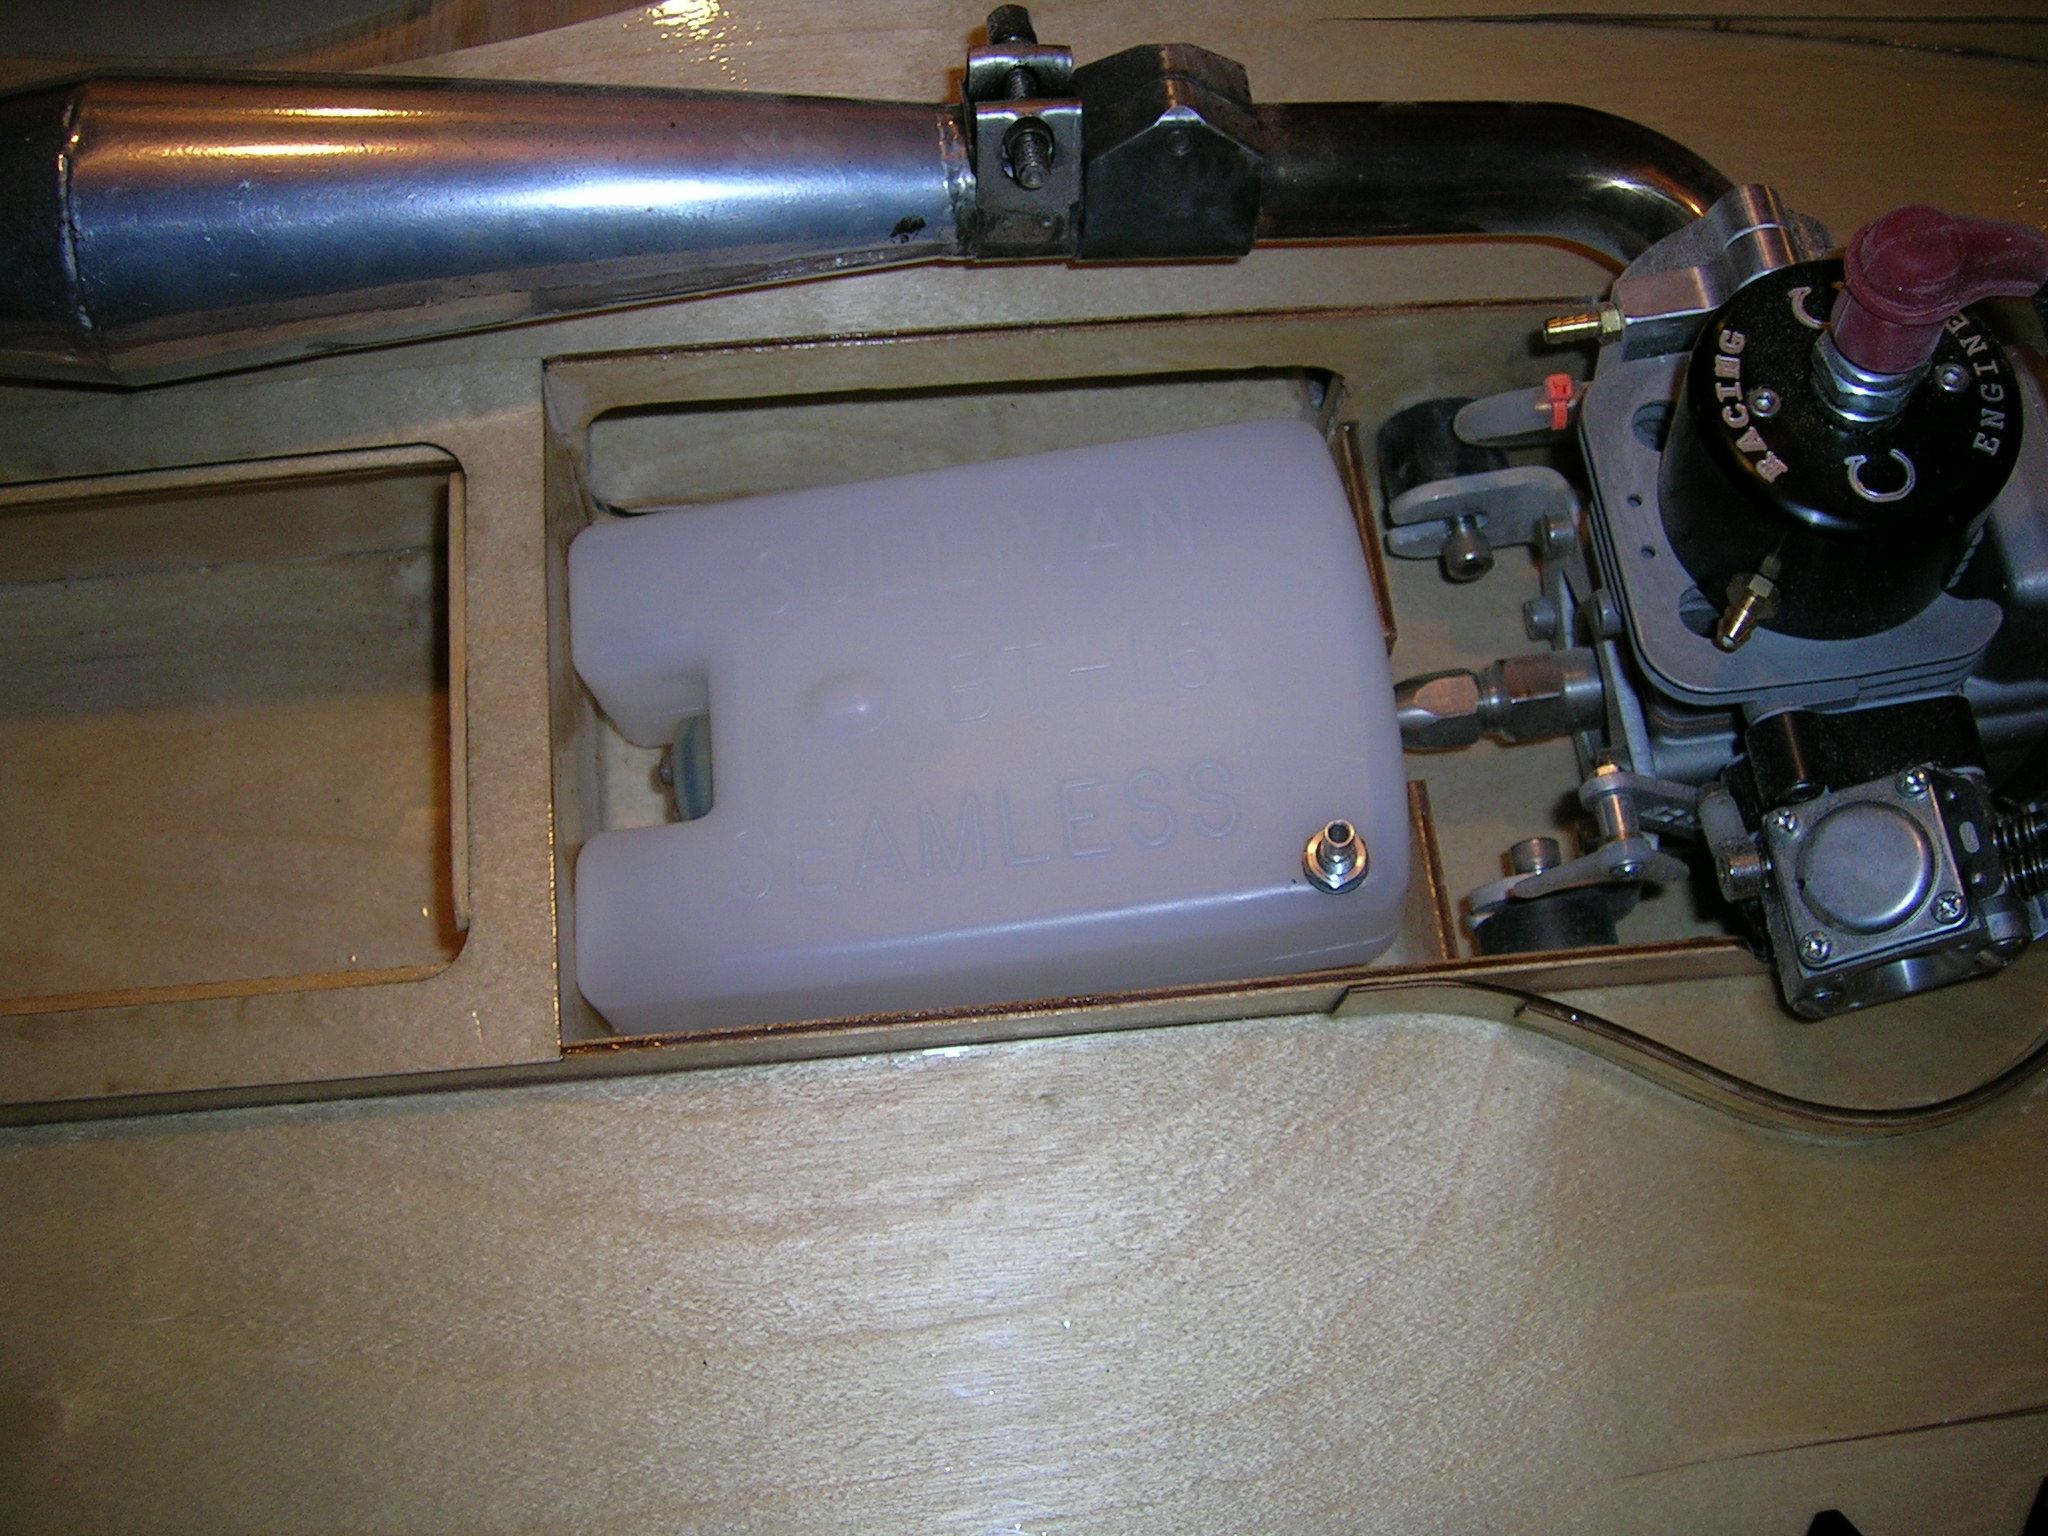
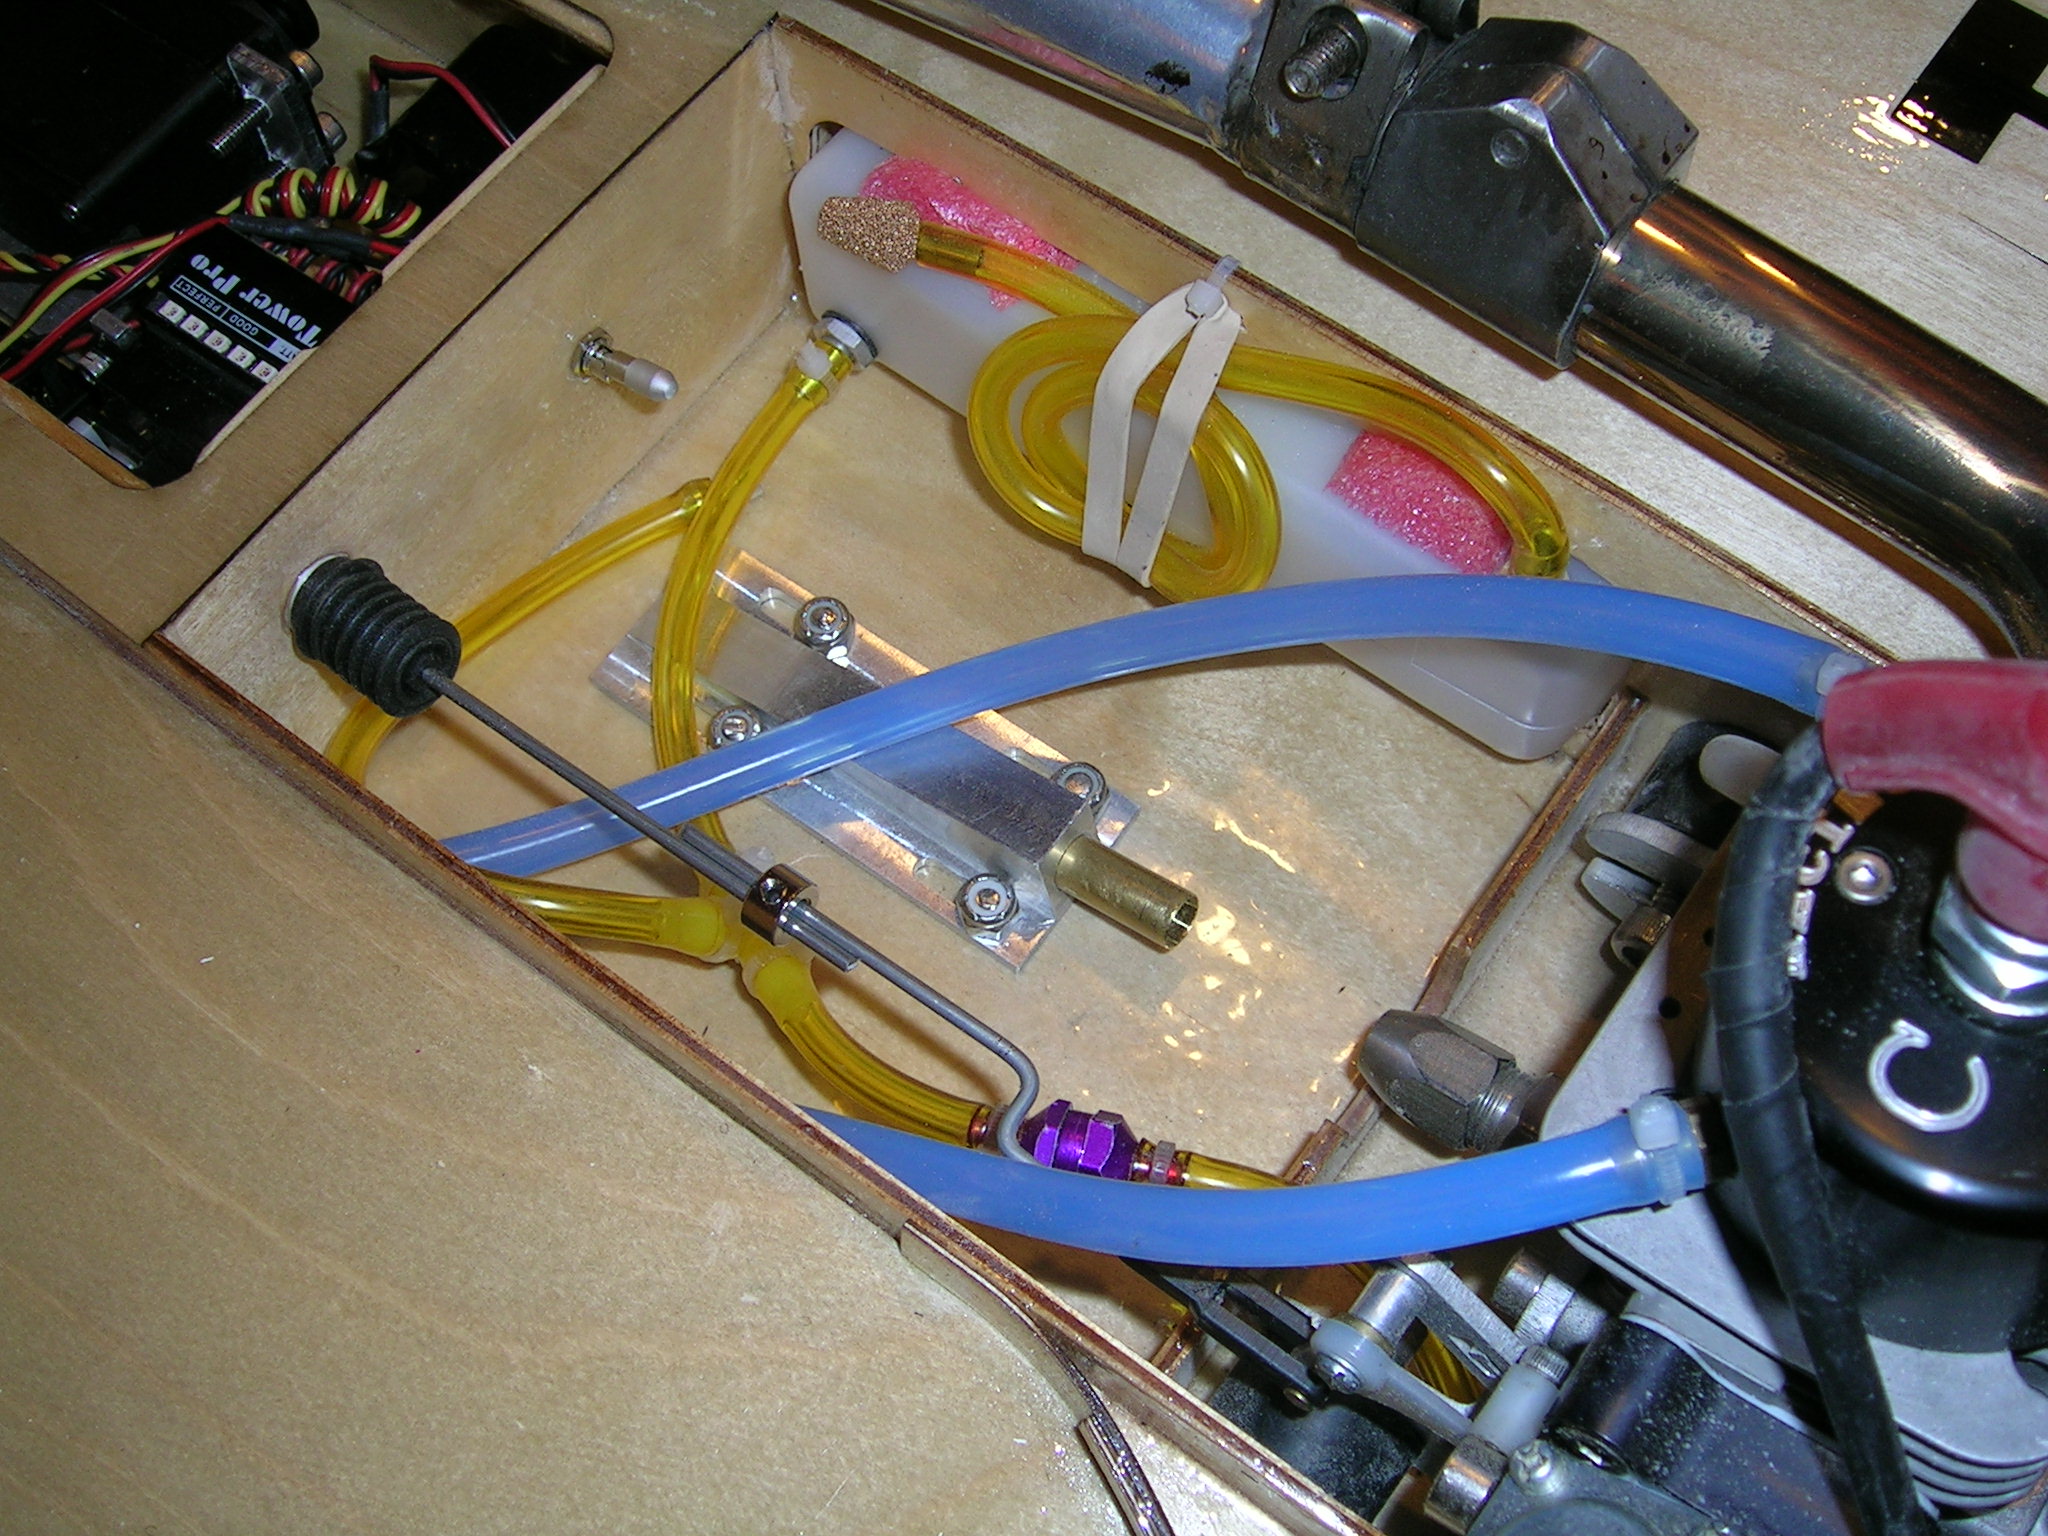
The initial tank setup was with a BT-16 Sullivan hard tank. With a little bit of trimming to the side rail it fits nicely in the port side of the hull. You have to block off the traditional rubber stopper and install new vent and pickup fitting though as pictured. This does for a very neat tank install. *I eventually switched to a 250ml IV bag in the same location, just because I really prefer the bags.
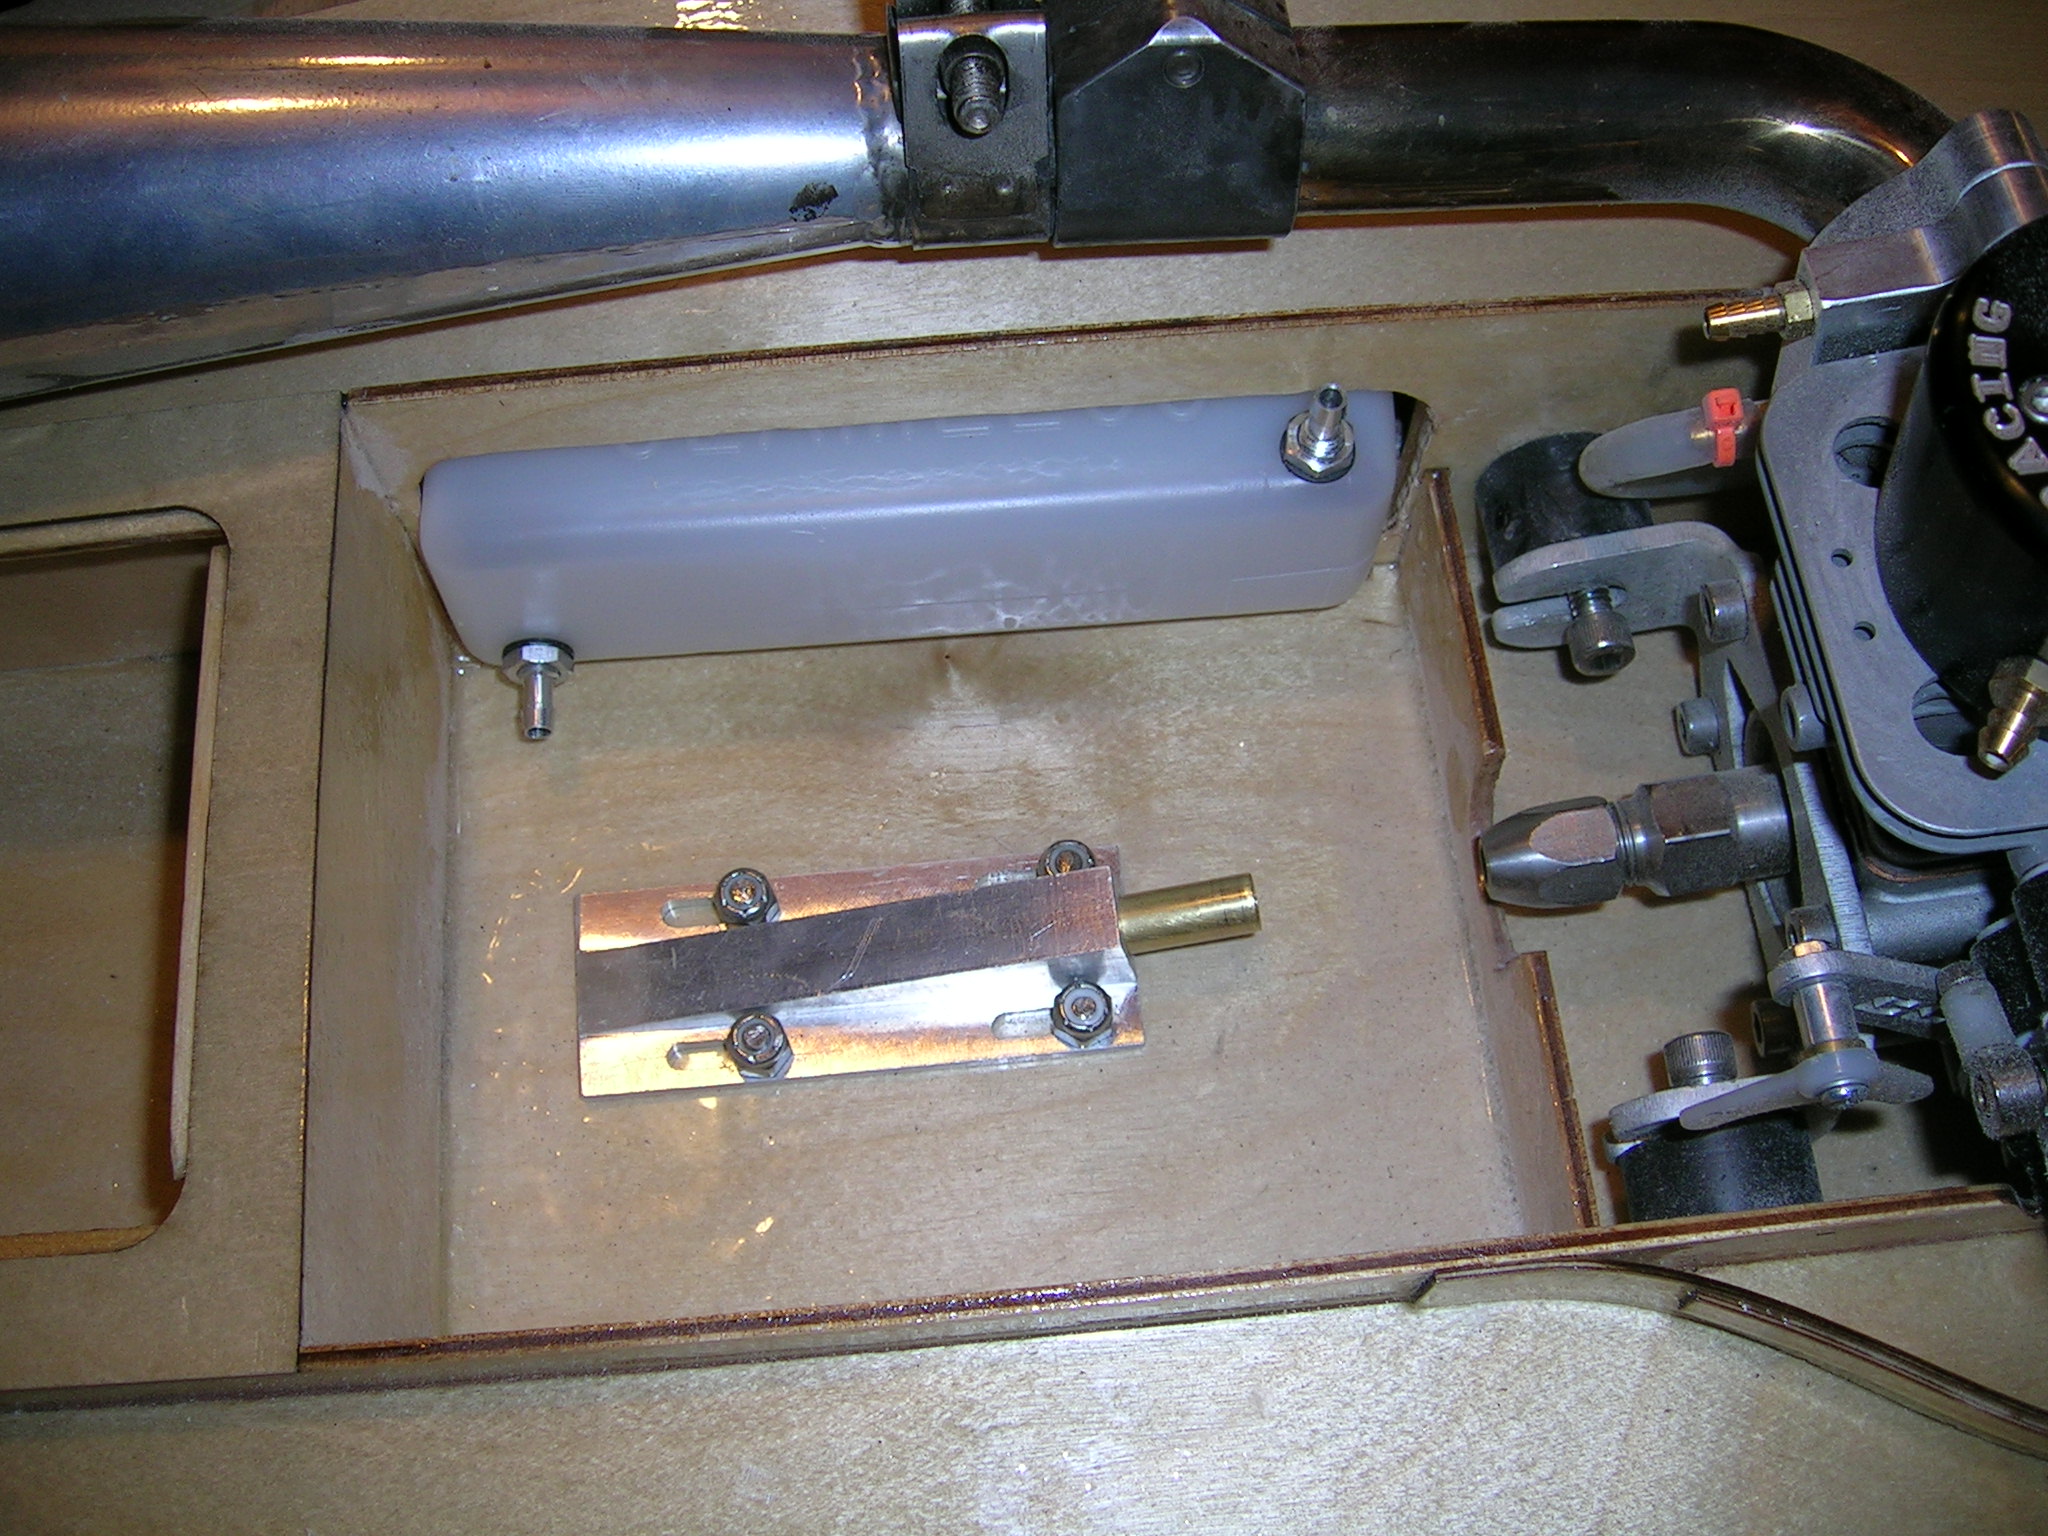
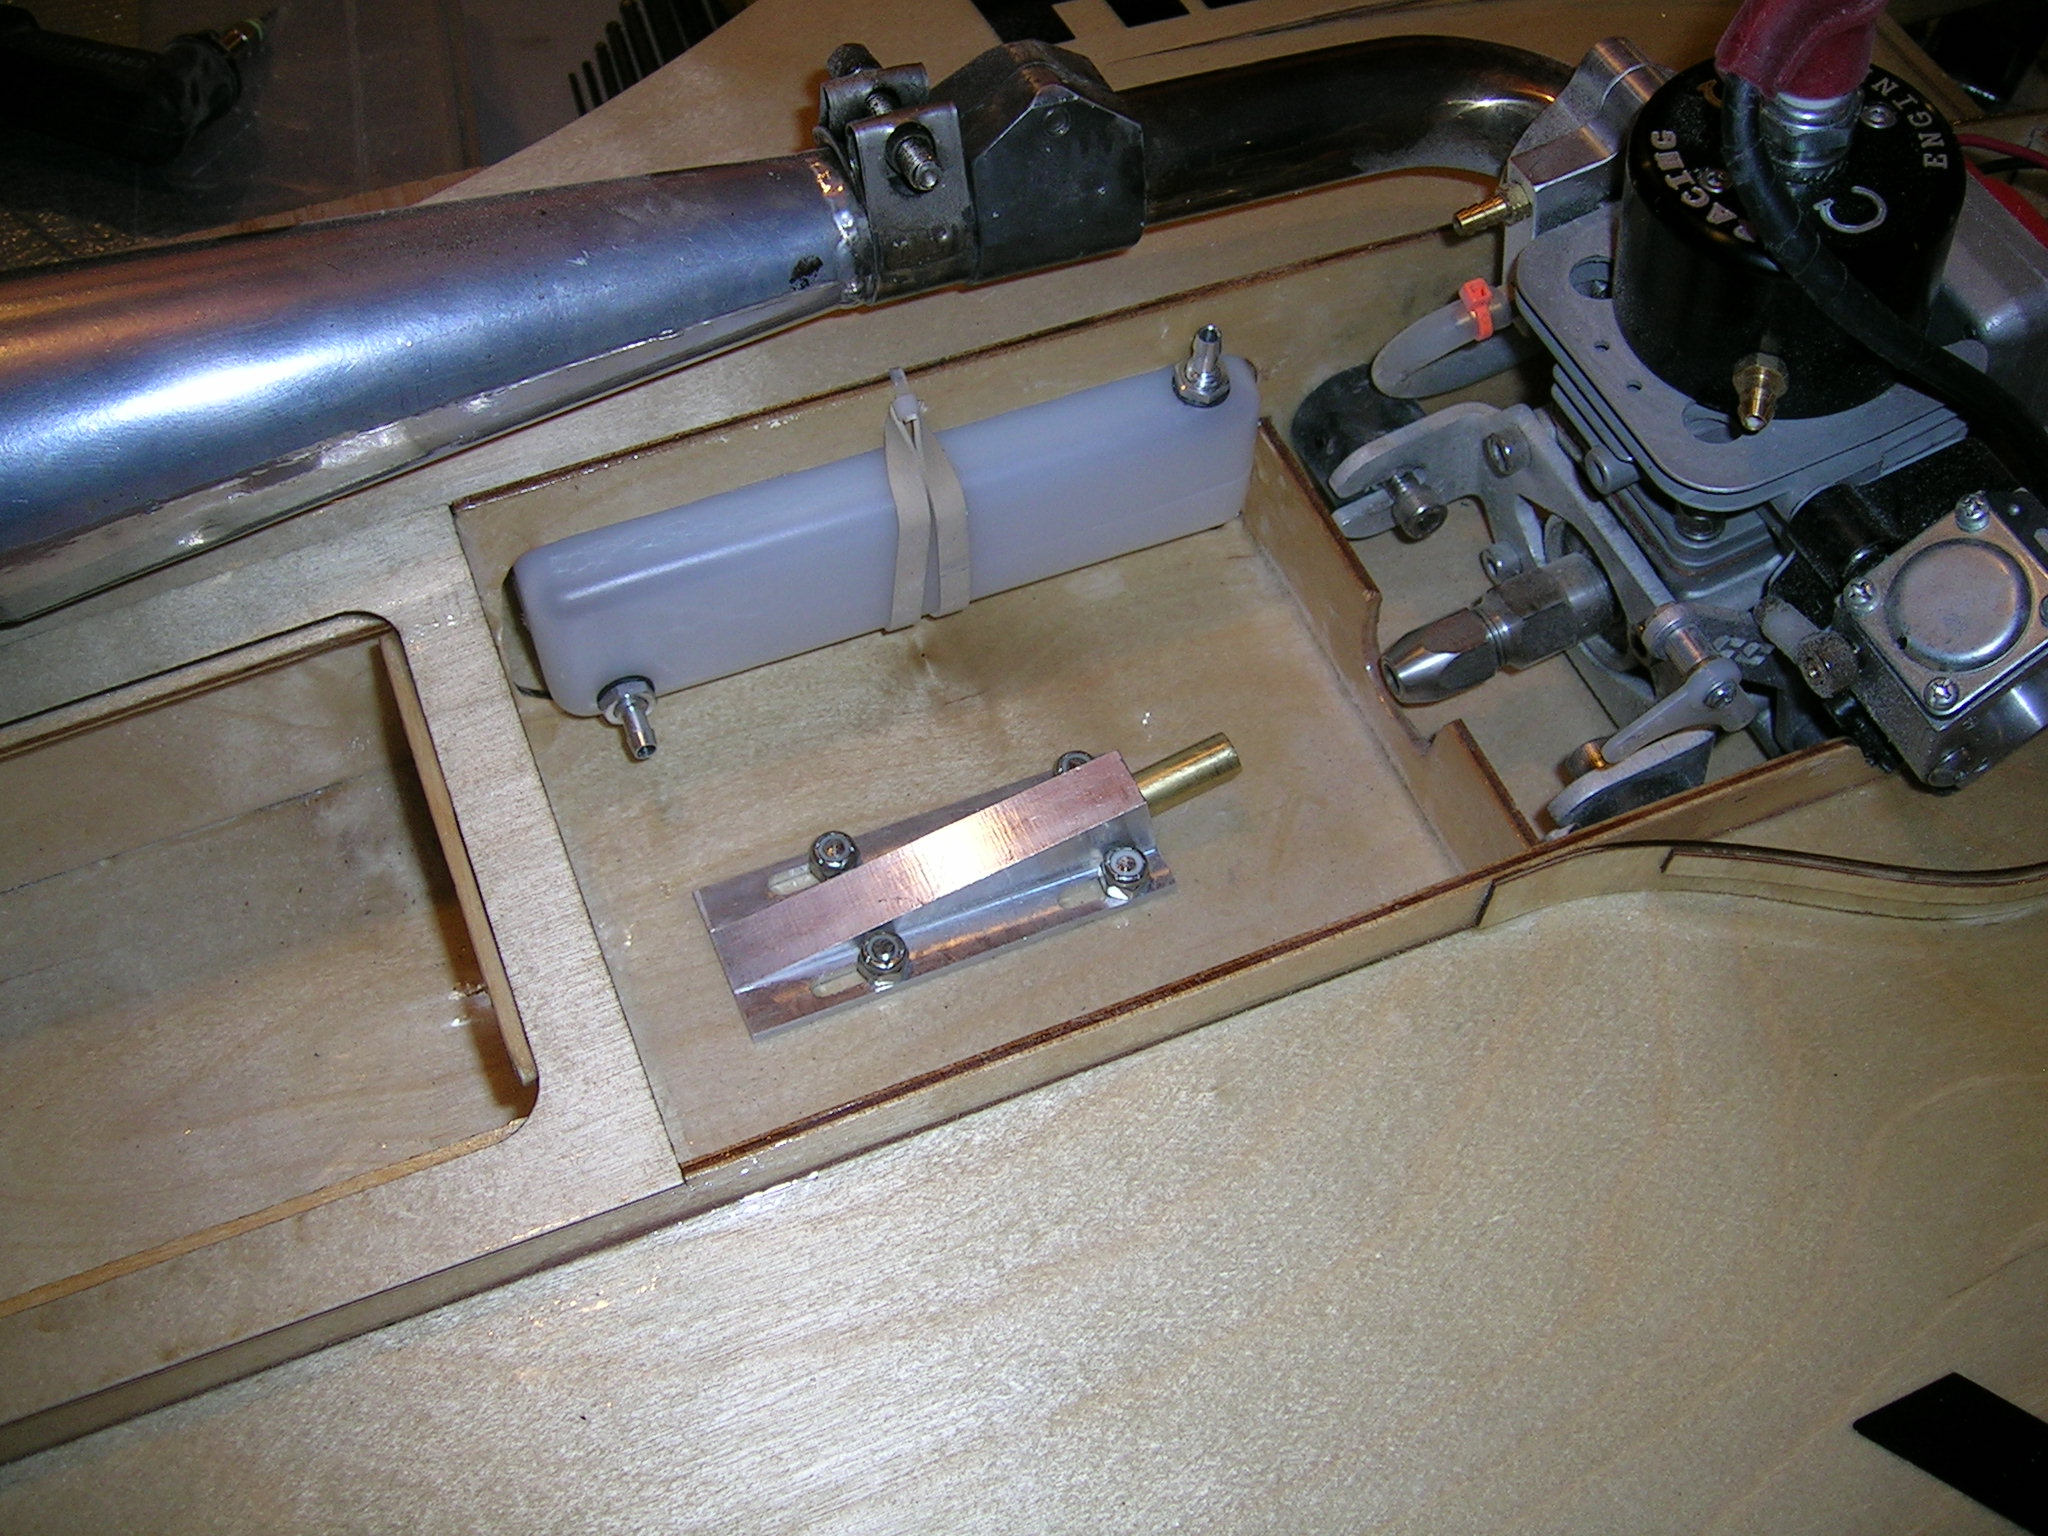
I used an aluminum stuffing tube block to hold the stuffing tube in the boat. The strut and rudder are Speedmaster as recommended by Blazer marine. I installed the rudder on the left as suggested. Many are running their Whiplash with the rudder on the right with great success also. I went with the left side mounting because: 1) that is what the instructions called for. 2) I prefer the control linkage pulling for a right turn rather than pushing, when possible. This reduces the flex in the control rod linkage. I ran the 4-40 control rod through a carbon fiber shaft just for piece of mind anyway. The carbon shaft is actually a hunting arrow cut to length.
The radio box is built into the Whiplash so make sure this area is sealed properly with epoxy when you build the boat. I used Aeromarine pushrod seals with Redline pushrod seal mounts. To mount the servos, I epoxied and sealed a piece of 1/4" thick oak to the bottom of the radio box compartment and made some aluminum servo mounts that were screwed into the oak piece with stainless steel screws. The radio system I use is 2.4 GHz from Xtremelink, so no external antenna is required. The water line was routed from the rudder into the back compartment cover to the engine, then to the pipe and back out the boat through the same back compartment cover. I made the two back covers from a sheet of carbon fiber. The radio box lid was made from a piece of Lexan so that I can see the electronics without having to open the box. The radio switch is a waterproof self locking switch from Gas RC Products.
Here are some pictures of the above mentioned items.
On the water...
Here as some pictures of wood Whiplash boats taken at the 2009 Northern Nats
My Whiplash...
Eric Lis Whiplash wood - 1rst Place LS27 Sport Hydro 2009 Northern Nats
Antron Brown Whiplash wood - 3rd Place LS27 Sport Hydro 2009 Northern Nats
Just for the record, second place in Gas Sport Hydro at the 2009 Northern Nats was won by Dale Brobst, also running a Whiplash but his was the fiberglass version (Whiplash GV). That's 1st, 2nd and 3rd, all Whiplash hulls. The results pretty much speak for themselves. It really is a great performer. Unfortunately I didn't place in the top 3...the best drivers took home the wood!
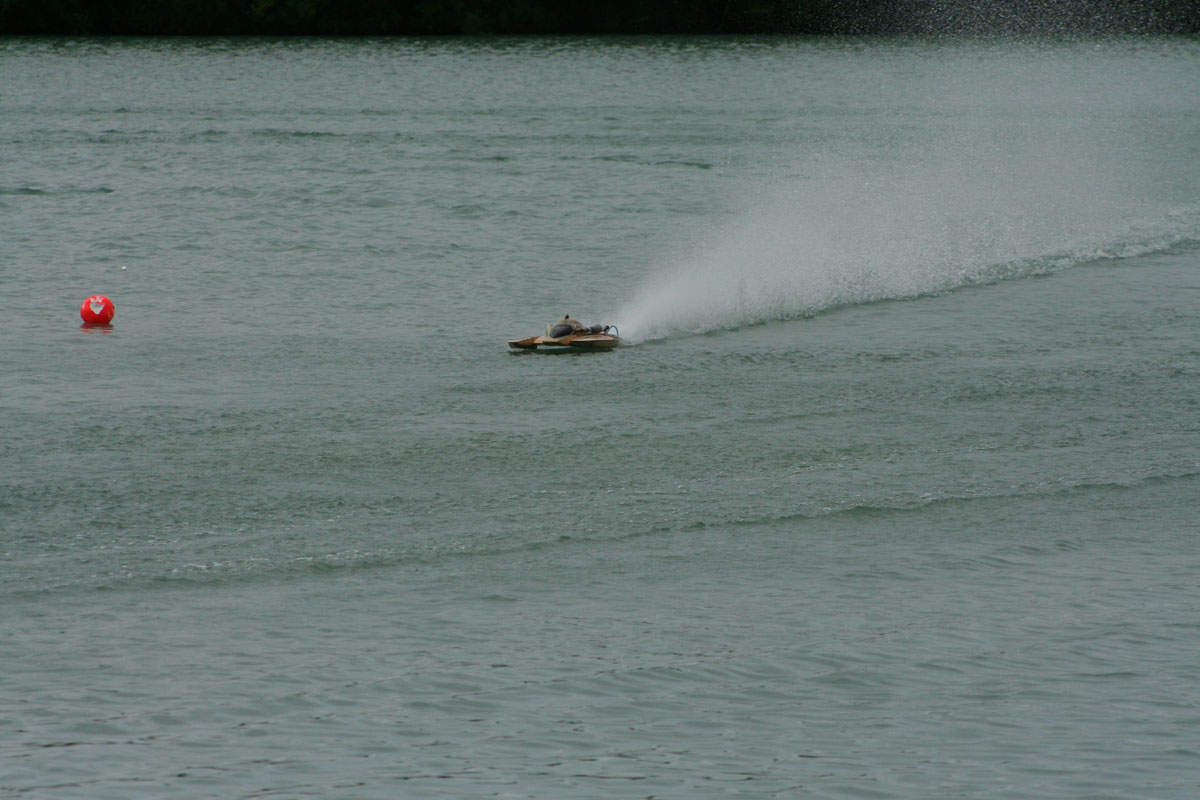
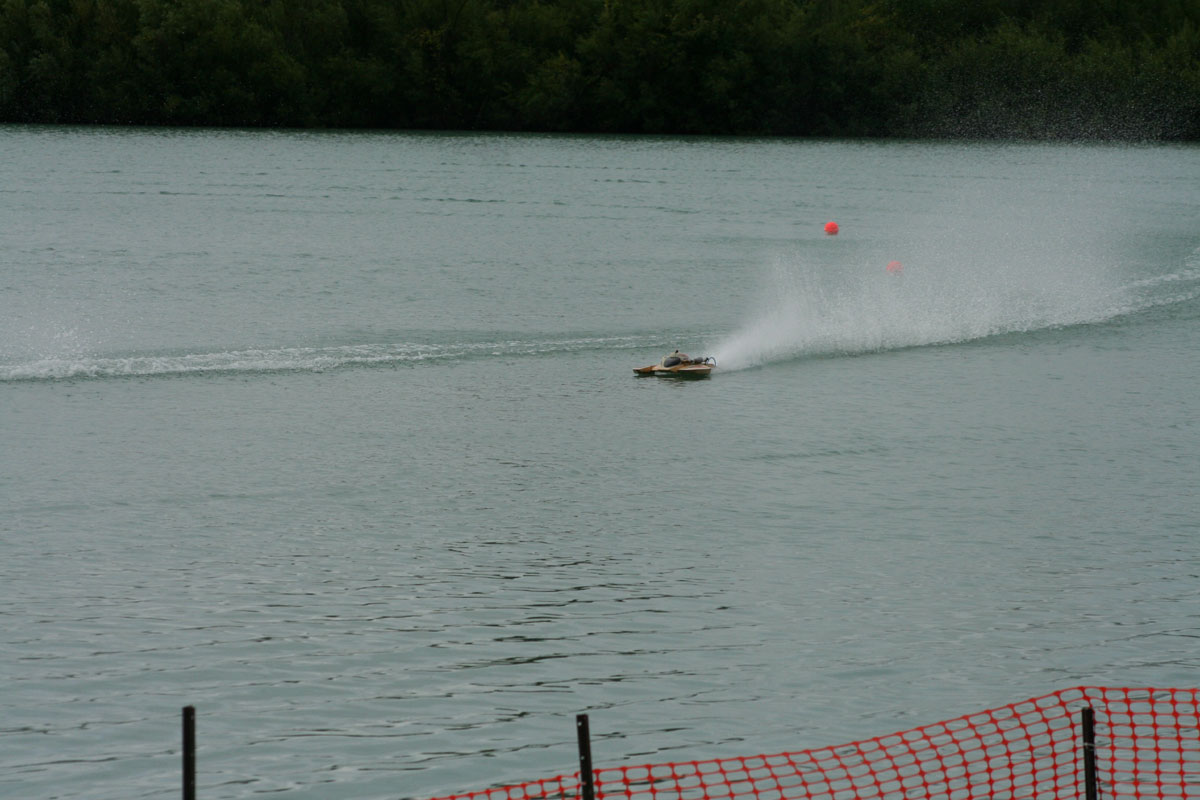
Here is a short video of my Whiplash during testing in open water at its first race...
Note the flat water...boat pickups even more with some chop.

Video with music soundtrack
Video without music
Note the flat water...boat pickups even more with some chop.
Video with music soundtrack
Video without music
Final impressions...
It took a while for me to be sold on the Whiplash. I had seen several run and to be quite honest most were average in speed and performance. Then I saw some really good ones run at national races and they were a cut above the rest. I decided then and there that it must all be based on how well the boats were being built and of course setup, so I decided to give one a try myself. I will admit that I did found it somewhat difficult to build with the instructions I had on hand at the time, but with some tips from Brian Blazer and Tom Tetrault, I got it done and correctly. The new manuals will help a lot for guys building a Whiplash for the first time. After some tips from Brian and also Carlo (CC Racing Engines) on setup and turn fin sharpening and positioning, the boat ran great. The first time I ran it was at the 2009 Northern Nats and I could not have been happier with it. With a little bit more stick (wheel) time I am confident that I will win races with this boat!
The Whiplash truly is an awesome Sport Hydro. The first thing you will notice when running it is how flat it runs and how fast it corners. My Whiplash actually seems to accelerate through turns. I'm not just talking about the prop slipping and engine RPMs going up, I mean really pick up speed! It feels just like driving a fast outrigger. The turns is where many of the races are won, and if you can pilot your Whiplash well around the buoys you can really take advantage of its cornering speed to win races. Do not think that this means the Whiplash is slow in the straights though, by no means is it anywhere near slow! This really is a great boat and if built and setup correctly you will love it!
Although there are new instructions available, I still think the level of difficulty of the build is a bit high for people building a wood kit boat for the first time. Not to discourage people from trying it, but just suggesting that first time builders should be prepared to spend a few weeks on the build. As noted before, read the instructions carefully, study the diagrams and pictures and above all, take your time and build it correctly, it will pay off in the end.
Boat hardware setup...
Setup was pretty easy. I basically followed the instruction with the exception for tilting the turn fin inwards a bit. You can fine tune this at the pond to get the best setting possible on your Whiplash. The strut is set at between 15/16" to 1" from bottom of the strut to bottom of boat. I run my strut flat, but you can set a little bit of negative (prop end down), no more than 1 degree.
Components used for this boat review from the following companies:
CC Racing Engines: Pro-Mod Zenoah engine, tuned pipe, Speedmaster Hardware.Propwork West (Brent Daily): Racer's Edge propellers ( 6719/3 - 654 ) - another good prop is the ABC 2716/2
Xtreme Power Systems : 2.4 GHZ radio equipment for JR-R1 radio
Special Thanks:
-
The Blazers for a great boat kit.
-
Carlo Catalanotto for the killer engine! Plus helping with hardware, setup and also test driving the boat while we took video.
-
Brent Daily for the props that give us that edge!
-
Eric Lis for the use of his video camera and taking footage.
-
My wife Andree for taking all the great pictures.
Happy Boating!
Contact / Purchase Information:
Blazer Marine
Cincinnati, OH USA
Tel: 513-598-1769
Email: This email address is being protected from spambots. You need JavaScript enabled to view it.
Website: www.blazermarine.com
Download Manuals and diagrams below:
Whiplash Manual 1
Whiplash Manual 2
Cowl Installation Supplement
Sponson Construction Supplement
Parts Diagram 1
Parts Diagram 2
Whiplash Manual 2
Cowl Installation Supplement
Sponson Construction Supplement
Parts Diagram 1
Parts Diagram 2