Product Review Article ... by Steve Mitchell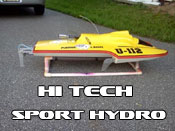
A reader's build and review of the Hi Tech Sport Hydro...
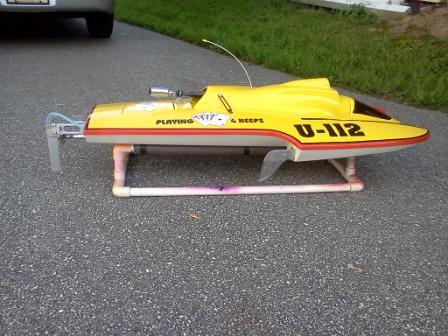
My name is Steve Mitchell (mitchesx) here on ModelGasBoats.com. I picked up a new Sport Hydro; one that is relatively unknown, and thought it would be a great subject for a review; especially written up from a sport boater with intermediate building and set up skills perspective, with a very modest budget. Most of us out there would consider ourselves in this group. I don’t have a big workshop with a lot of tools, so it makes building and setting up a boat a bit of a challenge at times. After building a Dumas Atlas Van Lines Sport 40 (heckuva first boat to start out with) and began running nitro in 2003, I switched to Gas in ’07; turning to the dark side.. Once I finished that, I had the bug, you know, the "one boat is never enough" bug.
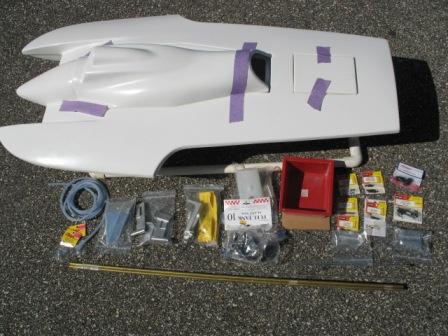
Enough about me! Let’s get to the boat, shall we? The manufacturer is Hitech Marine. If any of you read R/C Boat Modeler, you will remember the Hitech Lynx tunnels that always seemed to be pictured and placing in the races that they covered in print. This is the same company. They are building boats for the gas classes. If they are not already available, they are in testing, and soon will be. Their prices are not bad either! The boats come with a radio box, like many manufacturers are doing today. I took the motor and radio gear from another sport hydro that I had, and decided I was going to buy new hardware. I went with hardware from different vendors to show that good quality and functionality exists everywhere, and I think I picked a quality assortment. I also considered pricing and shipping costs with all of my purchases.
Enough about me! Let’s get to the boat, shall we? The manufacturer is Hitech Marine. If any of you read R/C Boat Modeler, you will remember the Hitech Lynx tunnels that always seemed to be pictured and placing in the races that they covered in print. This is the same company. They are building boats for the gas classes. If they are not already available, they are in testing, and soon will be. Their prices are not bad either! The boats come with a radio box, like many manufacturers are doing today. I took the motor and radio gear from another sport hydro that I had, and decided I was going to buy new hardware. I went with hardware from different vendors to show that good quality and functionality exists everywhere, and I think I picked a quality assortment. I also considered pricing and shipping costs with all of my purchases.
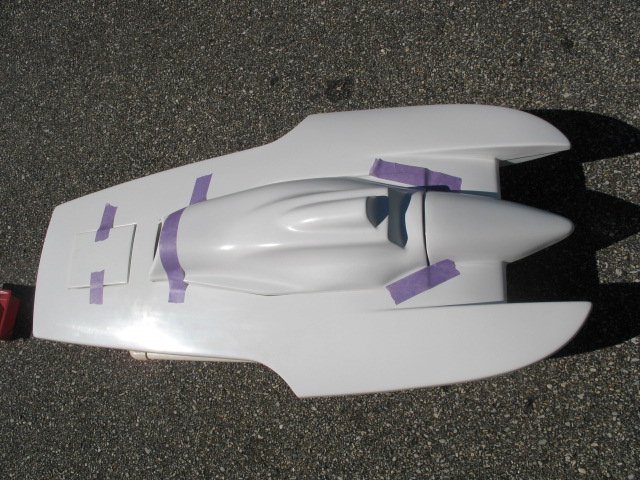
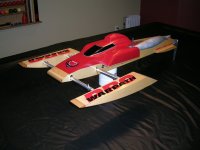
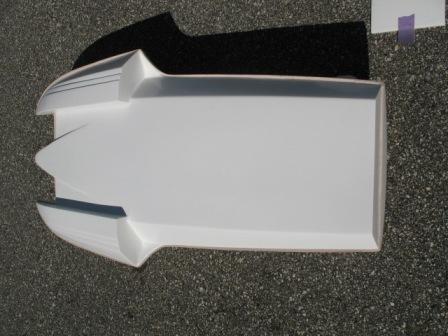
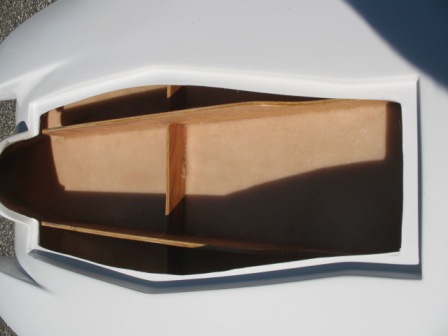
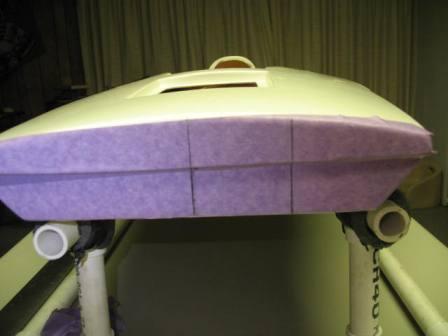
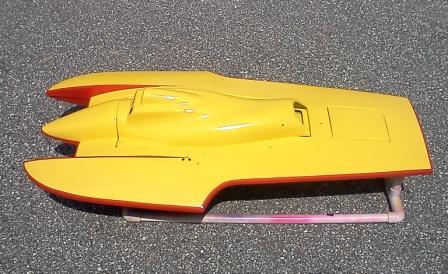
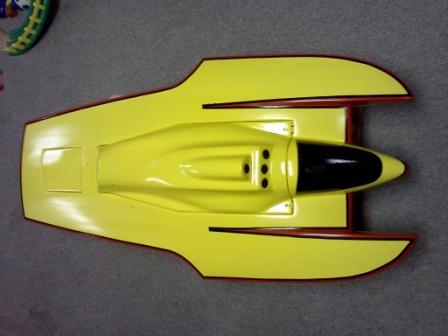
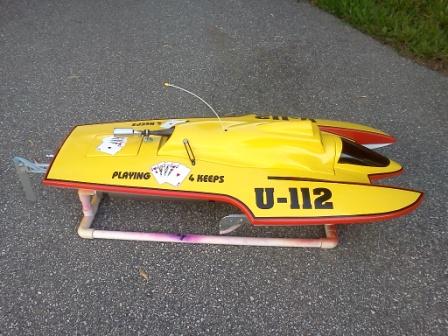
Upon its arrival, my initial thoughts of the boat had some plusses and minuses. I like the overall look of the boat. It reminds me of a few on the market already. The crown in the deck should help with down force and resist wind to help prevent blow-overs. The sponsons are stepped, and the edges on the sponsons were pretty defined. The cowling seems to have the shape of a 105 degree header bend built in. The fiberglass construction is Owens Corning and polyester resin. The fiberglass itself is of good quality. The hull seems quite sturdy, and is very light. The rails are marine ply, set at 5 inches, and stretch from the transom to just inside the cowl opening edge. There is a bulk head that goes from sponson to sponson, and adds strength while giving a place to mount the turn fin. The transom is marine ply as well. It goes from the bottom nearly to the top of the deck, and also extends from non-trip to non-trip. All ply is ¼ inch thick. As a suggestion, I think I’d like to see them add some fiberglass tape to the rails for added strength, at least where the motor mounts.
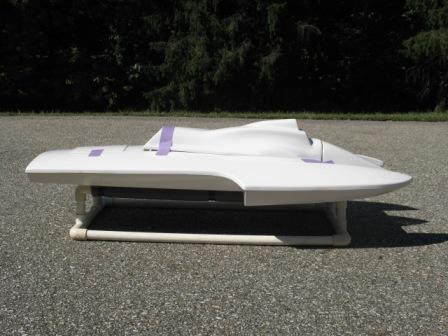

This hull is a shoebox design, and the first thing I noticed are the seams. They are quite large, and I attribute this as an attempt to add strength. They don’t look that bad, but an area of concern was the transom. The deck overlaps by a bit. I knew I had two choices, shim the hardware or notch the deck. There were no voids from the filler/bond in the seams like I have seen from other manufacturers. There was more excess on the hull than I’m used to seeing. The cowling and access hatch will require a bit of trimming to fit correctly. When it arrived, there were no setup instructions… Uh-oh… I contacted them and had a set faxed to me. More on that later.
Let’s get to the build. There were a few prototypes of this boat and some production hulls created and introduced to the market at this point. The notes that I received were a starting point and based on their Thunderboat hull. Due to the difference in hull sizes, I had to come up with some of my own setup. If it works, it should be a guide for everyone else.
Let’s get to the build. There were a few prototypes of this boat and some production hulls created and introduced to the market at this point. The notes that I received were a starting point and based on their Thunderboat hull. Due to the difference in hull sizes, I had to come up with some of my own setup. If it works, it should be a guide for everyone else.
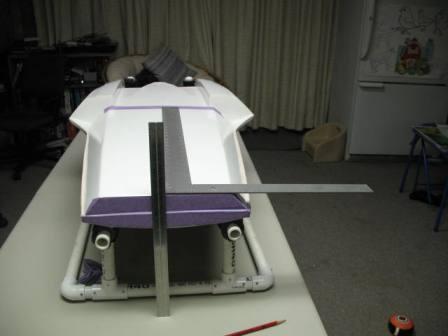
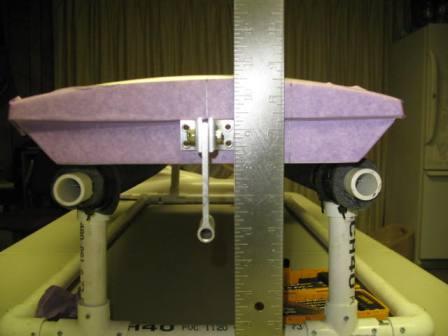
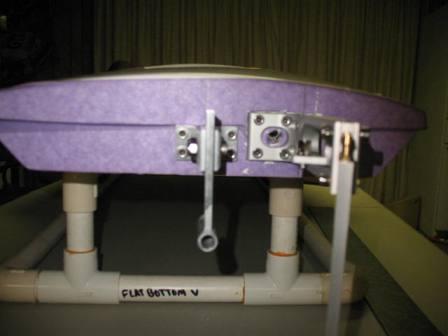
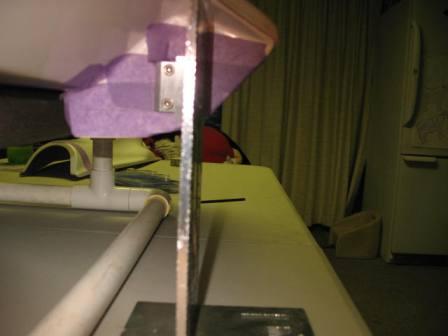
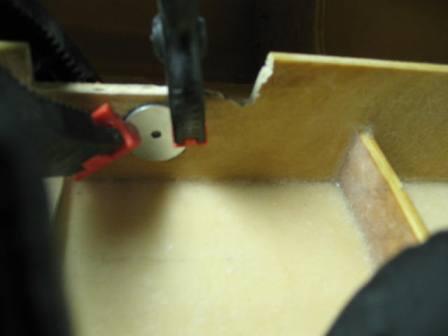
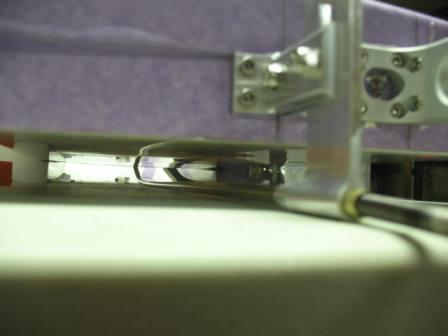
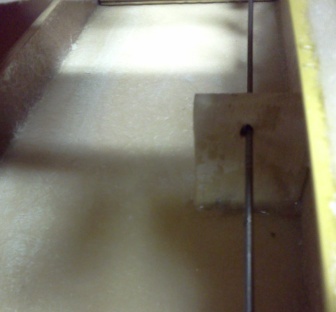
I always start with the transom hardware first. I used painters tape on the transom to keep the gel coat from cracking. I measured a centerline (which was difficult to judge due to the crown in the deck, and the seam sagged a little). To compensate for this, I measured a centerline between the sponsons and also on the transom, and used a straight edge to line them up. I then made a second line 2 ½ inches to the right of the centerline. This is the centerline of the rudder, and lines it up with the rails. Because of the aforementioned lip; I consciously decided to purchase a Top Secret Boats strut. The low profile brackets were just what the doctor ordered. To throw in a little more vendor independence, I purchased the rudder from Zipp Kits, and I went with their 4” standoff Dual pickup rudder. Because their rudder extension bolts on, and is exactly half of the width of the assembly, I was able to take it off the mounting bracket and butt it up against the line for more accuracy. It was at this time that I measured and notched the deck to go around the bracket. With the transom hardware drilled and mounted, and a 3/8 hole drilled for the pushrod, I moved on to the turn fin. I purchased a Speedmaster fin for this boat. I did base my location for the fin on their Thunderboat drawings. The edge of the bracket is 3 ½ inches from the inside of the sponson trap, 7/16” up from the ride pad, and the blade is on the outside of the bracket, even with or slightly inside the sponson chine.

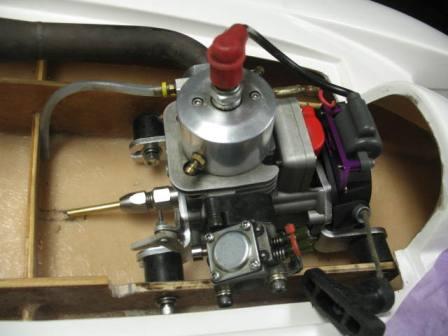
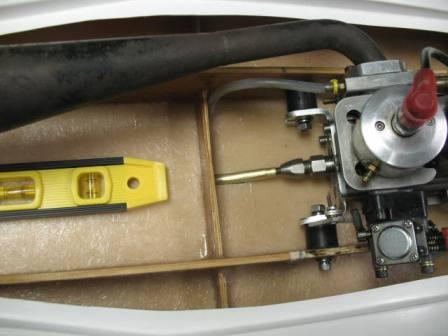
Now, onto the motor, and its placement. Here I had a few situations. The first was I could not reuse the mounts from the other hydro and just purchase the rubber isolators. The rear mount actually flexed and snapped right at the case bolts. It may already have been hanging by a thread, who knows! I purchased Gizmo Mounts (there’s that vendor independence again!) Here’s where I had to come up with my own setup. There were no real indications as to where the motor should be mounted. Working with Marc Levac on how to approach this, I put everything in the boat, and balanced it that way. The motor wound up being 29 inches from the inside of the transom to the center of the spark plug. That’s about as far forward as the rails will allow. I made a long notch in the rails in case I had to move the motor back. Using 1/8 plywood, I shimmed the motor up off the bottom, and set the angle as I wanted it. Using a cutoff pencil, I traced the rubber isolators. Using small clamps and 1” washers, I drilled a 1/8” pilot hole for each screw. I then went back and enlarged them to fit the mount screws.
This is my least favorite of all tasks (and maybe yours too!) - The stuffing tube. Using a 1/4 inch piece of brass, I measured and cut the hole for the tube to go thru, cut a small length of 11/32 brass tube, and slid it over the end of my 5/16. With the shaft inserted, I began to make my bend, testing and fitting the bend into the hole and back to the strut to get it just the way I wanted. Luckily, I’ve gotten pretty decent at this, and was able to make my bend pretty easily. Next, I made sure that tubing fit in the strut without any dramatic bends or changes in shape. I roughed up the 11/32 brass tube, and epoxied the tube in place with medium cloth and polyester resin, and let it set up overnight.
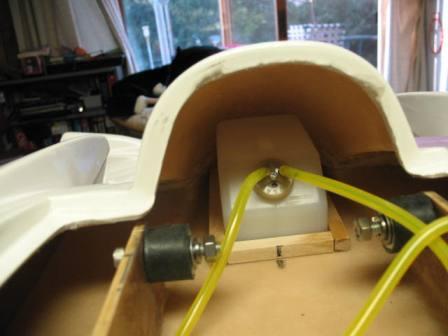
My next task was to get fuel to the motor. I used a 10 oz Sullivan hard slant style tank for this boat. I set up the tank for a corner pickup and top vent, and then marked the center of the boat under the point in the deck that the cowling aligns with. I made a tray out of 3/8 ply strips, and put eye hooks in them for the rubber band to hold it in place. Marking a center on the new tray, and aligning that with the mark on the bottom, I sealed and epoxied the tray in place.
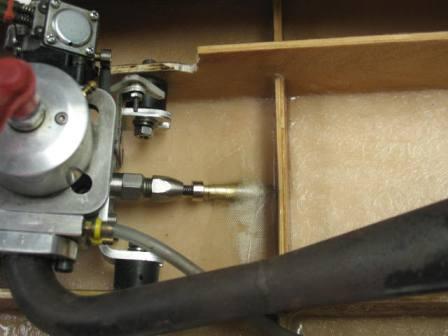
My plan of action called for me to drill two more holes in the transom for water lines, and also in the deck for outlets. I measured and cut the lines to fit in the hull without any strain.
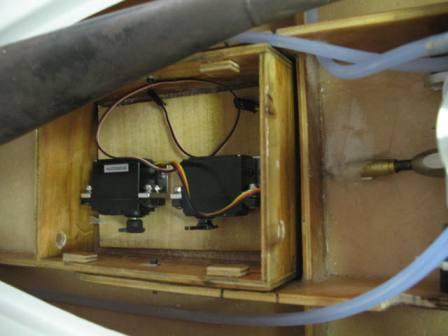
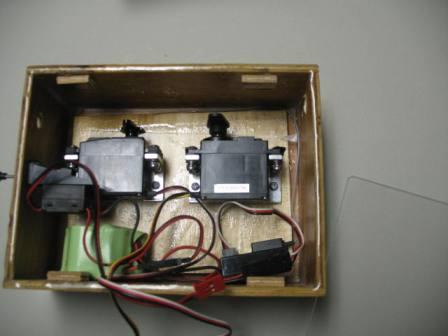
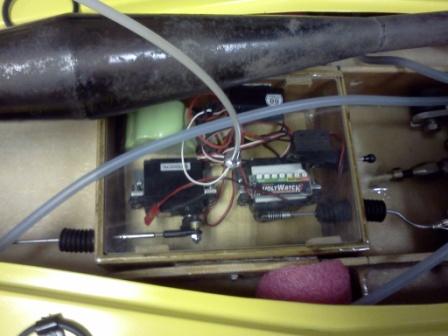
Radio Box- I decided not to use the one that came with the hydro; although it did remind me of one I had gotten with a TwinCraft mono a while ago. I purchased a Top Secret wood radio box for the boat. I added a ¼ plywood bottom to it, epoxying it in place, and sealing it off. I then marked and drilled two holes thru the rails and into the box to secure it with 4/40 screws. I used 3/16 inch wood screws to secure the Redline servo mounts, using pushrods to find their locations. Don’t forget! Before you mount your servos, charge your batteries and set your center for servo travel and horn. It makes it a lot easier to center and set up control surfaces! I then drilled the appropriate holes for the pushrod exits, and the switch location.
Radio Box- I decided not to use the one that came with the hydro; although it did remind me of one I had gotten with a TwinCraft mono a while ago. I purchased a Top Secret wood radio box for the boat. I added a ¼ plywood bottom to it, epoxying it in place, and sealing it off. I then marked and drilled two holes thru the rails and into the box to secure it with 4/40 screws. I used 3/16 inch wood screws to secure the Redline servo mounts, using pushrods to find their locations. Don’t forget! Before you mount your servos, charge your batteries and set your center for servo travel and horn. It makes it a lot easier to center and set up control surfaces! I then drilled the appropriate holes for the pushrod exits, and the switch location.
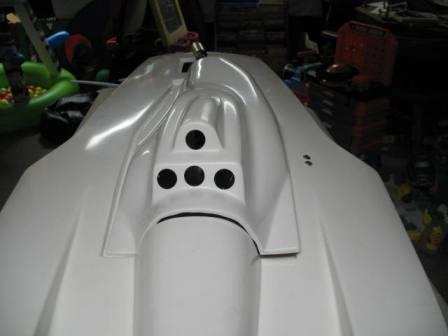
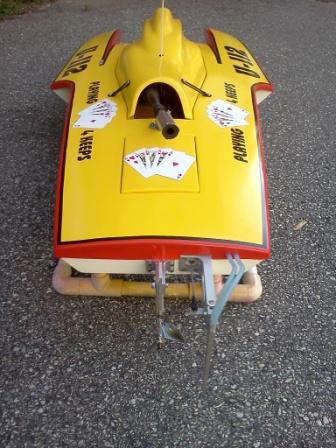
Cowling – I cut 4 holes in the front of the cowling for ventilation, and then opened up the cowling with a router bit on my Dremel. I cut two aluminum strips, roughed them up, and then epoxied them in place with medium cloth strips. After the epoxy dried, I put 2 4/40 screws in each and used the Dremel to cut them off even with the bottom of the cloth. The deck has quite a lip in it all the way around for the cowling to sit on. I notched the lip in the deck to line up with the strips in the hatch in an attempt to get it to fit snugger to the hull. If there were another area I’d like to see an improvement, it would be to put a lip on the cowling as an added precaution for keeping water out, and also to aid in seating the cowl to the hull. At this time I also put a bracket on the pipe and measured and drilled the location of the screw to mount it. I used ¼” ply under the deck to spread the pressure out, and sealed and epoxied it into place.
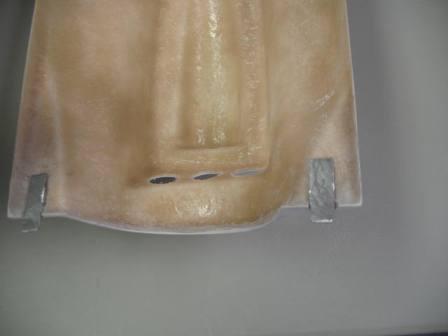
I went to work on the rear access hatch. Some excess had to be taken off the sides, and some wood epoxied in for mounting the Velcro to hold it in place. The whole thing had to be trimmed down at the bottom to get it to sit more flush with the deck.
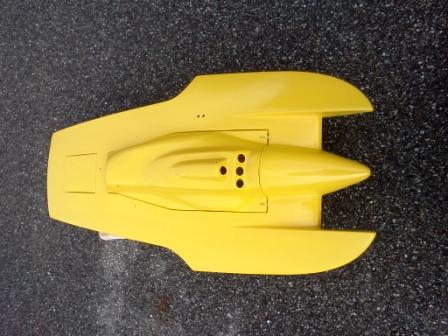
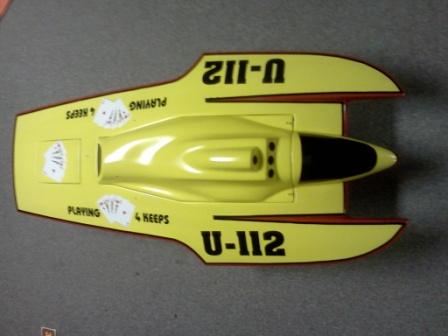
With most of the setup done and holes drilled, I prepped for paint. I sanded and used steel wool on the decks to roughen it up for adhesion, and applied my paint.
With most of the setup done and holes drilled, I prepped for paint. I sanded and used steel wool on the decks to roughen it up for adhesion, and applied my paint.
Once the paint and decal work was done, I reinstalled all the hardware, motor, flotation, set up my fuel and water line, installed my Top Secret Cowl locks, and cut my shaft to length. The last thing I do is set up my pushrods and seals. I usually plan this out very carefully from the onset. I am using standard 4-40 pushrods, and soon realized that the amount of space between the box and the rudder required a gusset. I made one out of wood, and epoxied it in place in the rear access area. This will help with pushrod flex. I wound up with only one Redline seal mount, which I used on the rudder side of the box. I wish they’d sell them in pairs! I did wind up making a slight S-bend in the throttle set up, but this should work out just fine. I used two Aeromarine radio box seals CA’d back to back for the throttle, and one snapped onto the Redline Seal mount. Gotta love them! I use Velcro (as most probably do) for battery and receiver mounting, which allows for easy removal, or adjusting weight in the boat. I usually Velcro my receiver to the side of the box, up off the floor. I marked and drilled a hole for my antennae mast, and an opening in the cowl.
Initial Setup
I set the hydro on a flat board and set my strut so that the boat sat level on the board. Remember that I balanced the hull out so that it would sit level with everything in place, with the c/g just behind the sponson transoms. The strut has no angle at this time, whatsoever. I tried to get my turn fin cant pretty much straight, we’ll see how it tracks the first time out. I’m using a 6717/3 for the first test, so we’ll see how that goes. It should provide enough lift to get it to run pretty well, and it is a good all around starting point.

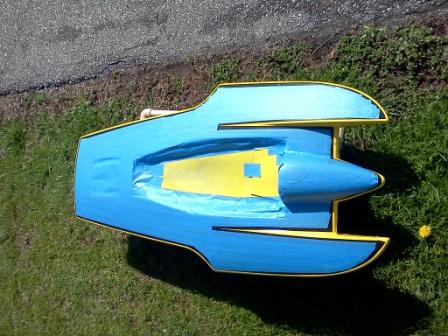
Finally! I have something to show for the effort put into this boat! Upon getting her in the water, I was impressed. The "pond" we were at is rather narrow; and makes cornering at speed a challenge, especially with the number of fisherman at both ends of the open water. She has a tendency to pull right, so I may need to adjust the turn fin to counter that. I will know when I take it to a larger body of water. I just couldnt stay in it long enough to find out. I may be able to go up on the strut slightly, it was a little glued to the water, and even though it continues to accelerate before I need to back off to corner, shows no sign of wanting to blow off. I have another 6717/3 to try on it, and also a 6518/3. It seems to me that there is a lot of potential here. I'm running a Toxic Al that's a few years old, it could be very interesting to see the capabilities with a new motor from one of the well known shops. If I can get video from another location that is wider I will get that posted also.
-Mitchesx
Contact Information
HiTech Marine
139 NW Taft Lane
Lake City, FL 32055
Contact: Craig Tokarski Sales/Builds
ph: 386-867-9676