Misc. Article ...by Rudy Hilado
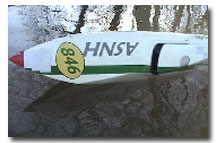
An amazing boat that sets itself right side up after a flip!
 I've
always been a fan of sport model boating--running a power model boat for the
sheer enjoyment of zipping around the pond, lake or river. While racing has
merit for providing an adrenaline rush, Freestyle boating, as I like to call it, can be just as
exciting. When I do freestyle boating, I tend to drive very aggressively,
spinning, jumping, rolling, and flipping the boat quite regularly, which can
result in a large amount of time out in the retrieval boat. In an effort to
support my freestyle appetite, I became fascinated with the idea of a boat that
would be able to automatically right itself in the event of a
capsize.
I learned that electric boaters have been exploiting this ability for some time, especially the European boaters (See http://www.rc-raceboats.de/), but I wasn't aware of anyone trying to incorporate self-righting properties in a gas powered boat.
A Tide Channel
There are several ways to make
a self-righting hull. You can make create a large floatation bubble on the deck
that causes the boat to roll to one side, but it generally makes for a strange
looking boat. Another way is to use a water or tide channel in the hull. The
tide channel temporarily shifts the balance of the boat causing it to roll on
it's side.
|
This shot shows the tide channel running most of the length on the port side. I used aluminum dryer vent sheets. Inexpensive and easily bendable. I needed to make a crease in the channel to make room for the header and the tuned pipe. Probably the hardest part was making the channel water tight. I had to use a lot of Marine Goop and I applied it to the inside seams using a long dowel. |
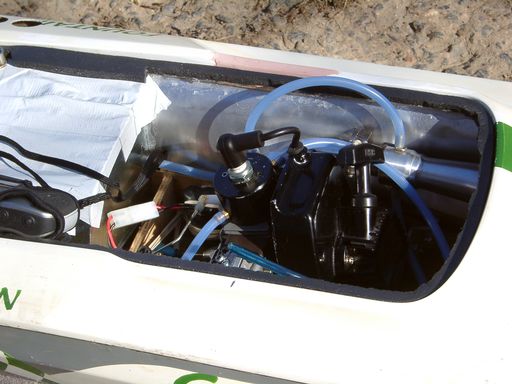 |
A tide channel is a large cavity built into one side of the hull, running nearly the whole distance from the transom to bow. When the boat is upside down, the channel fills with water causing that side of the hull to sink. This shifts the center of balance and eventually the weight of the motor causes the boat to continue rolling and "pop" right side up. The tide channel is open at the transom, so when the boat rolls over and the prop gets back in the water, the forward movement of the hull causes all the water to pour out of the channel and the boat is off and running again.
|
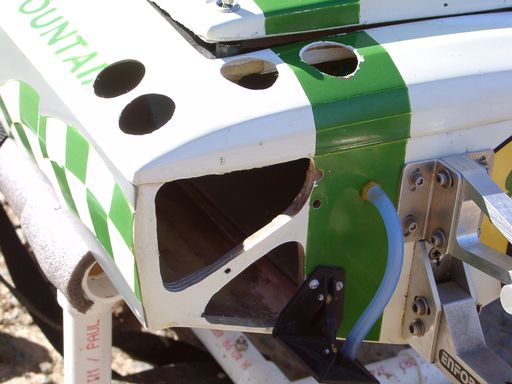
The transom is cut out to allow the tide channel to "flush" when the boat starts moving. It also allows water to enter when upside down. When the boat stops/stalls upright, water does rush back into the tide channel, but since air gets trapped, the boat only lists a bit, but it doesn't sink (hmmm). |
 |
There are several challenges that must be overcome to make a gas boat self-right. Electric boats have the luxury of being able to be completely sealed apart from the tide channel, but gas boats require air to get to the carb, and a method for the exhaust to leave the boat, and this has to work right side up, upside down, and during the rolling process.
So I picked up an old hull and I began to experiment. I modified a 48" Aeromarine Challenger to have a "tide channel" You can see that I hacked a bit on this hull, making some holes and then covering them up again with duct tape.
| This shows the two air vent holes for the tide channel. When water starts to pour in, the air has to escape. The hole above the "M" was cut first and probably doesn't need to be there. The one in the "yellow" really lets the air out. Being low on the freeboard also causes air to be trapped when upright, so the boat doesn't take on much water in the channel. | 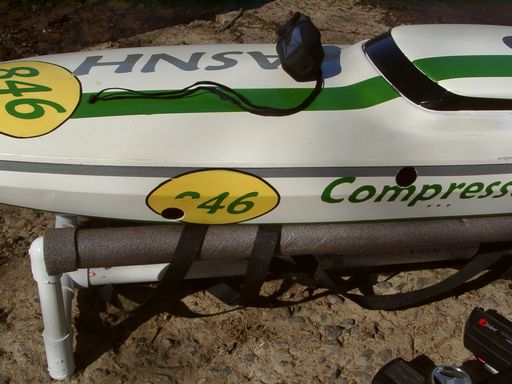 |
I decided to have the boat roll on the port side. This matched the rotation of the prop, which can assist in lifting the port side when righted. Unfortunately the tide channel would then occupy the space where the tuned pipe would typically sit. I handled the exhaust issue by routing the output through the front of the boat and out the starboard bow. This gets the tuned pipe out of the tide channel area, and it keeps the exhaust exit free while the boat is rolling.
The other problem is getting air to the motor. Since the top of the boat needs to be water tight (I wanted the boat to roll, not become a buoy or an anchor! Ooops, that happens later!), I created ventilation holes in the bow of the boat. These holes are above the waterline when the boat is upside down and they provide a good supply of air to the carb.
After much cutting and hacking...
In the end it worked fairly well. The most difficult part of this project is trying to make the hatch fully waterproof. It still leaks a little, but the water drains out pretty quickly (using one of those much maligned auto-bailers).
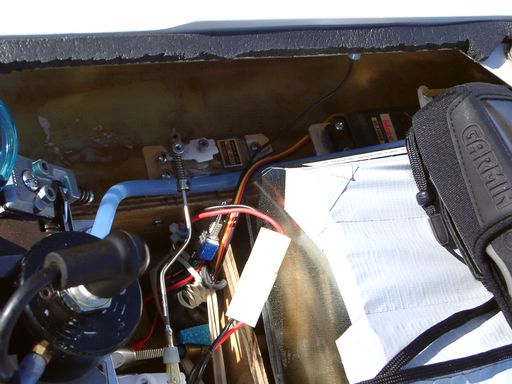 |
Since I didn't have space for a radio box, I moved the servos to outside the starboard engine rail. The servos have been packed with dielectric grease so they are pretty much waterproof. |
With this size hull, I think the port side of the engine rail didn't have enough volume to hold enough water to cause the boat to roll (or roll fast enough), so I had to move the radio box components to the starboard side of the engine rails and make the area in the back (where the radio box is typically placed) part of the channel. This allowed a lot more water to get in and roll the boat as well as drop the transom.
| This picture shows the exhaust routed to exit near the front. The stinger of the tuned pipe was attached to a stainless steel "gas hose" (used for clothes dryers or hot water heaters). The picture also shows the starboard vent slots for the hull (a little bigger than necessary). | 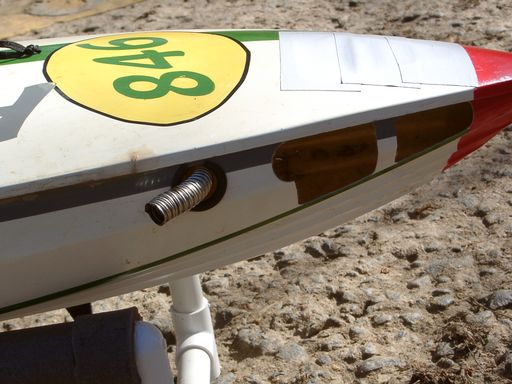 |
For the forward exhaust, I used a flexible stainless steel gas pipe (used with clothes dryer appliances) mounted to the end of the tuned pipe. The exhaust can be optionally routed to exit out the starboard side of the transom, since it doesn't get wet there either, but it's a bit harder to get it to that location because the exhaust port on the motor is on the left. An additional benefit to routing the exhaust so it comes out near the bow is it allows the pipe to fit completely within the boat and you can use a 90 degree header. The standard configuration for an "in the hull" pipe is to have it exit out the transom, but this often requires a long "wrap forward" header to make the pipe fit, with several inches of the pipe hanging out the back. If the pipe is in the hull pointing toward the bow, you can use a shorter 90 header, which can increase the performance of the motor.
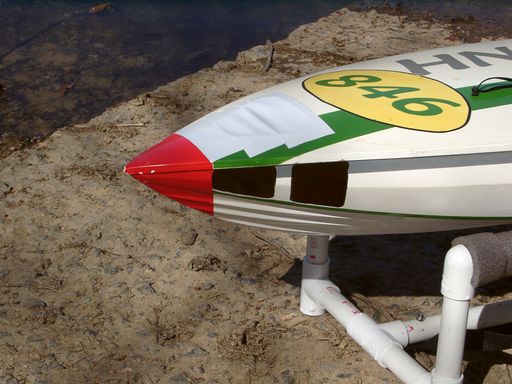 |
Vent holes on the port side. Again, too big. I plan on covering the holes with aluminum screen. Notice on the deck of the boat, I had cut an original vent hold. This worked, but it was too close to the water when capsized. If there was a little chop, the water would splash up into the hull. |
Proper venti lation makes a big difference in the performance of a boat. Running with a hatch and very little air moving through the hull will really slow you down. I first tried a big vent on the top deck, but it was too easy for water to go in there when capsized. Instead I cut out vents in the freeboard near the nose of the boat. I over cut it a little bit, but water never got in through the nose vents. To let the incoming air move through the hull, I also cut a hole in the right of the transom to provide an air exit point.
The rollover pro ss still took a little too long (it's not a good idea to have the motor run upside down for a long period with no water going through the cooling jacket), so I think additional holes along the tide channel on the top deck will help the water get in there faster.
Also it's important to use an IV bag fuel tank or a fuel tank with a clunker. The motor has to get fuel when it is upside down and the regular tanks donut handle this well.
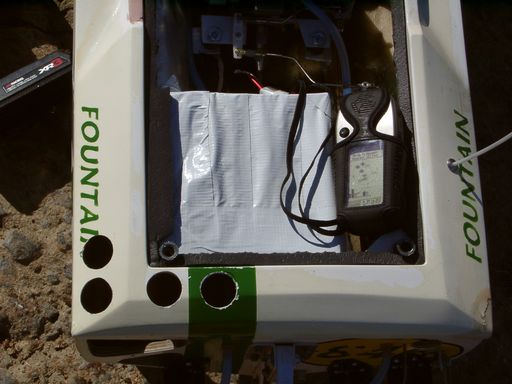 |
This picture shows the flood holes that allow the water to enter the tide channel. The boat needs more flood holes so it will fill faster. The area covered with duct tape is part of the tide channel. More water volume was needed to overcome the buoyancy of the hull, so I used the area typically occupied by the radio box. I used duct tape to temporarily cover the area. I plan on putting a permanent aluminum cover there. |
Occasionally when the boat rolled over, the motor would stall due to sudden load on the prop (which kind of defeats the whole self-righting concept!). I think this problem would be solved if I incorporated a clutch.
|
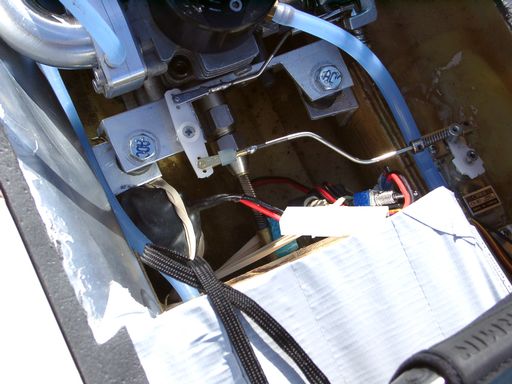
I had to tuck the receiver and battery around the stuffing tube. The battery was mounted on the port side to add weight and help in the rolling process. |
 |
Also, running the mo tor without any cooling when it is upside down is not desirable. I think this problem can be solved by incorporating a water pump to push water through the jacket when it is upside down. I believe I know how to make this work, but I'll leave it up to the reader to imagine the possibilities. :-)
Experiment, try out that wacky idea you have, but most of all...have fun!
(read more about the fate of this boat here)
Special thanks to Marty of www.martysrcboats.com for hosting the original post on this project.
|
Video #1 shows the complete powered rollover process. |
 |
 |
Video
#2 shows the rollover process with the boat un-powered. |

